ABOUT THIS BLOG

"A Faithful Attempt" is designed to showcase a variety of K-12 art lessons, the work of my art students, as well as other art-related topics. Projects shown are my take on other art teacher's lessons, lessons found in books or else designed by myself.
Thanks for visiting!
LAND ACKNOWLEDGEMENT I acknowledge, with deep respect, that I am gathered on Treaty 7 territory. I acknowledge the many First Nations, Métis and Inuit whose footsteps have marked these lands for generations. I respect the histories, languages and cultures of all the Indigenous peoples of Canada, whose presence continues to enrich our community.

Thursday, December 8, 2011

Set Painting for School Plays


As Art teachers, many of us are involved with the annual school play. In all of the schools I have worked out, I have been in charge of the set paintings for the school play. I usually design the backdrops and some of the props, and sometimes design the poster and program, if there's no IT teacher. As anyone who has been involved in this knows, it is a huge undertaking, especially if you're the only Art teacher in the school! For that reason, I've always had a "Set Design Club". I try to get at least a couple of talented high schoolers to help out, and then kids in the younger grades can join as well. Depending on how organized the whole production is,  I either get to start early in the process or scramble at the last minute! (usually involving evenings and weekends- ugh).

I took a few photos this year of how I go about designing a backdrop for a school play. I worked very closely with the Drama teacher- they are like kindred spirits to us Art teachers; I've never met a Drama teacher I didn't like! They are so energetic and enthusiastic!

So, after meeting with the Drama teacher on what their vision is for the play, I make some watercolour sketches of what the backgrounds might look like. Then I meet again with the Drama teacher and we discuss them and I make any needed changes or adjustments.

preliminary watercolour sketch for the mountain scene

This year, the play was "The Hobbit". I had to do some research (aka: Wikipedia, heh, heh) on it as I have never read the book. The school didn't have any existing backdrops, so the Drama teacher had these huge flats built by a carpenter friend, then she and I spent a Saturday stretching canvas on them. It was a two-person job for sure: one to stretch the fabric and the other to staple.
These are about 4 ' x 9'. They were HUGE!!!  The first ones were even bigger, but after stetching one of them in the basement of the Drama room and then trying to move it upstairs, we realized they didn't fit through the doors! The poor carpenter had to disassemble all 9 flats and re-do them.
Lesson learned: make sure the backdrops fit through doorways!

So the Drama teacher had this brilliant idea of having three scene changes. To do this, we had three panels for each scene. I numbered the backs of these 1,2 and 3. All the # 1 panels were hinged together and put on heavy duty caster wheels. Same with the #2 and #3 panels. So essentially, each panel had three different scene changes on it. For the scene change, stagehands in the back of the stage would swivel/turn the panels around so the next scene (ie: #2) would line up. It worked surprisingly well.

Back to the process. Once the canvas was stretched, I had my Grade 6 class prime all the panels during class one day. We used cheap latex house paint (mis-tints at the hardware store) for this step. Using house paint is always messy because it's so liquidy and drippy. We put drop-cloths under everything, but inevitably paint seems to get everywhere and I was running around like a madwoman
with a bucket and sponge trying to stay on top of all the drips.
Ok- let these dry flat, otherwise the stretchers could warp. 


Once dry, I projected my sketch with an opaque projecter onto the canvas and students
traced the drawing, using charcoal, directly onto the canvas. 


Then let the painting begin. I post my watercolour sketch for students to refer to. I save loads of plastic containers with lids to use for mixing colours. Have lots of buckets with water to clean the brushes in. This painting process takes a surprising amount of time due to the amount of surface area being covered. The paint was surprisingly inexpensive as we just bought mis-tints at the hardware store. You simply need a few basic colours and from there you can mix so many additional colours. 


Phew! Finished! Here is the completed scene #1 panels in the gym ready for the first scene.


Here's Gollum!


Here's the Dwarves with our #2 mountain scene backdrop.


Here's scene #3 with Smaug the dragon. Check out the cool papier mache dragon head! 
A student dressed in black is manipulating the head.


End of the play. ALOT of work, time and effort goes into any school production, but it's worth it once you see the play and the reactions of the students, staff and parents. As well, the kids who help out painting get a sense of pride and accomplishment in seeing their hard work on stage. They also get a 'real life' experience through working on a collective project outside of school time; the whole process is so valuable on many different levels.

Please share any of your school production experiences/tips/suggestions in the comments section!


Sunday, December 4, 2011

Symmetrical Nutcrackers


This is a re-posting of a project I taught last year to my Grade 6 class.
Students looked at examples of nutcrackers and then drew a symmetrical nutcracker by folding a sheet of paper in half and drawing one half of the nutcracker. This is transferred to the other side to create a symmetrical nutcracker drawing.

I start off by showing examples of nutcrackers (real and/or photos) and then we talk a bit about the history of nutcrackers and how they're made.

The History of Nutcrakers

Nutcrackers posess a rich history that goes back about 300 years ago in Germany. The carving of nutcrackers developed as a cottage industry in forested rural areas of Germany. They provided a supplemental income during the winter months or when other industries, such as mining, dwindled.

Nutcrackers only became popular in North America about 50 years ago after the Second World War. American soldiers stationed in Germany began sending nutcrackers home to loved ones as gifts. Thus began the tradition of collecting nutcrackers in North America.

As well, when Tchaikovsky’s ballet, The Nutcracker Suite premiered in St. Petersburg in 1892, the popularity of nutcrackers grew tremendously. The ballet became very popular in the United States in the early 1950’s and ignited the passion for these fascinating creatures. The strong following of this classic production greatly increased the popularity of collecting nutcrackers in America.

How Nutcrackers are Made

Here's a short video that shows a nutcracker being made at a workshop in Seiffen, Germany.  There's no music, or any sounds for that matter, in the video, so you might want to narrate out loud! I enjoy showing my students products handmade by artisans; I hope it gives them a real appreciation for the handcrafted and shows them the beauty of working with their own two hands.


So, to get started, students fold their paper in half vertically and then draw only half of the Nutcracker (including half a nose, half a mouth, one eye, etc)- this will keep it symmetrical:


 Then they passed over their pencil lines with a dark 4B pencil, folded the drawing in on itself, and rubbed over the pencil lines with the handle of a pair of scissors. 
This lightly transferred the drawing to the other side of the paper. The transfer is quite light, so at this stage they can erase and make any changes necessary. For example, some nutcrackers ended up being waaaay too skinny or waaaaay to wide. So students can adjust them and re-transfer them. Once the basic figure is complete, students can add on accessories like swords or anything they might like their nutcracker to hold.


Once they're happy with their drawing, pass over the pencil lines
with a permanent black marker.


They painted them with watery tempera discs; watercolours would also work well.

Ta da!


Tuesday, November 29, 2011

Sparkling Snow Globes


This is a re-posting of a holiday project my Gr.6 students did last December. I will be starting to post my holiday lessons now, as I know I have a tendency to start any themed projects way too late. I always forget how many days tend to be missed in December due to illnesses, various school events, students leaving early for extended holidays, etc.

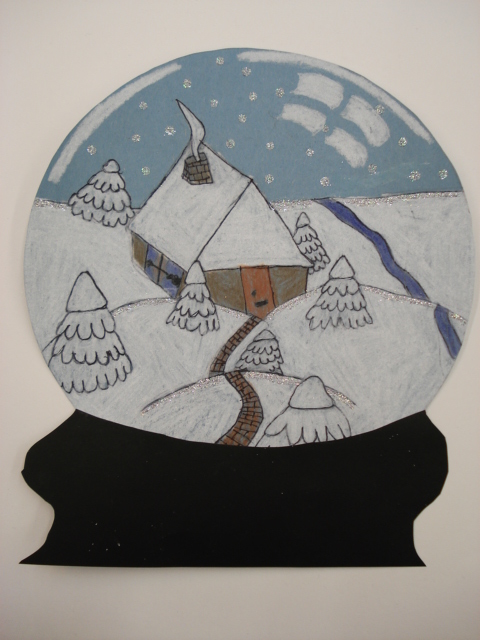
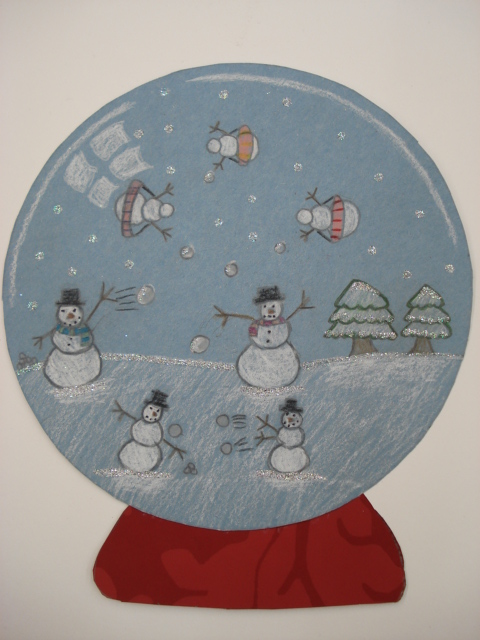
So students were asked to design a snow globe- they could draw any scene they liked; their 'ideal' snow globe world. These are made from construction paper, coloured pencils and glitter.

History of Snowglobes:
Snow globes are thought to date from France during the early 1800’s. In 1889, a snow globe containing a model of the newly built Eiffel Tower was produced to commemorate the International Exposition in Paris. Snow globes became popular in England during the Victorian era and, in the early 1920s, crossed the Atlantic to the North America where they became a popular collector’s item.


It's always helpful to have students first look at a real snowglobe. Then they can see the way the light hits the globe and use that for reference when they draw their highlights.

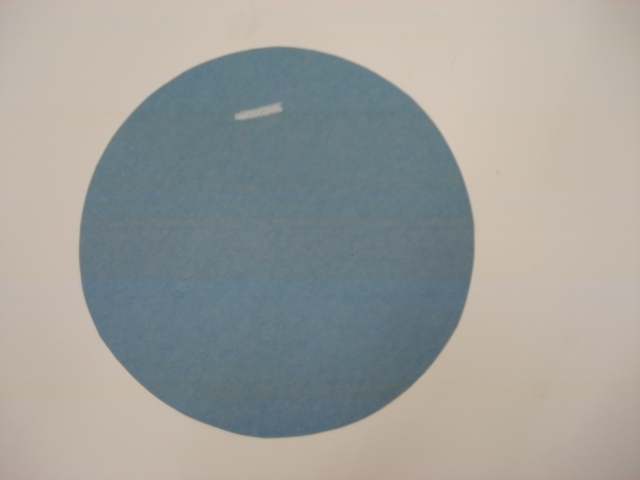
To make these, first cut a large circle out of light blue paper (we used plastic lids as tracers) and design a base from scraps of coloured paper. Use a gluestick to glue everything together.


Glue them together and then start drawing your snow globe scene. I had students imagine what their 'ideal' snow globe world would look like. They practiced first in their sketchbooks so they could plan out their ideas. Then begin drawing the good copy onto the blue paper in pencil first.


Pass over the pencil lines with fine tip black pens...


Then colour with coloured pencils; remind them to press hard, especially with the white and to try to add shading using a range of values. I showed the students how to add a curved highlight and/or reflection of a window at the top to help make the circle look 3-D; like a globe.
White glitter was added at the end for some holiday sparkle...

Fact: I am a glitter hoarder and proud of it.

Here are the Gr. 6 results. 
Some of the boys did pretty funny mini battle scenes within their globes ;) 
The rest of the class went with more traditional winter or Christmas-y scenes.

Ta da!


detail


Gingerbread Man Battle Scene!

Army dude taking a giant snowball to the abdomen

detail: Gingerbread man with laser beam eyes...


On display with the Grade 7 "Gingerbread House" project which you can see here.


Thursday, November 24, 2011

Creativity Needs Time

This sweet video called "Deadlines" (by KreativMagazin) illustrates how innovation and creativity need time.

Related Posts Plugin for WordPress, Blogger...