ABOUT THIS BLOG

"A Faithful Attempt" is designed to showcase a variety of K-12 art lessons, the work of my art students, as well as other art-related topics. Projects shown are my take on other art teacher's lessons, lessons found in books or else designed by myself.
Thanks for visiting!
LAND ACKNOWLEDGEMENT I acknowledge, with deep respect, that I am gathered on Treaty 7 territory. I acknowledge the many First Nations, Métis and Inuit whose footsteps have marked these lands for generations. I respect the histories, languages and cultures of all the Indigenous peoples of Canada, whose presence continues to enrich our community.
Showing posts with label recycled materials. Show all posts

Sunday, April 25, 2021

Low Relief Designs from Cardboard


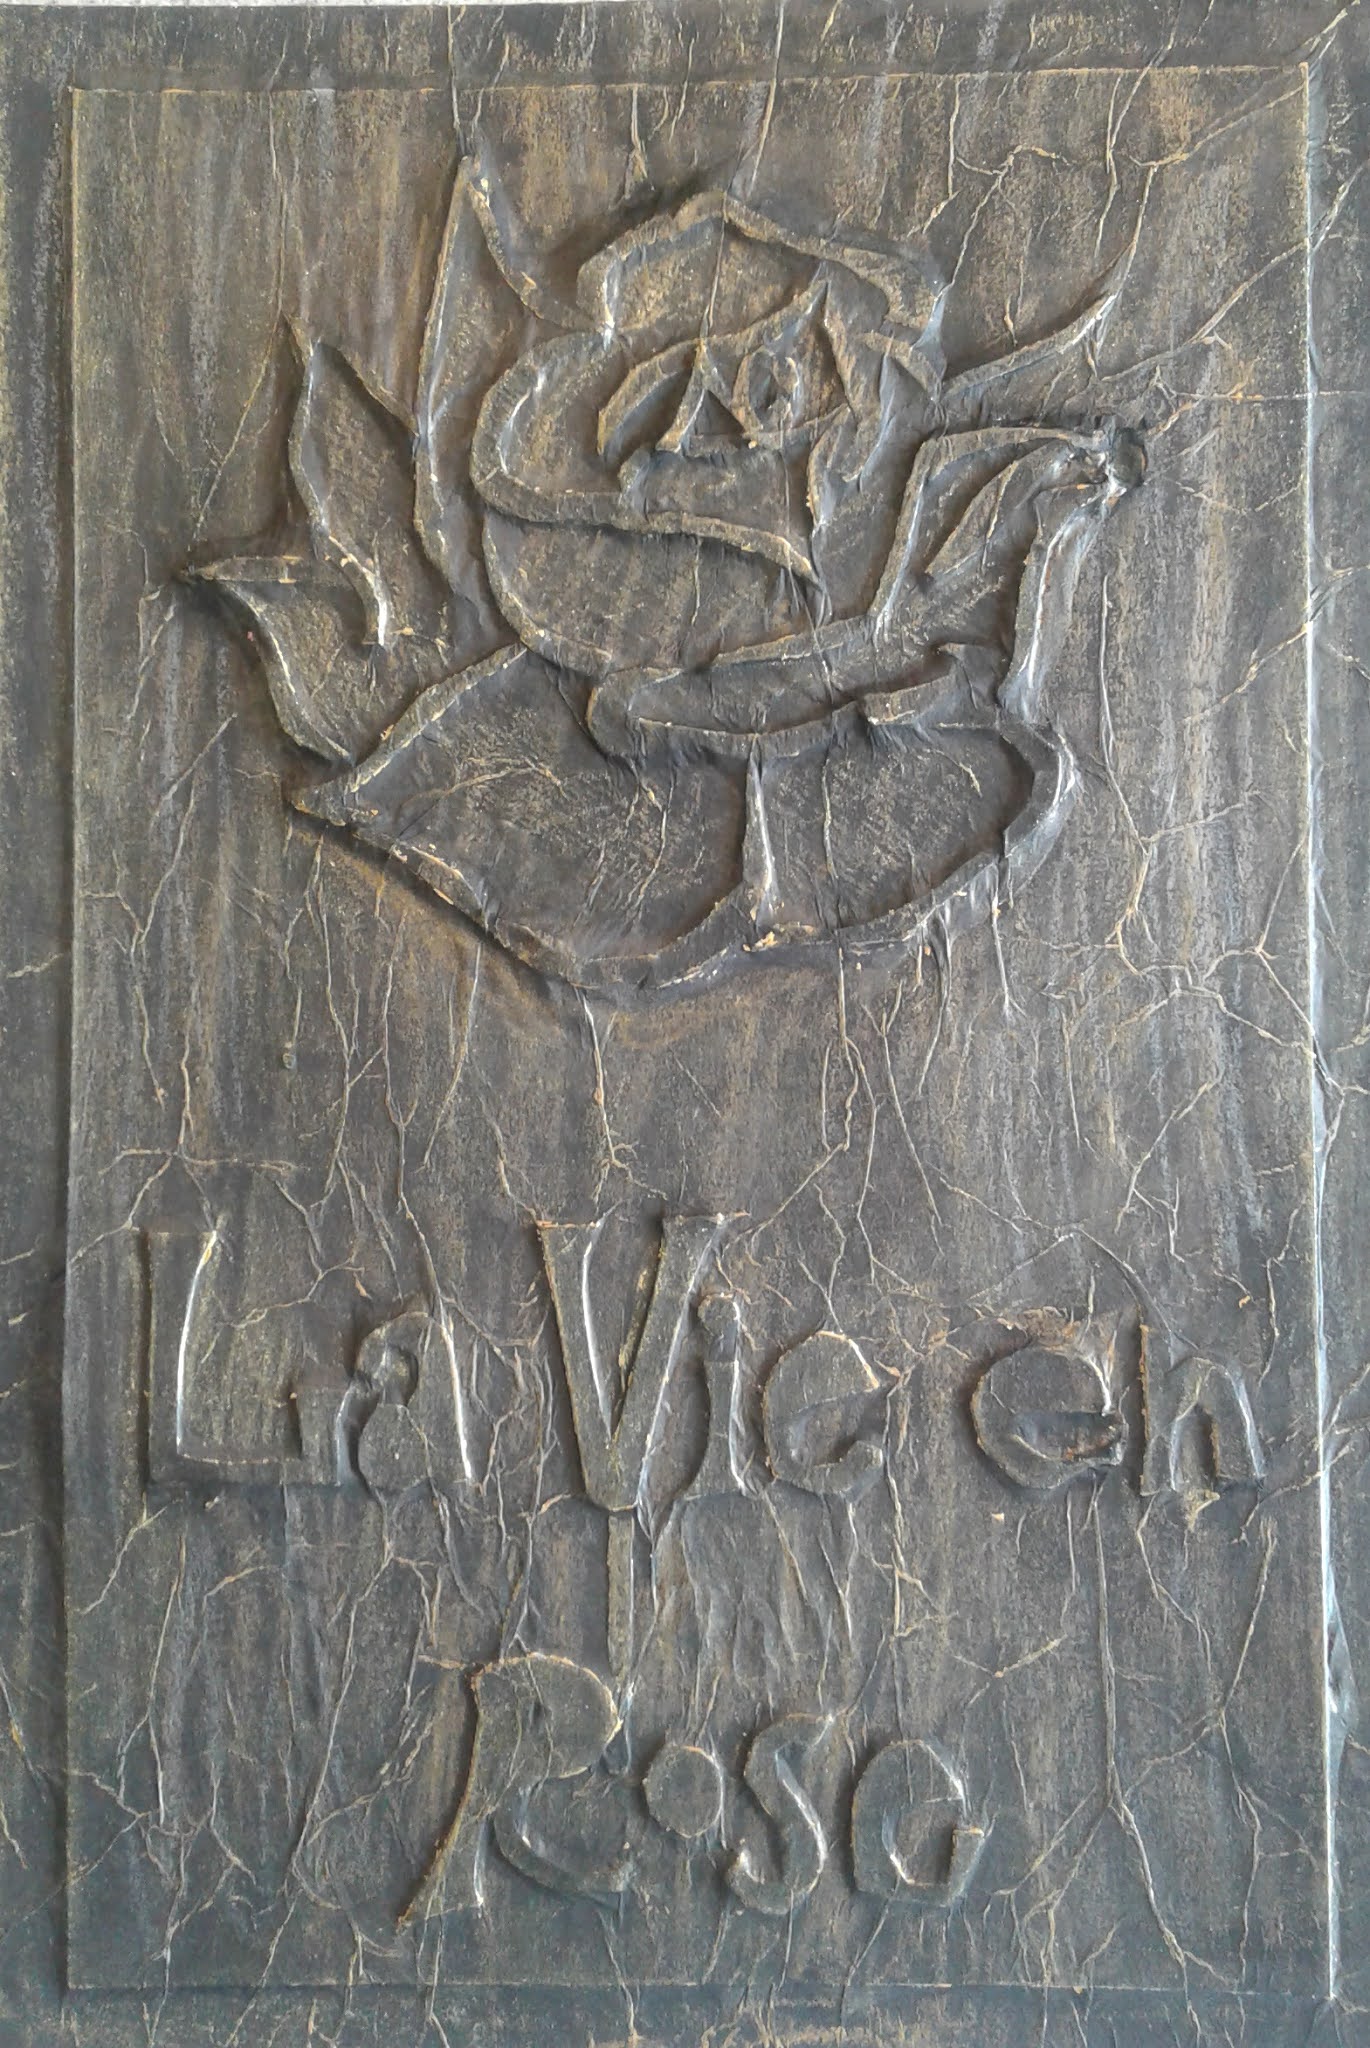
This is a really cool low-bas relief project that I based on Mexican milagros. I posted about this previously HERE

You need: thin cardboard scraps, cardboard for a base (cereal boxes, scrap mat board, etc), good quality scissors that can cut cardboard, white glue, black issue paper, metallic wax crayons (paper removed). 

So I save cereal boxes from home and collect 'good' cardboard throughout the year and keep it in a big box. I also get scrap mat board donated from a framing store. I pre-cut all the cereal boxes into nice clean rectangles using my large paper cutter. 

Students started off by sketching a design of something they like. The need to include the word- it can be in any language. Start by gluing a slightly smaller thin piece of cardboard onto a larger one. This will rete a border. Students will then cut out all their shapes for their design. They need to think in terms of 'layers'. I encourage them to have 4 layers (including the border). Glue all the pieces down with white glue. Let dry overnight.


I need to then flatten these all overnight as they warp pretty badly. I just stack a bunch of heavy board and books on top.
Then the students cut a sheet of black tissue paper about an inch larger than their design and crumple it up (gently) to create texture. Then they cover their whole cardboard design with a thin layer of white glue. They paint this on using old paintbrushes. Lay the black tissue on top and carefully pat it all around the shapes using another dry paintbrush. Work from the center outwards. 
Be slow and gentle because the paper can tear!


Wrap the excess around the back and glue down.


Then, using the side of a metallic wax crayon, rub over the entire design and this will really highlight the design and make it 'pop. It also makes it look liked aged metal like tarnished silver or pewter.


Some Grade 7 - 9 finished artworks:


Sunday, September 25, 2011

Cardboard Tube Creatures: Vampire, Bat and Cat


Here's another tutorial for more cardboard tube Halloween creatures. See my original post here.
In the classroom, I would demo how to make all of these and then let student choose what they want to make.  Of course some might come up with new ideas or different ways of doing this- even better!

So for the vampire, start off with a toilet tube and push down each side of one end to form the vampires pointy ears (they have pointy ears, right?)


Then draw on a simple face and and cape/shirt.  Paint the whole vamp with acrylics or tempera.  Let dry.


Once dry, you can add smaller details with a marker. 


The bat is similar but a bit easier, so more suited to younger students.


Follow the steps above to create the ears. Paint black and let dry.


I made my wings out of scrap corrugated cardboard- but use any heavy paper you have, fun foam, etc.
I made a template first on scrap paper to made sure it fit my bat then I cut it out and painted it black.


Have students sketch out ideas for the face.


Cut out face features from coloured paper scarps and glue on. Then hot glue on the wings. Done.


Now for the cat.


Create ears and paint black.


Cut out facial features and accessoried from scrap coloured paper. Cut tail shape from scrap card. Paint.


Glue it all together. Easy!


Make them all and you'll have some fun and inexpensive Halloween decorations for your classroom!


Wednesday, March 30, 2011

Milagros Bas Relief


This is a bas relief (or low relief) project that uses recycled cereal boxes. A bas relief is a low sculpture technique in which the design elements are just barely more prominent than the (overall flat) background.

For this project, Grade 9 students build up the relief with layers of cut-out cereal box shapes. They had to represent something they are thankful for. 
I found the lesson plan on the fantsastic CRIZMAC website.

I first showed a slideshow of milagros examples and explained the history and meaning behind them.

from Wikipedia:

Milagros  are religious folk charms that are traditionally used for healing purposes and as votive offerings in Mexico, the southern United States, other areas of Latin America, as well as parts of the Iberian peninsula. They are frequently attached to altars, shrines, and sacred objects found in places of worship, and they are often purchased in churches, cathedrals or from street vendors.

Milagros come in a variety of shapes and dimensions and are fabricated from many different materials, depending on local customs. For example, they might be nearly flat or fully three dimensional; and they can be constructed from gold, silver, tin, lead, wood, bone, or wax. In Spanish, the word milagro literally means miracle or surprise.


This is what you'll need:
  • Sketchbooks or scrap paper 
  • Scissors
  • Pencils
  • Lightweight cardboard (we used cereal boxes)
  • Cardboard squares to use as the base for the milagro (we used mat board scraps which were donated from a framing shop)
  • White glue, paintbrushes
  • Black tissue paper (can usually find at the Dollar store)
  • Metallic crayons

I do this project towards the end of a term when I've had enough time to build up my cereal box collection- of course, you can always ask students to bring them in as well.
Metallic wax crayons or oil pastels.  Take the labels off.

So students begin by sketching a simple design for their milagro in their sketchbook.  They needed to represent somehting they were thankful for. They had to have a minimum of three layers and they could include a word (in any language) if they wished.  I got the usual suspects of video games, but for the most part, I did get some more meaningful symbols such as love, friendship, mothers, music, etc.

Then students use a piece of mat board for the base and then start drawing and cutting out the shapes needed from the cereal boxes. Think in terms of layers. Lay it all out and decide how you want the composition to look.

When you're happy with it, glue all the pieces down with an even, thin layer of white glue.

Let dry (overnight) and you will have something like this:

Then mix up some white glue with a bit of water to thin it down, and using a paint brush, brush over the relief and then gently and carefully lay a sheet of black tissue paper (cut slightly larger than the relief) over the relief and pat it down with your fingers and/or a paintbrush.  Rub around all the shapes.  It's ok if you get lots of wrinkles.

Wrap it around the back like a present (see below) and glue it into place. Let dry.

I stacked books on top of them overnight as they had a tendency to warp a bit....

When they are dry, rub the side of a metallic wax crayon all over the design
and it will pop out and look like old metal.

Here are some Grade 9 results:
Ta da!


detail of the bas relief


"Love" in German


"Rain"

Related Posts Plugin for WordPress, Blogger...