This was a cross-curricular project I did a few years ago with an amazing Grade 3/4 teacher. Her students were studying different climates and habitats and together we devised this project. The students worked in pairs (strategically chosen by their teacher) and chose a climate to research, study and eventually, in my class, build. I believe the choices were desert, rainforest, Arctic and grasslands. They drew detailed sketches out in their sketchbook which showed the major landmasses/topographical features they would build, the colours they would use and the different animals that would inhabit that particular climate.
So I had, by this time, collected a bunch of boxes which I had cut down to use as the base for the models. You also need loads of newspaper and masking tape. I have to say, cutting cardboard is one of my least favourite activities.
ANYWAY, students drew their plan onto the cardboard in pencil and then black marker in order to see it.
The, using newspaper and masking tape, they scrunched up the newspaper and taped it down in bunches to start creating the land masses. The students worked magnificently in their little groups.
This was the beginning of a huge mountain...
Once all the newspaper is stuck down, students covered everything in strips of plaster gauze. This is where things get really messy but the KIDS LOVE IT! I demonstrated to the kids how to carefully smooth out each strip with their fingers and mould it around the features.
Painting time! I showed the kids how to mix colours and layer colours in order to get a realistic effect.
The huge mountain turned out so well.
While the models were drying, students used coloured plasticine to make all their little animals.
I also had a wide assortment of materials for their use: twigs, moss, sticks, beads, etc. They also brought in things from home and collected stuff from outdoors (sand, pebbles, etc.) they thought might be useful.
Then all of these items were hot glued onto their diorama.
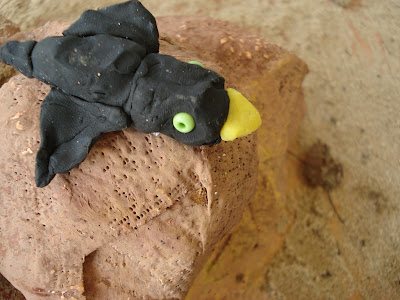
Unfortunately I didn't get any shots of the finished dioramas but here are some close-ups of some of the creatures created. They're pretty cute. The finished models were put on display for the school community to see.
 |
| dog sled in the Arctic |
 |
| I believe this was a gorilla... |
 |
| wolves! |
 |
| penguin |
 |
| a spiky desert creature |
 |
| a mountain climber in the Arctic |
 |
| monkey in the rainforest |


9 comments:
these are fantastic sculptures!! I read your comment about DAS: modelling it is a little bit harder than fresh clay, when it is dry is a bit fragile, but more resistant than dry clay (not cooked). I used it when I hadn’t a ceramic kiln.
Wow- you are certainly brave soul! These are fab. I did something very similar (habitats) except we made dioramas from shoe boxes.
Those are just fantastic!! I'm bookmarking this post to try with my kids this summer!
Miriam: thanks so much!
Gabriela: this was a small class (about 12 students) and also very well-behaved, so I knew this scale of project would be manageable with them!
Eddie: please share a link if you blog the results of your kids work this summer- have fun!
Great project! I especially love the little figures with beads for eyes and other decoration. I am wondering if they would melt if I baked them in Sculpey (polymer) clay.....Thanks for posting.
Rina
Thanks Rina! If you use polymer clay, just buy glass beads and you can bake those no problem, I think.
What a fantastic project.
I love the little sculptures.
Also the idea of students working together it teaches then a lot about cooperation and exchange of ideas.
What a great project. These landscapes are the kind of things kids will remember doing FOREVER!!
Thanks Chesterbrook!
Fine Lines- yes, the kids definitely remember this project and always and forever ask: "Can we do another plaster project?!" They love plaster more than any other medium we use.
Post a Comment