
This is a fun and relatively simple project that mimics the look of batik fabric without all the hassle of using melted wax, fabric and an iron.
Batik is cloth that has been decorated using a wax-resist dyeing technique. Java, in Indonesia, is famous for it's batik traditions, but many other countries use it (Malaysia, Brunei, Singapore, Thailand, China, etc.) Dutch traders in the 19th century introduced the technique to parts of Africa, hence you can find many batik products there as well.
I first showed students photo examples of batik fabric from Indonesia and showed photos of the process. I also had on hand some fabric I bought when I was in Mozambique. I showed them the 'crackle' effect in the background, made by scrunching up the wax and re-dyeing it in a darker colour.

Here are the steps:
Very important- use regular white copy/printer paper.
Thick paper won't work for this project (trust me, I tried).
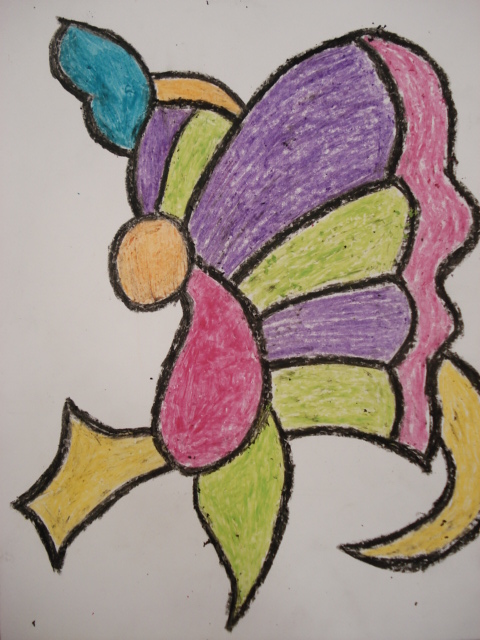
Draw a design- something large and bold. You don't want any super small areas.

Colour design in with wax crayons. Press hard. Use lighter colours, especially for the background.
When you've finished coloring, outline the design with a thick black wax crayon- this will help the design stand out in the end.
Then crumple up the paper. Two-three times-- you want lots of cracks.
Then slowly and carefully unfold it and flatten it out.

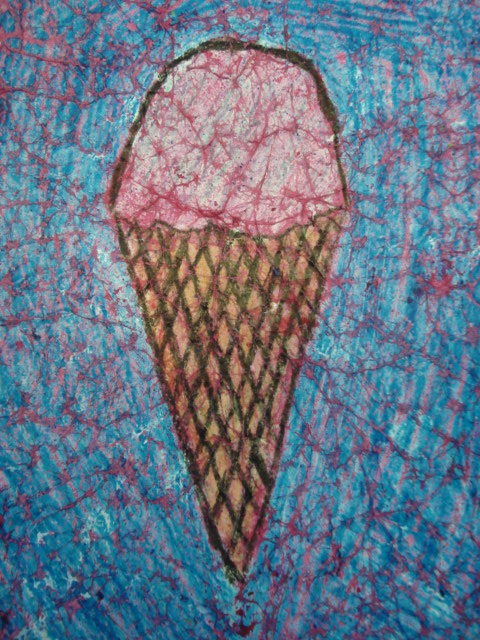
Detail of the cracks- the cracks will reveal the paper underneath and this is what the paint will stick to.

Then, use some watered down acrylic paint in a darker colour (purple, dark blue, dark red) and paint it over the picture; press hard/scrub with the brush to get the paint into all the nooks and crannies. Finally, blot off the excess paint with a paper towel. The paint will stick to the cracks (exposed paper) and will not stick to the waxed areas.

Detail of crackling revealed by the paint.

Here's my Grade 8 students working on the project:
Always practice in the sketchbook first.... test colours, design, etc.

Drawing the good copy.

Colouring in the design with wax crayon. Press hard.

Crumple up the paper....

Carefully flatten it out.

Paint a dark colour of watery acrylic on top...it gets messy for sure.

Dab off the excess with paper towels...let dry.

Ta da!


 |
| Chinese characters meaning 'Peace' |


9 comments:
Ooohh! Such great results!
super results! I like the effect with the darker colors like red and purple just as well as the black.
Wow! These look amazing.
Thank you so much for giving the step-by step instructions.
Thanks Kathy, Anna and Chesterbrook! I like this project alot because it's almost 'fool-proof' and has a high success rate with all students.
I started this today with my 2nd grade class and they thought my demo was really cool! We will finish it next week and I know they will love the results. Very nice!
I just did this today for a summer school project. The kids LOVED it! 5th-7th graders. There were scared to "ruin" their drawings by crumpling them up, but then loved the results!
Thanks for this really cool lesson!
We did a "garden theme." Kids drew flowers, bugs, butterflies, etc. We used blue, purple and green for our cracks. They look awesome!
Thanks again! I made two myself! Love it! ;)
Mrs. Skojec: I hope the project worked out for your Gr.2 class- let me know; I've never tried this with that age group before.
Anonymous: I'm so glad your kids liked this project! It is quite traumatic crumpling up the drawing you've worked so hard on! lol
I love your 'garden' theme- perfect summer idea :)
Thanks a lot for step by step instructions.will definitely try this cool technique.
Post a Comment