ABOUT THIS BLOG

"A Faithful Attempt" is designed to showcase a variety of K-12 art lessons, the work of my art students, as well as other art-related topics. Projects shown are my take on other art teacher's lessons, lessons found in books or else designed by myself.
Thanks for visiting!
LAND ACKNOWLEDGEMENT I acknowledge, with deep respect, that I am gathered on Treaty 7 territory. I acknowledge the many First Nations, Métis and Inuit whose footsteps have marked these lands for generations. I respect the histories, languages and cultures of all the Indigenous peoples of Canada, whose presence continues to enrich our community.

Monday, August 18, 2014

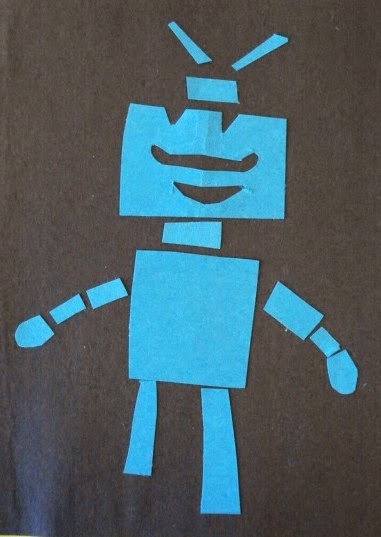
Robot Collage


This was an end of the year project that uses up all those scrap colored papers 
we Art Teachers keep/store/hoard all year long!
Grade 3 students reviewed/discussed symmetry and I showed them how to fold small pieces of paper 
and then cut out a shape. The folding keeps the shape perfectly symmetrical. 

Use a glue stick to glue everything onto a contrasting colored piece of background paper. 
I encouraged students to glue all the parts of the robot slightly apart to give it that jointed robot feel. 


Friday, August 1, 2014

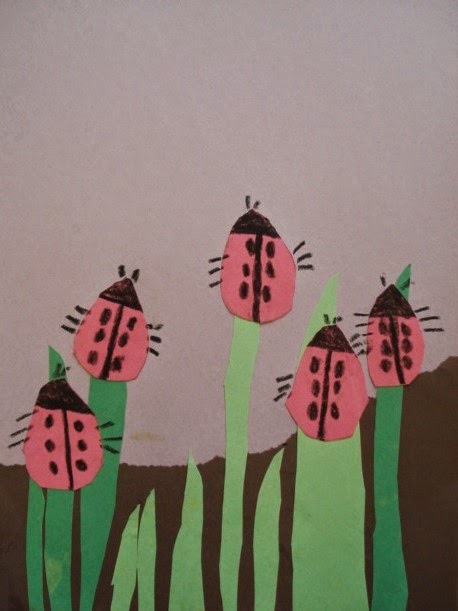
Ladybugs in the Grass


This is a super cute summer collage project that I found HERE on Artsonia.
They're from Art teacher Kate Sakowski from Peter Muschal Elementary School in New Jersey.

Grade 1 students started off by looking at Google images of ladybugs on the Smartboard. One child asked "Do we have to make them red?, so then I asked, "Well, I wonder if they come in different colors?" We Googled it and sure enough, ladybugs come in a range of colors including yellow, orange, blue, pink, brown and the most common, red. I had no clue they came in such a variety of colors!


Students started off my tearing a piece of brown construction paper for the 'dirt' and gluing it to a background color (for the sky, basically). Then students cut up strips of grass from two different colors of green paper. We discuss how this gives 'variety' to the artwork and helps make it more interesting.


Then students made an oval template on a small piece of cardstock and used that to trace onto colored paper of their choice. This helps keep all the ladybugs relatively the same size. Then they used a black crayon (marker would be better) to color in the head and spots.


All the ladybugs get glued onto the grass and finally the six legs are drawn on. 
I really think these are so adorable!


Sunday, July 13, 2014

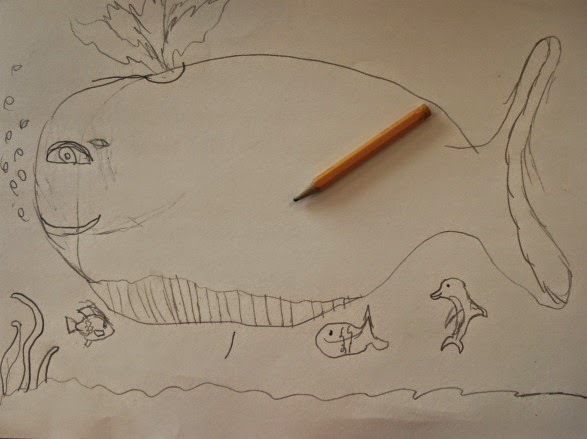
Inside-Out Seascapes


This is a great lesson I found in a 2007 edition of "Arts & Activities" magazine. It was created by Art Teacher Judy Kalil from Florida. It's a seascape lesson with a twist- the seascape is inside the underwater creature's body, so it's super fun and imaginative for students!

I've done this lesson both as a watercolor and with colored pencils (perfect for a sub lesson). 

So students started off by researching and choosing an underwater creature to draw. Fish are more or less the simplest and most popular, but you can also look at whales, sharks, octopuses, etc.
Draw the main outline/shape of the body. Don't add any details inside the body other than an eye and a mouth. Draw some sand along the bottom of the ocean and a few little seascape-y accessories.


Inside the body, draw the main details of the seascape. We brainstormed ideas of what one might find in a seascape (boats, pirate ships, islands, palm trees, coral, etc.) to help give a starting point.


Once the drawing is complete, outline everything with a permanent black marker/pen.


Next class period: crack open the watercolors! 
We painted the inside seascape first and then the background last. 


Completed watercolor examples:


Colored pencil examples:


Wednesday, July 2, 2014

Mondrian-Inspired Animals


I finally got around to trying out the popular "Mondrian Animals" lesson. I originally saw it in "Arts & Activities" magazine by art teacher Berniece Patterson - find the lesson plan HERE.

It's a great project for those on a budget because it uses very simple supplies: white paper, regular water-based markers and a ruler. I started off by showing kids a slideshow of Mondrian's famous squares and rectangles art. We talked about the colours used, why he might have limited his colour palette and if they thought his artwork would be easy to create or not (seeing as it's so simple.) His style of art is considered 'non-representational'.


Piet Mondrian (1872-1944) Composition C (no.III), with Red, Yellow and Blue, 1935

Kids started off by drawing a simplified outline of an animal of their choice. They were instructed not to include any details within the body other than a simple eye. The, using a ruler, they drew horizontal and vertical parallel lines within the animal body. Keeping the lines parallel proved to be quite a challenge for them!! I find that students rarely use rulers (for drawing straight lines at least) these days in class, and it shows during art class!! 


Once all the lines were drawn, students coloured in some of the shapes using Mondrian-esque 
colours of red, yellow and blue with touches of black. 
The last step was to use the ruler again to trace over all the lines with a thick black marker.


Related Posts Plugin for WordPress, Blogger...