ABOUT THIS BLOG

"A Faithful Attempt" is designed to showcase a variety of K-12 art lessons, the work of my art students, as well as other art-related topics. Projects shown are my take on other art teacher's lessons, lessons found in books or else designed by myself.
Thanks for visiting!
LAND ACKNOWLEDGEMENT I acknowledge, with deep respect, that I am gathered on Treaty 7 territory. I acknowledge the many First Nations, Métis and Inuit whose footsteps have marked these lands for generations. I respect the histories, languages and cultures of all the Indigenous peoples of Canada, whose presence continues to enrich our community.

Tuesday, August 7, 2012

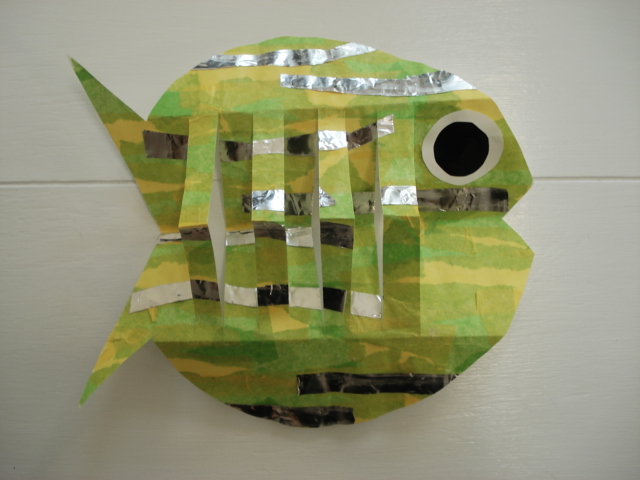
Collage Pop-Out Fish


This is a fun and colourful fish project suitable for elementary students. I usually do it with Grade 3 classes. I found this project in an art activity book years ago-I will take a guess and say that it might have been from an Usborne book, but I truly don't remember for sure. 

This would be a great project to collaborate with any classroom teachers if they are studying fish and underwater themes. Students could research a specific fish and use the correct colours and shapes of fins, etc. This also makes a really nice hanging display.

So the supplies you'll need are very simple: tissue paper, regular white paper, white glue, aluminium foil
Start by choosing two or three colours of tissue paper for your fish.


Rip them into a bunch of strips.
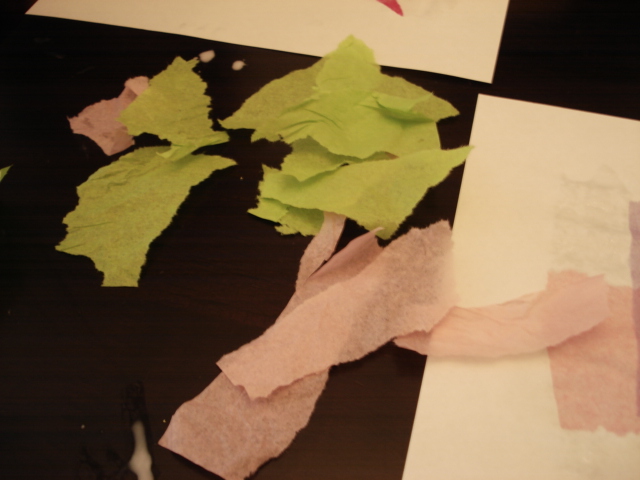

I had my 2 year old niece try this project out for a little summer activity. Preschool kids can do the collage part, but adults or older siblings would have to do the cutting and folding for them. 

Take some watered down glue in a container and use a flat paintbrush to gently glue down all the strips of tissue paper, covering all the white paper. Paint over-top of the tissue paper as well, to really seal it down.
My niece used ALOT of glue and only managed to cover about 10% of the paper before she lost interest ;)


Overlap the tissue paper to create new colours.


Once you've covered all the white paper, it's time for the aluminium foil.
Oh, you could also add some glitter at this point as well!!!!


Rip or cut the foil into some thick strips and glue those down. Use full strength white glue 
because the watered down glue won't hold it.


Let the paper dry over night. The next day it will have curled at the edges, so it helps to 
flatten it with heavy books for a day or so.


Ok- once the paper is dry and relatively flat, lay it out portrait style and fold it in half 
(bring the bottom up to the top)


Draw half of a simple fish shape- just the body and a tail.


Cut it out. 


Now take the top of the body and fold/bend it down until it almost reaches the bottom fold.
Crease well (the paper will be thick due to the collage layers, so crease it well).


Turn the fish over. Bend/fold the other top edge over in the same way. Crease well.


Unfold. Draw 8 lines going from the bottom fold up to the top fold. Make these about a finger width size. Also cut a mouth. 


Cut the lines, making sure to stop at the top fold.


Open up the fish. At this point, some of the foil may have peeled off- it doesn't seem to stick very well (seeing it's a non-porous surface). You can glue it back on or rip it off in frustration like I did ;)


Ok- now for the 'pop-out' part.

Hold the head and pull the first strip out. Keep the second strip inwards. Keep going, making sure to alternate out, in, out, in and crease each strip well.


Done!


Success!


Now to add the features. Use the scraps of the collage paper (students can swap 
papers to mix and match) to cut out fins.
Glue on a large eye.
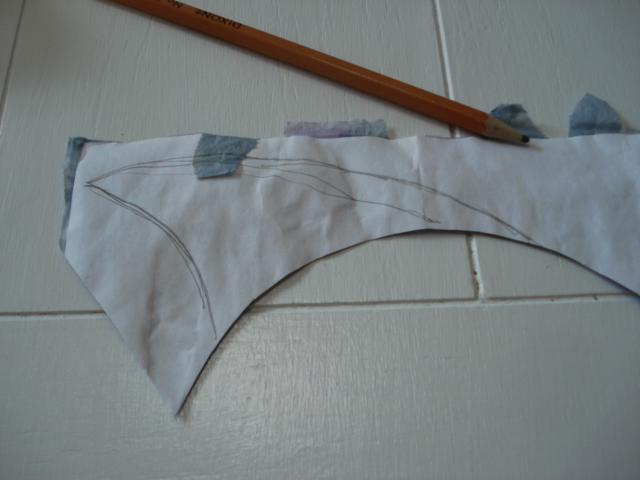


If you want to hang them up for a cool display, punch a hole at the top and 
add some yarn/string/ribbon, whatever.


Ta da!


Saturday, August 4, 2012

Ai Weiwei: Never Sorry Documentary Trailer

I've blogged about the famous Chinese artist Weiwei before. Now, a new documentary about his work is coming out. The trailer looks pretty compelling. As an antique lover, I cringed when he dropped the 2000-year old Han Dynasty vase :( But this is what Weiwei does: questions authority, defaces classical objects, and combines old world artifacts with symbols of the modern, consumerist age.

From Youtube:

Plot Summary: Ai Weiwei is China's most famous international artist, and its most outspoken domestic critic. Against a backdrop of strict censorship and an unresponsive legal system, Ai expresses himself and organizes people through art and social media. In response, Chinese authorities have shut down his blog, beat him up, bulldozed his newly built studio, and held him in secret detention. Ai Weiwei: Never Sorry is the revealing inside story of a dissident for the digital age who inspires global audiences and blurs the boundaries of art and politics. First-time director Alison Klayman gained unprecedented access to Ai while working as a journalist in China. Her detailed portrait provides a nuanced exploration of contemporary China and one of its most compelling public figures.


Friday, July 27, 2012

Cookie Cutter Ceramic Bowls


This is a clay project I did a while back when I taught a clay hand-building course 
to a class of 6 and 7 year olds. This was one of the final projects we did and I have to say it was quite challenging for them but overall, they did a great job!  I found the idea for the lesson here on the Bryn Mawr school website in Baltimore. You can see their lovely finished examples on their website; unfortunately I didn't get any finished pics of my kids final glazed pieces.

So what you essentially need for this project is:
an assortment of cookie cutters, rolling pins, molds to make bowls (sturdy paper plate bowls work great)


Roll out the clay so it's about 1/4" thick. For my young students, I have them hold up their thumbs and tell them the clay can't be any thinner than their thumb, or it will crack and break as it dries.
Then, punch out some shapes using a cookie cutter. Lay these inside the bowl mold 
(we used a bunch of bisque fired bowls we have specifically for making handmade bowls, but a paper plate bowl works well also.) Slightly overlap each shape and carefully 'scratch and attach' using water (I never use slip- plain water works just as well) and a fork or toothbrush. Smooth out any rough edges with your finger and a bit of water. Keep overlapping and filling the bowl shape until you have the size you want. 

Let these dry slowly in the mold until leather hard, remove from the mold (a couple days later), let dry another few days or so, bisque fire, then paint them or glaze them. 
They make lovely little decorative bowls!


Saturday, June 30, 2012

Klimt Gold Patterns Collage


I found this lesson, by Art teacher Kris Fontes from Union City High School, on the Incredible Art Department site and it's since become one of my all-time favourite lessons to teach. I find that all students have a high success rate with this project.

In this project, students create an elegant drawing in the ornamental, decorative and luxurious style of Austrian artist Gustav Klimt. Instead of gold scratchboard, as used in the original lesson on the IAD site, we simply used gold markers and gel pens on black paper.


You need fairly simple materials for this: magazines and/or printer, scissors, glue sticks, black paper, and gold pens/markers and books/images of Klimt's work.


I start off by showing a slideshow of Klimt's work and talk a bit about the Art Nouveau movement. Have students describe the patterns and colours used.


From Wikipedia:

Gustav Klimt (1862–1918) was an Austrian Symbolist painter. His major works include paintings, murals, sketches, and other art objects. Klimt's primary subject was the female body. He is most famous for his “Golden Phase” where he used gold leaf in his paintings. 


The Kiss, 1907-08
 "Whoever wants to know something about me – as an artist which alone is significant – they should look attentively at my pictures and there seek to recognize what I am and what I want." (Gustav Klimt)


Adele Bloch-Bauer's Portrait, 1907  
(sold for a record $135 million in 2006)

First find a nice large picture in a magazine of a figure that has some flesh showing- a head and arms, or whatever. I told the students to look for lots of photos and then choose the best from the bunch. It does take some time to find just the right image.
Some students wanted a particular person, so they found a photo on the internet and printed it out. The quality wasn't as nice as a magazine photo, though.


Carefully cut out the figure from the background:


Place your figure on the black paper and carefully and lightly trace around it with a pencil.


This is so you'll know where to re-glue the parts in the next step.


Now, cut away all the clothing.


Then glue down, using a glue stick, all the 'flesh' parts. Use your traced guidelines 
to help place all the pieces in the right spot.


Now, students are going to design patterns for the clothing and patterns for the background.
One pattern needed to be quite dense and complex, while the other could be simpler, so as to create contrast. Students designed their patterns first in their sketchbooks.

For the good copy, we used two types of gold pens: one thin (Staedtler brand) and a thick one (I bought a bunch from the Dollar store- they were surprisingly good quality I have to say!). 


Here are some Grade 9 results:


And some Grade 10 results:


Tuesday, June 19, 2012

Sliced Fruit Drawings


Here's a sketchbook assignment from a Grade 10 class- they had to draw, from direct observation, any type of fruit which had been sliced in some manner. They could use any medium to draw with but most chose either coloured pencils or pencil. Oranges and apples were the most popular fruits to draw. 
Fruit still life's are such a classic subject matter to draw.


Related Posts Plugin for WordPress, Blogger...