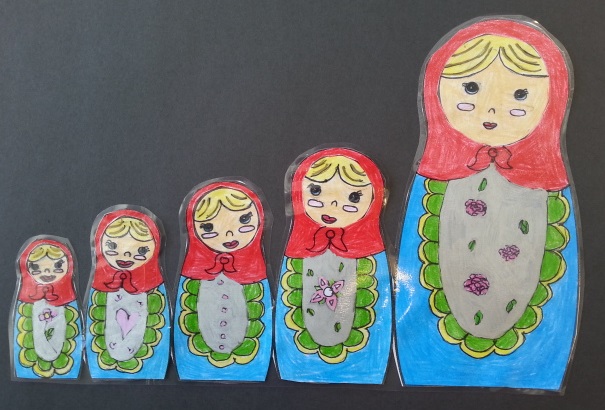
This is a great sub lesson as it uses very simple materials yet keeps the students engaged. It's also a great Global Arts lesson (traditional Russian craft) as well as teaching the art elements of pattern and shape and colour.
See my previous post about these
HERE.
I grew up having a set of matryoshka dolls which I absolutely adorned and was just this year, gifted a GORGEOUS set by one of my students who is originally from the region. There's something about opening up the set that is so magical and then closing it up and trying to line it all up perfectly is really satisfying.
I found a template online
HERE for matryoshka dolls. I believe the original lesson for this (a card) is from
HERE. The bodies and faces are separate. I enlarged it onto 11x17" photocopy paper. You could also use cardstock. I did this lesson with a mixed grade class from 4 - 6. I showed them a slideshow of different types of matryoshka dolls and we discussed the characteristics and the history of them.
Matryoshka dolls, also known as nesting dolls or Russian dolls, are a set of wooden dolls of decreasing size placed one inside another. The name matryoshka, mainly known as "little matron", is a diminutive form of Matryosha (Матрёша), in turn a diminutive of the Russian female first name Matryona.
History
The first Russian nested doll set was carved in 1890 at the Children's Education Workshop by Vasily Zvyozdochkin and designed by Sergey Malyutin, who was a folk crafts painter in the Abramtsevo estate of Savva Mamontov, a Russian industrialist and patron of arts. Mamontov's brother, Anatoly Ivanovich Mamontov (1839–1905), created the Children's Education Workshop to make and sell children's toys. The doll set was painted by Malyutin. Malyutin's doll set consisted of eight dolls—the outermost was a mother in a traditional dress holding a red-combed rooster. The inner dolls were her children, girls and a boy, and the innermost a baby. Savva Mamontov's wife presented the dolls at the Exposition Universelle in Paris in 1900, where the toy earned a bronze medal. Soon after, matryoshka dolls were being made in several places in Russia and shipped around the world.
Themes
Matryoshka dolls are often designed to follow a particular theme; for instance, peasant girls in traditional dress. Originally, themes were often drawn from tradition or fairy tale characters, in keeping with the craft tradition—but since the late 20th century, they have embraced a larger range, including Russian leaders. Common themes of matryoshkas are floral and relate to nature.
STEPS
I have some actual examples of the dolls- they were passed around so students could play with them. You can find these at Eastern European import stores or, if you're lucky, thrifting! I always keep an eye out for them and get super excited if I find one as they can be quite expensive when bought brand new. So far I've only found one but it only had one doll inside, so definitely not a complete set.
Then students start sketching out their designs directly on the template. They could do either traditional designs or something more contemporary of their choice. Draw the faces, then cut them out and glue them onto the bodies.
Outline everything in fine tip Sharpie once finished drawing.
Colour in: I give the choice of coloured pencils or markers but I do prefer the look of markers.
Cut all the pieces out. The bodies are connected on the template because it's meant to be a folded standing
card. But I didn't do that but feel free to do it that way!
Then glue onto construction paper. This helps give a sturdier background.
And bubble cut around that.
Some finished artworks: Grades 4,5 and 6
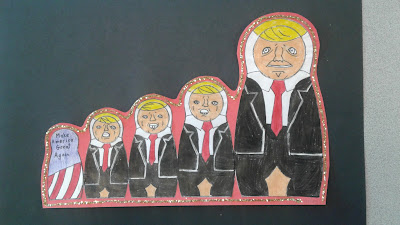 |
| this was a political parody |