ABOUT THIS BLOG

"A Faithful Attempt" is designed to showcase a variety of K-12 art lessons, the work of my art students, as well as other art-related topics. Projects shown are my take on other art teacher's lessons, lessons found in books or else designed by myself.
Thanks for visiting!
LAND ACKNOWLEDGEMENT I acknowledge, with deep respect, that I am gathered on Treaty 7 territory. I acknowledge the many First Nations, Métis and Inuit whose footsteps have marked these lands for generations. I respect the histories, languages and cultures all the Indigenous peoples of Canada, whose presence continues to enrich our community.

Friday, October 27, 2023

Kasuma Pumpkin Prints


For this Halloween themed project, Grade 4-6 students looked at the work of the "Princess of Polka Dots", Yayoi Kasuma. She lives and works in Japan.

For Yayoi Kusama, pumpkins have been a lifelong source of fascination. She was first drawn to them in childhood, citing their “generous unpretentiousness” and “spiritual balance,” and has explored them continually in her painting, sculpture, installation art, and poetry. They first appeared in her work in the 1940s and have been the subject of some of the most important works of her career. Today, polka-dotted pumpkins are synonymous with the artist and her idiosyncratic style.


Students started off by drawing a realistic pumpkin with segments. 


Then outline it in Sharpie and create the Kasuma dot pattern within each segment. 
Start large, then medium, then small.


Once it's all dotted in, cut a sheet of tin foil the same size as the paper.
Using bingo daubers, draw a pattern all over the tin foil. Spray it with a water bottle to wet the whole sheet of foil.  Then press the pumpkin drawing face down onto the wet tin foil. Rib the back gently and them lift to reveal the colourful print!


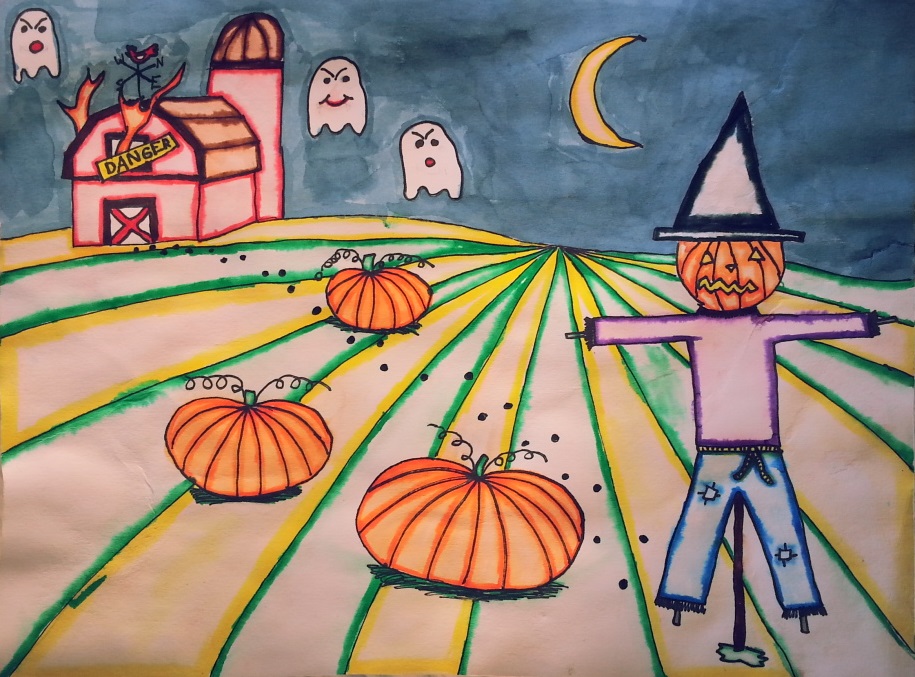
Some completed Grade 4,5,6 artwork!


Wednesday, October 18, 2023

One Point Perspective Pumpkin Patch Landscape


This is one of my favourite Fall themed art lessons- I teach it to my Grade 6 classes every year. It reviews one point perspective, and shows how to create a sense of depth by changing the size of pumpkins in a field (small, medium and large). I give students a choice to create either a 'typical' fall scene (scarecrow, pumpkin, barn, etc) or to create a more 'spooky' Halloween version.

I previously posted all the steps HERE.

We draw them in pencil first, outline in fine tip Sharpie, then colour however you want- we use marker watercolour and liquid watercolour for the sky. I find Crayola markers work best for the marker watercolour technique.

The biggest challenge with this is getting the kids to draw the scarecrow, in the foreground, really large.


Paint the sky with watercolours.


Some Grade 6 results:


Friday, October 13, 2023

Papier Mache Monsters


This was a project I taught for the first time a couple of years ago. To be honest, papier mache projects aren't my favourite because, first of all, they take so long to complete when you only see your students once a week. Secondly, I find it really difficult getting my students to use good paper mache techniques- they want to rush, use huge pieces of paper and just don't take the time and care needed to get a nice smooth finished. 

Nonetheless, students tend to enjoy paper mache so I sucked it up and forged ahead!
I taught this to a mixed class of Grade 7-9.
I saw this lesson posted on Instagram, and, for the life of me, I can't find where I got it from. So, if you're the originator of this lesson, please leave a comment so I can credit you!

Materials you will need: black ping pong balls (I found it was cheaper to order beer pong balls off Amazon!), newspaper or newsprint, a variety of empty plastic bottles and small boxes, masking tape, acrylic paint.


I asked students months before to bring in empty coffee creamer. Spoiler alert: barely anyone did!  I find my older students are pretty much useless at bringing in things from home. So yeah, it mostly came from me!! I also asked staff. For boxes, I collected small ones such as kleenex, Kraft dinner, and any other small food boxes from home.


I have a large roll of newsprint that we used for paper mache-ing. 


So students chose either a bottle or a box, then, using newspaper, the taped on arms and limbs and a head, making sue to include a ping pong ball for an eye. 

Here's my sample below:


They do a layer of papier mache. Let dry completely.


Then paint it however you like using acrylics.


Students work:


I use Elemer's Paste for my papier mache mix. 
It's essentially wallpaper paste. 


I made the biiiig mistake of also starting this project in may, forgetting how hectic and crazy May and June are at my school, with so many field trips and missing students. So I ended up with half the classes not finishing their monsters which was super sad for me!

Nonetheless, lesson learned maybe?!
Here are some completed monsters:


Related Posts Plugin for WordPress, Blogger...