ABOUT THIS BLOG

"A Faithful Attempt" is designed to showcase a variety of K-12 art lessons, the work of my art students, as well as other art-related topics. Projects shown are my take on other art teacher's lessons, lessons found in books or else designed by myself.
Thanks for visiting!
LAND ACKNOWLEDGEMENT I acknowledge, with deep respect, that I am gathered on Treaty 7 territory. I acknowledge the many First Nations, Métis and Inuit whose footsteps have marked these lands for generations. I respect the histories, languages and cultures of all the Indigenous peoples of Canada, whose presence continues to enrich our community.

Monday, January 22, 2018

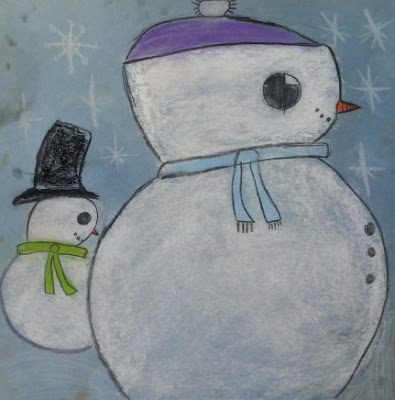
Chalk Pastel Snowmen in Profile


We have a loooong winter where I live, so I tend to do quite a few winter-themed lessons. I sure love how they look but do not enjoy the cold at all!  This is a snowmen lesson where I wanted to show my Grade 3's how they can give the illusion of distance or space in their work by using two different sizes of snowmen. I had them draw them in profile just to mix it up a bit. 

They started off by drawing their snowmen in pencil on 12" x 12" 
light blue construction paper.


For colouring them, I gave students the choice between chalk pastels (great for blending but soooo messy) or construction paper crayons (not so great for blending but soooo clean!)


Once everything was coloured, students outlined their pictures with a black coloured pencil.


Some Grade 3 results:


Sunday, January 14, 2018

Faux Stained Glass using Aluminum Foil and Sharpies


This is a really fun and engaging lesson I found HERE on the Kinder Art website. 
I modified the steps a bit. These turn out really beautiful with wonderful colour effects that these photos aren't able to capture!

We used plastic sheet protectors. Students looked online for photo inspiration. On regular photocopy paper (which fits in the page protector), students drew out their image in pencil. They had to make sure to turn it into stained glass effect by fracturing up the image. Slide the finished drawing into the page protector and then outline the drawing using a black permanent marker. Then colour it all in using coloured permanent markers.
Then, get a piece of cardboard the same size as the paper (81/2 x 11"). You'll also need a piece of aluminum foil about an inch larger than the cardboard. Crumple up the foil really well a couple of times and then smooth it out flat again. It should be all textured now.


Glue and wrap the foil to the cardboard. Then cut the page protector apart so it's only one sheet. Then staple the image on top of the foil. For the rectangular artworks, students used coloured mini duck tape to wrap the edges. 


Finished!


Because of the reflective nature of these, they were super tricky to photograph!
This lesson is a great tie-in to Medieval Art if you teach that as part of your curriculum.


Close-up detail photo


Thursday, January 11, 2018

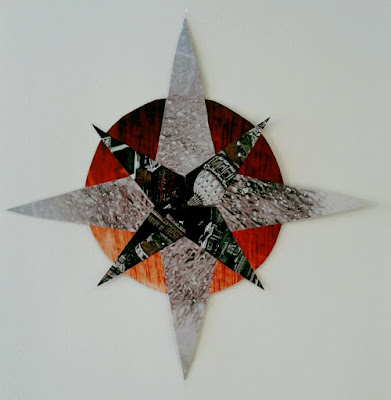
Compass Rose Collage


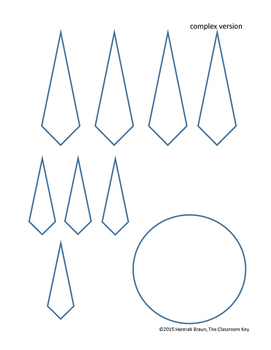
This collage project was a really good freebie I found on Teachers Pay Teachers- you can find it HERE. This ended up being a great lesson for when I needed a Substitute Teacher one day. The project is simple enough for someone not trained in Art to teach, yet engaging enough to keep the kids interested and working the entire class. It also reinforces good cutting and gluing skills.

You simply need old magazines, scissors, Sharpies and glue sticks.


The link above gives you a template to print off. Kids cut one of each out and trace it onto interesting looking magazine papers. I encouraged them to keep the rose compass symmetrical for a more cohesive look, but many did not and I ended up not minding the mismatched ones. 


Compass Rose Craftivity   

Careful cutting and gluing is essential for all the pieces to line up accurately.
Once they were were all glued and dried, I laminated all of them as they were quite delicate and thin, being made of only magazine paper.


Some Grade 4 - 6 results:


Related Posts Plugin for WordPress, Blogger...