This is a gorgeous styro print project I saw online HERE a few years ago. I finally got around to teaching it this past year. Let me tell you- the struggle was REAL! This took forever to complete and many of my students got frustrated. There's a large amount of unpredictability in this lesson and my perfectionists really struggled with getting 'perfect' prints. Nonetheless, it pushed us out of our comfort zones and they learned a lot about printmaking with this project.
I did this lesson with a mixed group of Grade 7-9 students. I don't know how teachers do this with elementary aged students!!
I followed the directions posted HERE. They are great!
So the lesson involves quite aa bit of prep in terms of cutting your styrofoam into perfect squares, then cutting heavy white paper into a larger square that will fit 4 prints. Thank you rulers and paper cutter.
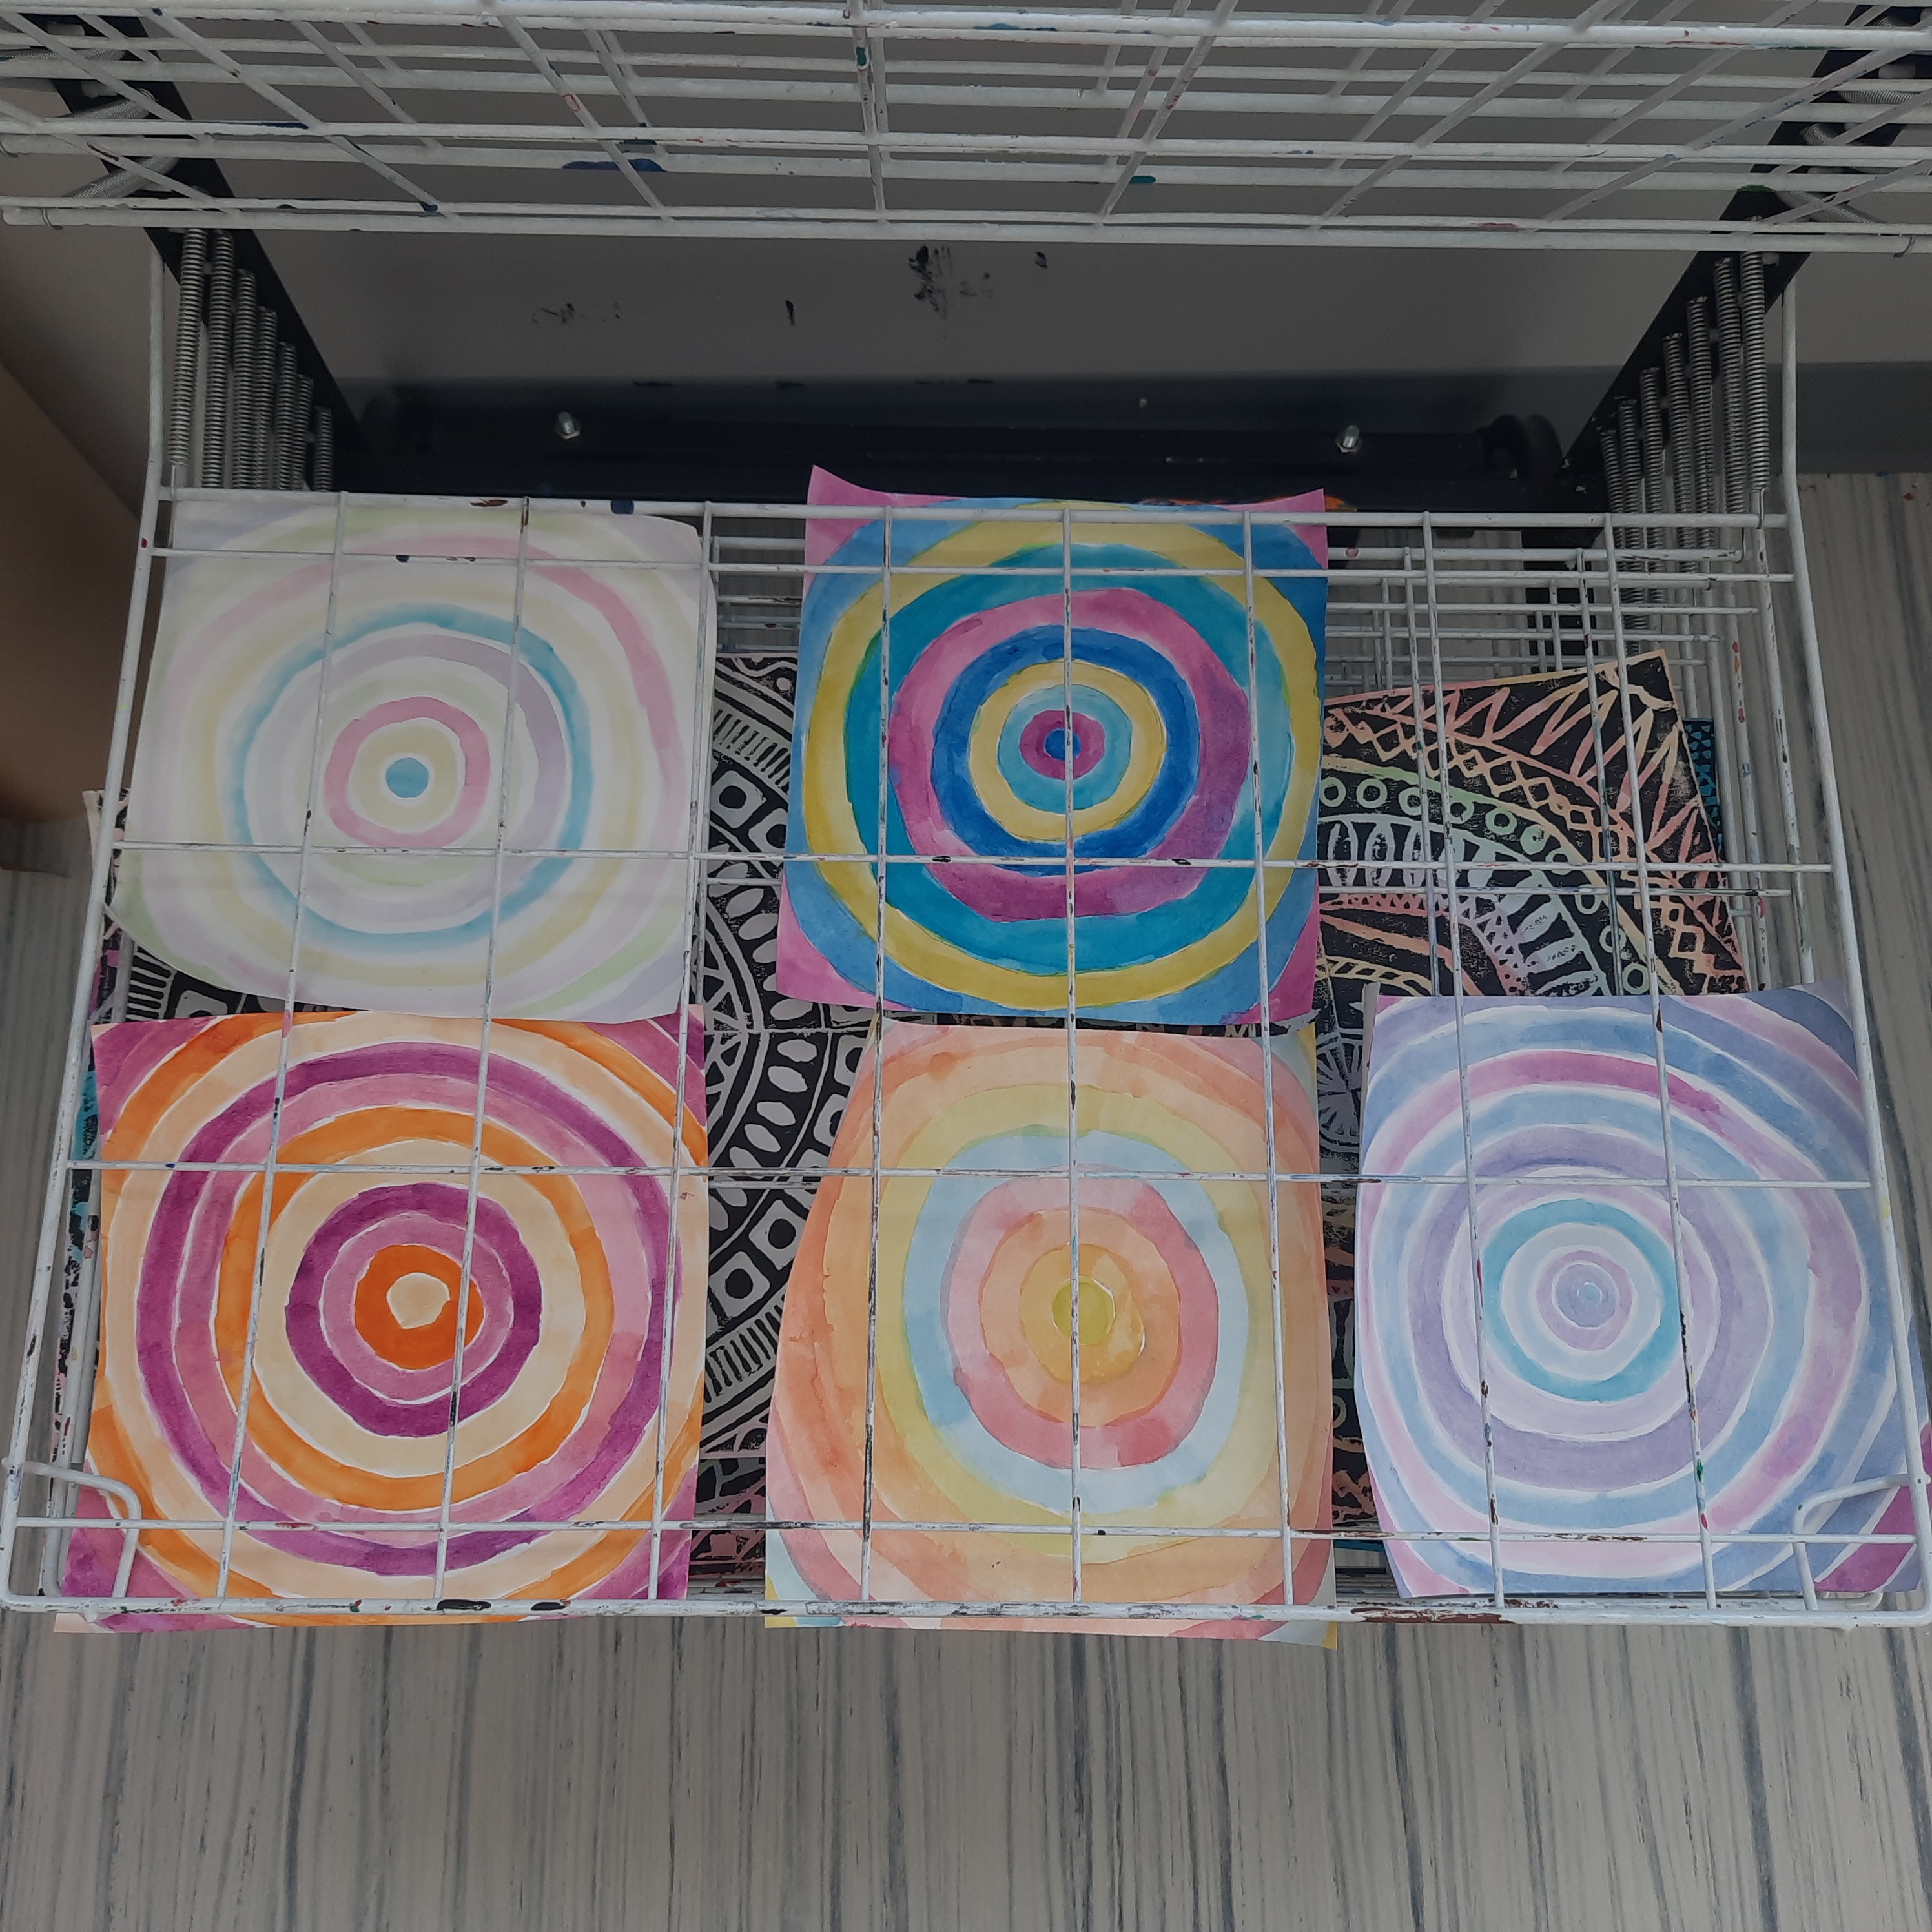
The first class students painted radial circles on their white paper using watercolour. You can basically use any medium for the background colour. Let dry.
Then students draw their design on white copy paper the same size as their styrofoam square. Tape the paper design on top and press through with a dull pencil to transfer the design. Press down entire areas; this will allow more of the background colour to show through once printed.

Students made a couple of practice prints and then printed on their good copy. It was stressful, lol
Getting the right amount of ink on the brayer was the hardest part by far.
Use printing ink- it works the best.


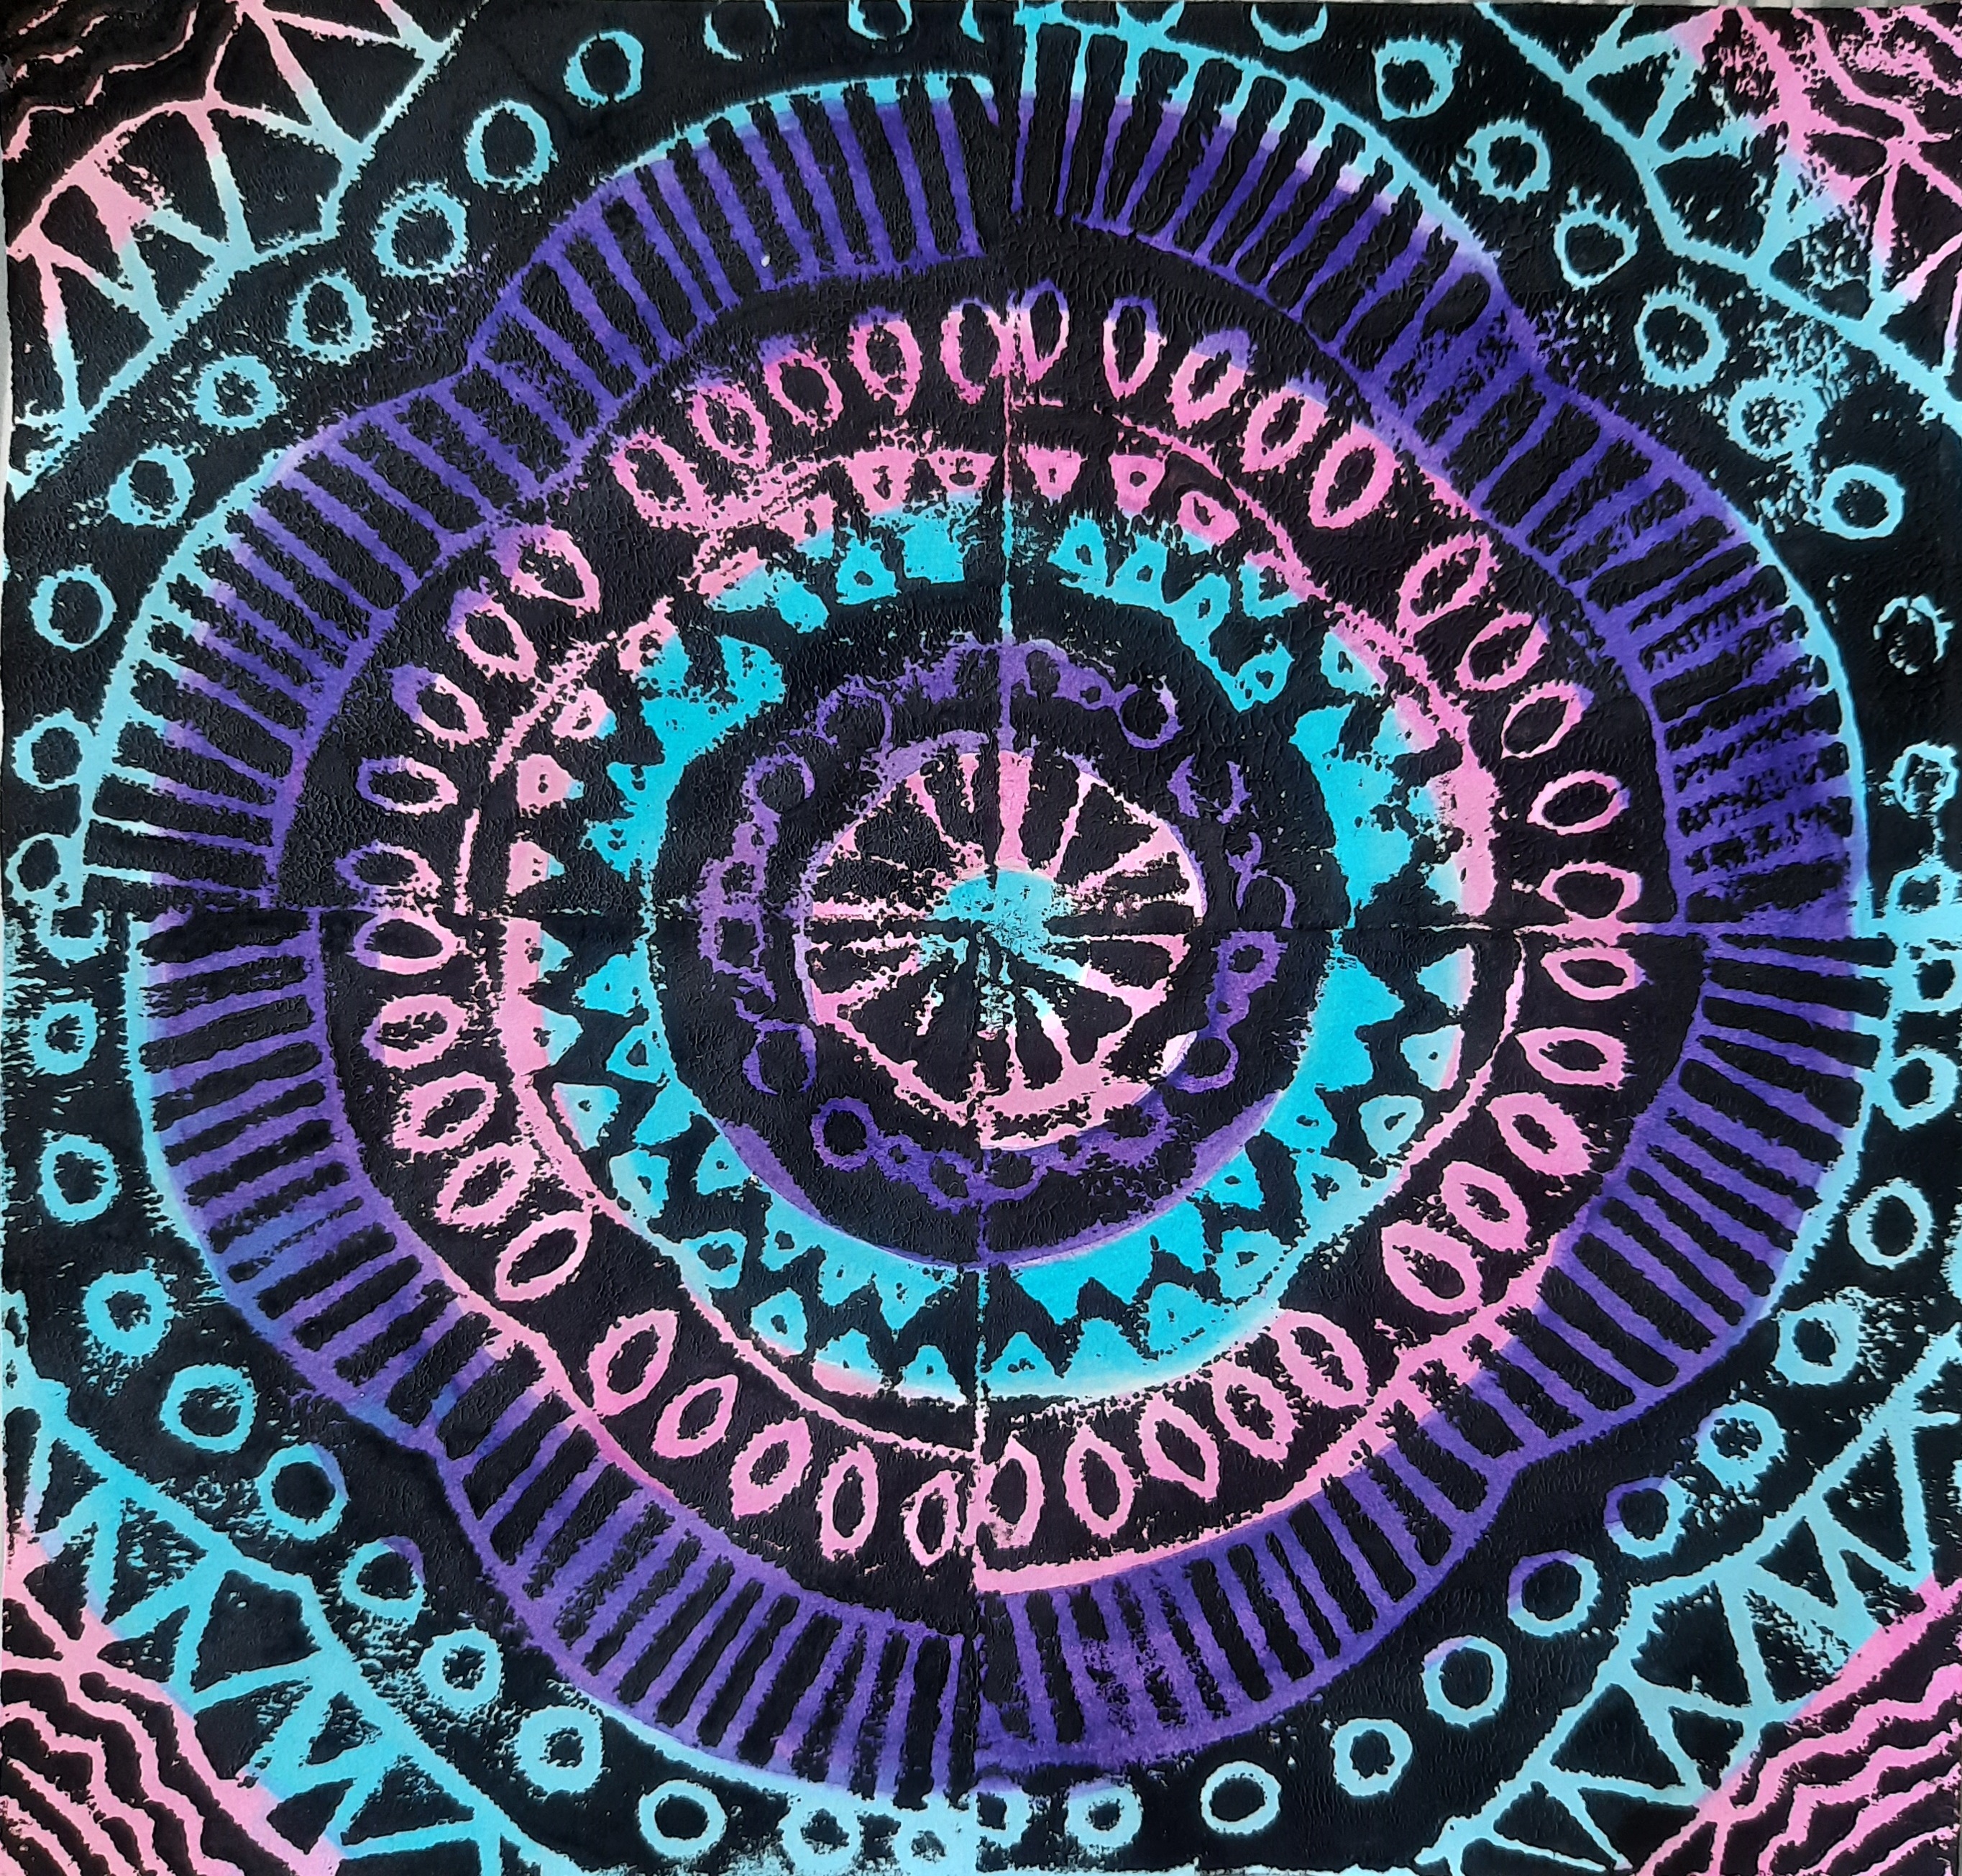
Make sure to draw the arrow pointing to the center of your design, otherwise the radial part doesn't work! Some students messed this up.


Here's an example of when the print is incorrectly placed. They just had to continue this pattern to make it symmetrical. Not the end of the world but yeah.

Some finished prints: Grade 7.8.9


No comments:
Post a Comment