ABOUT THIS BLOG

"A Faithful Attempt" is designed to showcase a variety of K-12 art lessons, the work of my art students, as well as other art-related topics. Projects shown are my take on other art teacher's lessons, lessons found in books or else designed by myself.
Thanks for visiting!
LAND ACKNOWLEDGEMENT I acknowledge, with deep respect, that I am gathered on Treaty 7 territory. I acknowledge the many First Nations, Métis and Inuit whose footsteps have marked these lands for generations. I respect the histories, languages and cultures of all the Indigenous peoples of Canada, whose presence continues to enrich our community.

Friday, November 6, 2015

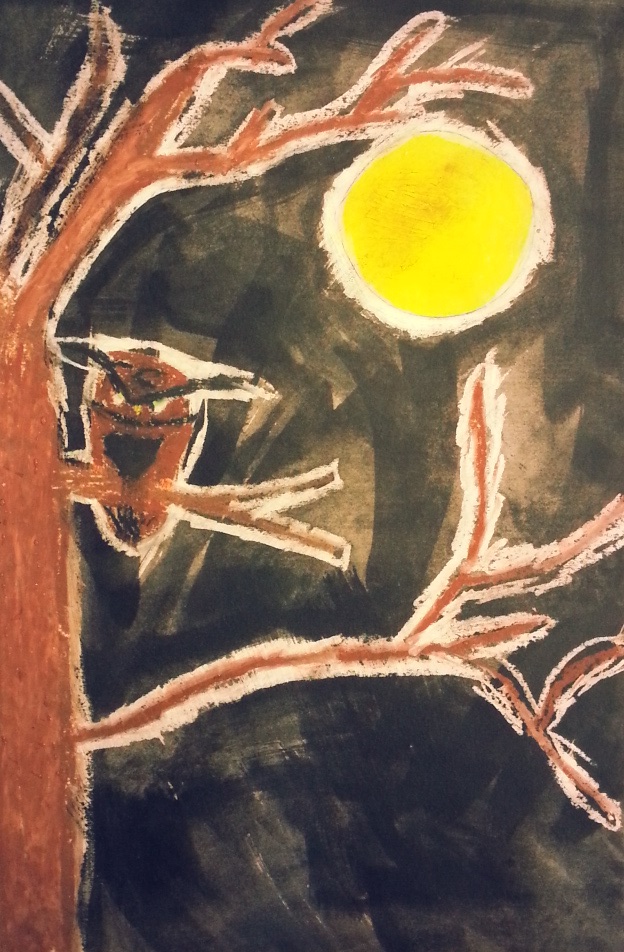
Owls & Cats in the Moonlight


This is a fun October/November project that my Grade 4 and 5 students quite enjoyed. It's an oil pastel resist project that I found HERE on the blog "Kids Artists". You can find all the instructions there. We substituted black tempera pucks for the blue ink. The biggest challenge was getting the kids to draw their animal nice and big, so it wouldn't get 'lost' amongst the tree and branches.


Sunday, November 1, 2015

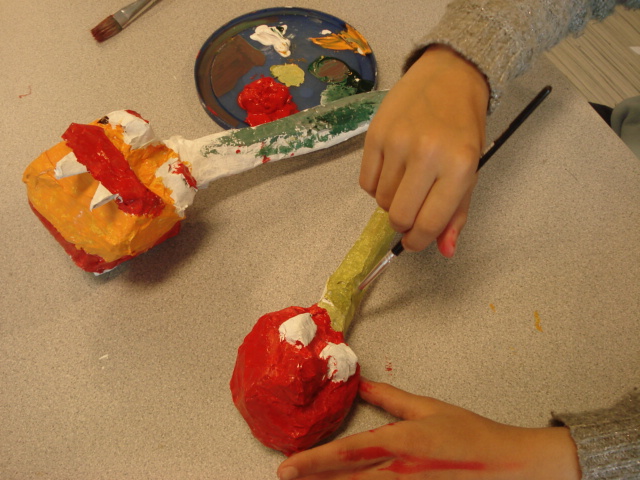
Papier-mâché: "Foods with Moods"

"Sassy Strawberry"

This is a fun papier mache project I only do every few years or so, my "Foods with Moods". It's inspired by THIS book which I own and love reading to my students.  

I will fully admit papier mache projects are not my favourite to teach. I love how they turn out in the end, but I find it such a time consuming process, with loads of drying time in-between, Plus I find my elementary/middle school students struggle with doing the papier mache technique well. They always want to rip huge sheets of newspaper in order to find a 'faster' way of covering the form. I find, in general, they don't have the patience needed to make really refined papier mache sculptures. I think, in the future, I'm going to teach this to older grades. Currently, I taught this to a mixed grade level class of Grades 4-6 students.

So first I read the story to the kids to inspire them. Then they need to decide on any type of food (fruit, veg, candy, whatever) and decide on a 'mood' for their food. 
Using newspaper, scrunch it up into the relative shape of the food. 
Tape it all together using masking tape. Then scrunch up different features (eyes, mouth, etc) and tape those on securely.


I've always used wallpaper paste for my papier mache projects- it's cheap, not sticky and wipes off hands and tables easily. The kids say it feels like 'drool', lol. Plus it doesn't go 'off'. I use this Elmer's Art paste and love it. I've found it's almost impossible to find old-fashioned wallpaper paste in hardware stores anymore, so I order the Elmer's stuff now. I store it in Tupperware type containers so the kids can share them at their tables. I demo the old tear the paper into thin strips, dip into paste, wipe off excess and lay onto form. Smooth it down, and always overlap the next strip.


Once covered in newspaper strips, we lay them onto small yoghurt cups to allow for 
maximum air circulation and let them dry overnight.


The next class the kids prime them with white acrylic paint. Time to wait again for it to dry. *sigh*
(have a backup project at this point, unless you have short class periods- mine are 80 minutes long).
Once the base coat is dry, kids paint their food using acrylic paints. I really encouraged them to get the paint into all the nooks and crannies and not to let any base coat show through.


About a year later- just kidding, but it felt like a year- probably 4 weeks later, these were ready. I displayed them in the art room on paper plates during some school-side event. They were a big hit!


this is a broccoli!


Friday, October 23, 2015

Scarecrow Illustrations


Here are some adorable scarecrow illustrations made by my Grade 2's. The goal was to have them add as many details as possible- to show them that details add interest to a work of art. We want the picture to tell a story and we want the viewer to spend time looking at their artwork. 

We started off by looking at photos of actual scarecrow and noting the different types of detail on them (patches, plaid shirt, old, ratty clothing, some type of hat, straw, etc). 
They drew these on 12x18" pale blue construction paper. Then they outlined them in Sharpie and finally coloured them using construction paper crayons.
All in all, this took about 4- 40 minute periods.


Tuesday, October 20, 2015

Wacky Witches Legs


This was a super fun Halloween art project I did with my Grade 4-6 mixed elective class- the famous "Witches Legs" you see all over Pinterest. I'm not sure who posted the original project but I looked at lots of different blogs for inspiration.

I *believe* the original source for this lesson, of which there are now many variations, is HERE.

My students started off by painting a striped background on heavy white paper using tempera pucks.


While the background dries, prepare your legs and skirt. I pulled out my big scrap paper box plus grabbed some of the bright coloured copy paper from the photocopy room :)
Students went to town and needed very little assistance.


Once the background paper is dry, glue the skirt and legs on. 
I find white glue sticks better to painted tempera surfaces.


I brought out all my little 'bits & bobs' for decorations: buttons, sequins, lace scraps, 
stick-on jewels, glitter glue, etc. The cheap $1.50 bins near the checkout at Michaels are a great place to find lots of fun, sparkly, stick-on crafting items.


I love how they all turned out!


Related Posts Plugin for WordPress, Blogger...