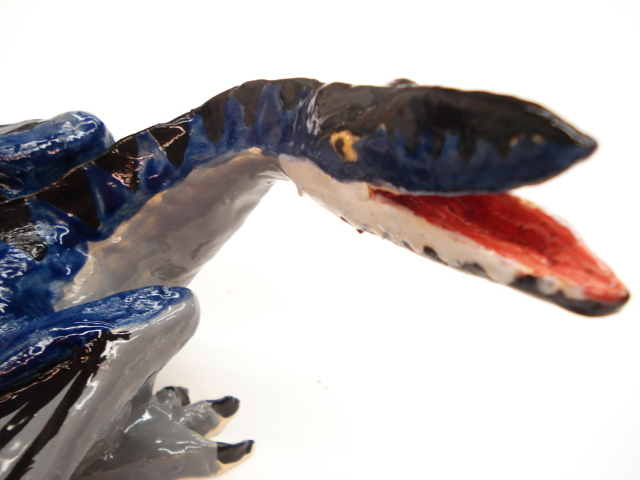
Another lesson I taught to 6 year olds in my handbuilding ceramics class. We used a paper plate for a mold to drape the clay over. Then kids 'scratched and attached' all the different features of their chosen animal. Pity I didn't take pics of the glazed pieces. Make a hole at the tip for hanging- they're for decorative use only.
ABOUT THIS BLOG
"A Faithful Attempt" is designed to showcase a variety of K-12 art lessons, the work of my art students, as well as other art-related topics. Projects shown are my take on other art teacher's lessons, lessons found in books or else designed by myself. Thanks for visiting!
LAND ACKNOWLEDGEMENT
I acknowledge, with deep respect, that I am gathered on Treaty 7 territory. I acknowledge the many First Nations, Métis and Inuit whose footsteps have marked these lands for generations. I respect the histories, languages and cultures of all the Indigenous peoples of Canada, whose presence continues to enrich our community.
Tuesday, December 28, 2010
Monday, December 27, 2010
Art History-themed music video: "70 Million"
An entertaining and cheeky music video for “70 Million”, a song by Franco-American band, Hold Your Horses!, offers a wink at art history as band members playfully reconstruct famous paintings in an off the wall lyrical interpretation all their own.
70 Million by Hold Your Horses ! from L'Ogre on Vimeo.
Sunday, December 19, 2010
Painted Heart Weaving

This is a fun but time consuming lesson- great for Valentine's Day.
I was inspired by the super cool lesson found here on the
Los Cerros Middle School art page in California.
I showed samples of American Pop artist Jim Dine's Heart series for an art history tie-in.
Paint the same heart (draw one and then trace it onto another sheet of paper the same size) in contrasting colors on two sheets of paper. Then weave the two hearts together!
Sheet #1 (about 16x20")
Sheet #2- same hearts, contrasting colours
Woven together- ta da!
Here's another example (with glitter)
Fold one sheet in half and cut about 1" strips up to the top but not all the way through- leave a 1" space along the top. This is the 'warp'.
Cut the other sheet into 'weft' strips. Then weave them into the other sheet.
Glue the edges on the back so it's all secure.
Ta da!
this one used wavy scissors to cut her strips
Pinch Pots
We used Mayco Stroke & Coat for the glaze- 2-3 coats and it works perfectly every time.
The Pinch Pot. A typical basic introduction into handbuilding with clay. I think there are endless possibilities with what you can make with a pinch pot. I find even the simplest vessel so satisfying.
These were created by Grade 7 students.
We used Mayco Stroke & Coat for the glaze- 2-3 coats and it works perfectly every time.
Pirate Treasure Maps
Grade 7, 8 and 9 students created these detailed Treasure Maps.
I saw this lesson on a Canadian arts & crafts TV show, "Art Zooka", early one morning.
Here is the lesson plan: http://www.cbc.ca/artzooka/media/makes/Episode12Makes1.pdf
First they sketched a plan in their sketchbook. They had to include a compass rose, a pirate ship, a Jolly Roger flag, a path and 'X' for the treasure and a scroll with some sort of title. Many kids thought up a theme for their map. They had to also think of unusual names for all the features on the island.
Then they drew a good copy on thin white paper and outlined it all in fine tip permanent marker...
then colored it with pencil crayons- I encouraged them to press hard and use
shading and value changes for extra realism...
a good example of a student testing colors before she commits to the good copy...
Finally, they cut the edges unevenly, some tore them and then we tea stained them all and
crumpled them up to make them look two hundred years old.
Ta da!
| I added gold glitter to the treasure chests for texture and sparkle. |
| 'annoyed teacher mountain' lol- sometimes I belong there! |
This student burnt some holes and added drips of melted candle wax to add to the authenticity.
| this one's pretty funny |
Saturday, December 11, 2010
Clay Dragons
Grade 8's made dragons for their clay unit.
Before this project they practised drawing dragons with an oil pastel project you can see here.
They had the choice of either an Eastern Asian style snake-like dragon or the more traditional 'fairy-tale' European winged dragon. I demonstrated both techniques, emphasizing the Asian dragon was slightly easier. The Western dragon involved fusing together two pinch pots in order to get a hollow body, then the biggest challenge of attaching the legs, wings and head. This was a challenging project but I was really happy with the end results.
My sample: a bisque fired Asian style dragon.
I used a wooden coffee stir stick from a coffee shop to create the scales.
A popsicle stick would create larger scales.
Here are some students' work waiting to dry (let them dry a week, at least).
Here are some glazed dragons waiting to be fired (we used Mayco Stroke and Coat glazes)
Ta da!
| This guy was inspired by the film "How to Train Your Dragon". |
Subscribe to:
Posts (Atom)