ABOUT THIS BLOG

"A Faithful Attempt" is designed to showcase a variety of K-12 art lessons, the work of my art students, as well as other art-related topics. Projects shown are my take on other art teacher's lessons, lessons found in books or else designed by myself.
Thanks for visiting!
LAND ACKNOWLEDGEMENT I acknowledge, with deep respect, that I am gathered on Treaty 7 territory. I acknowledge the many First Nations, Métis and Inuit whose footsteps have marked these lands for generations. I respect the histories, languages and cultures of all the Indigenous peoples of Canada, whose presence continues to enrich our community.
Showing posts with label Scratch Art. Show all posts

Thursday, October 10, 2024

Scratch Art


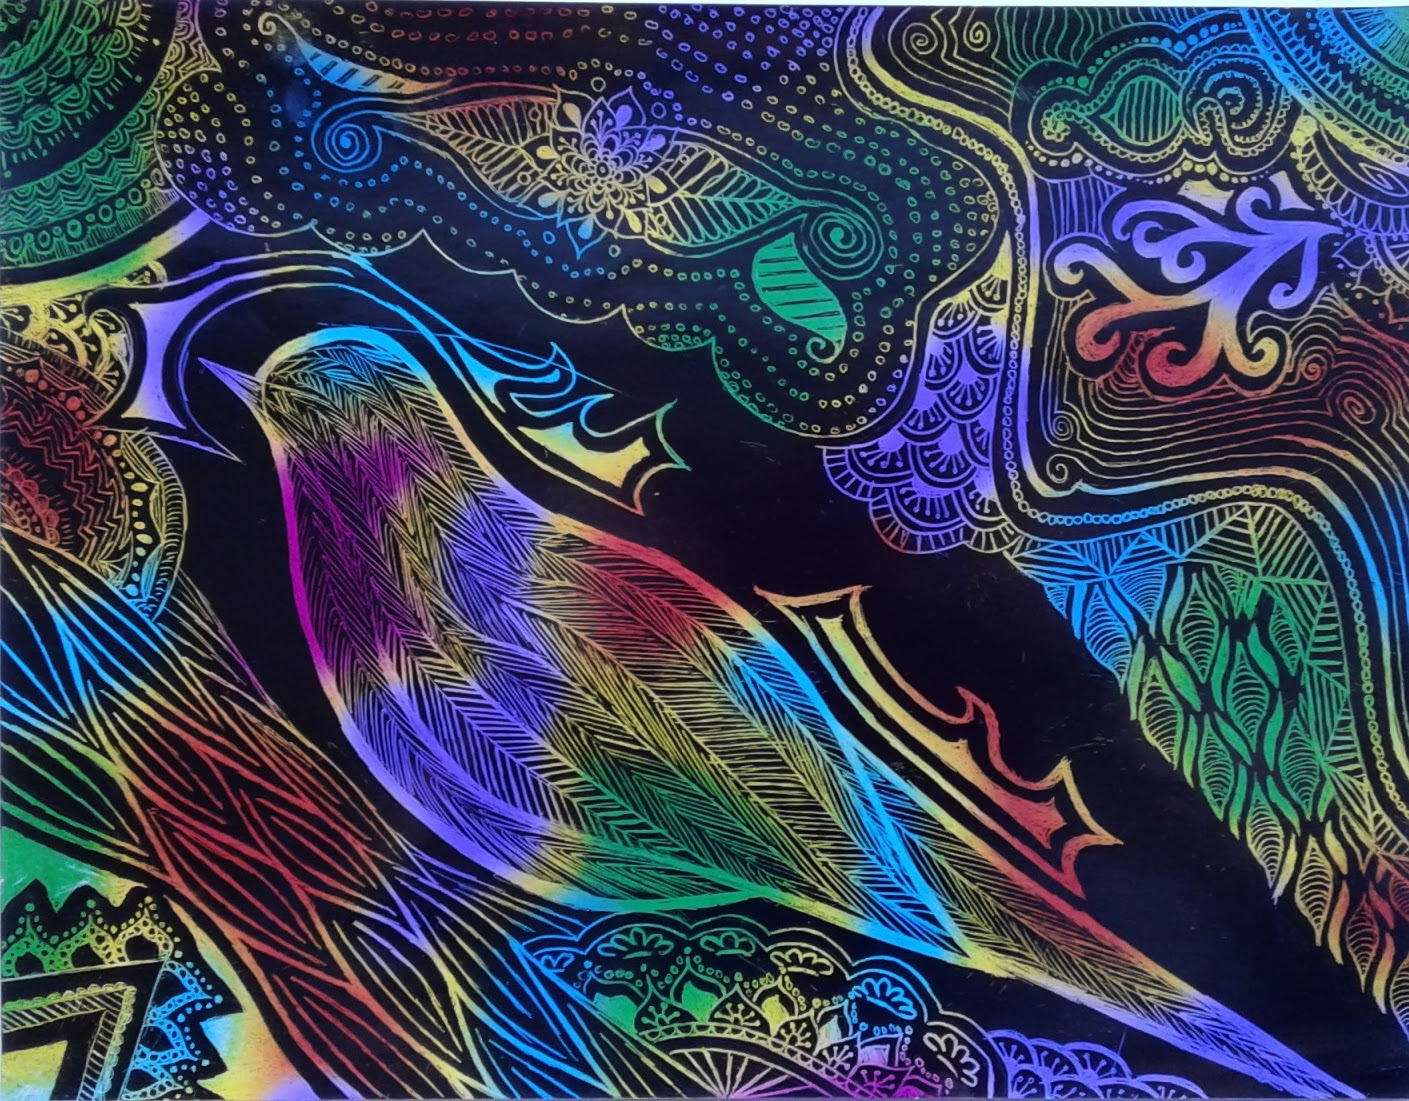
This was an open project I gave to my Grade 10-12 class. They have done scratch art before so I didn't need to review much, other than telling them lots of details, pattern and line work. Fur and feathers work very well with scratchboard techniques.

They sketched a drawing first on regular copy paper. Then they tape it onto their chosen scratchboard and trace over the lines firmly with a ball point pen. This transfers a faint grey line onto the scratchboard. 


The gold ones were very difficult to photograph as they are metallic and highly reflective! Hence why I had to photograph these n an angle. 


Friday, October 22, 2021

Scratch Art


Good old classic Scratch Art!  Mess free, fun to do, pretty results!

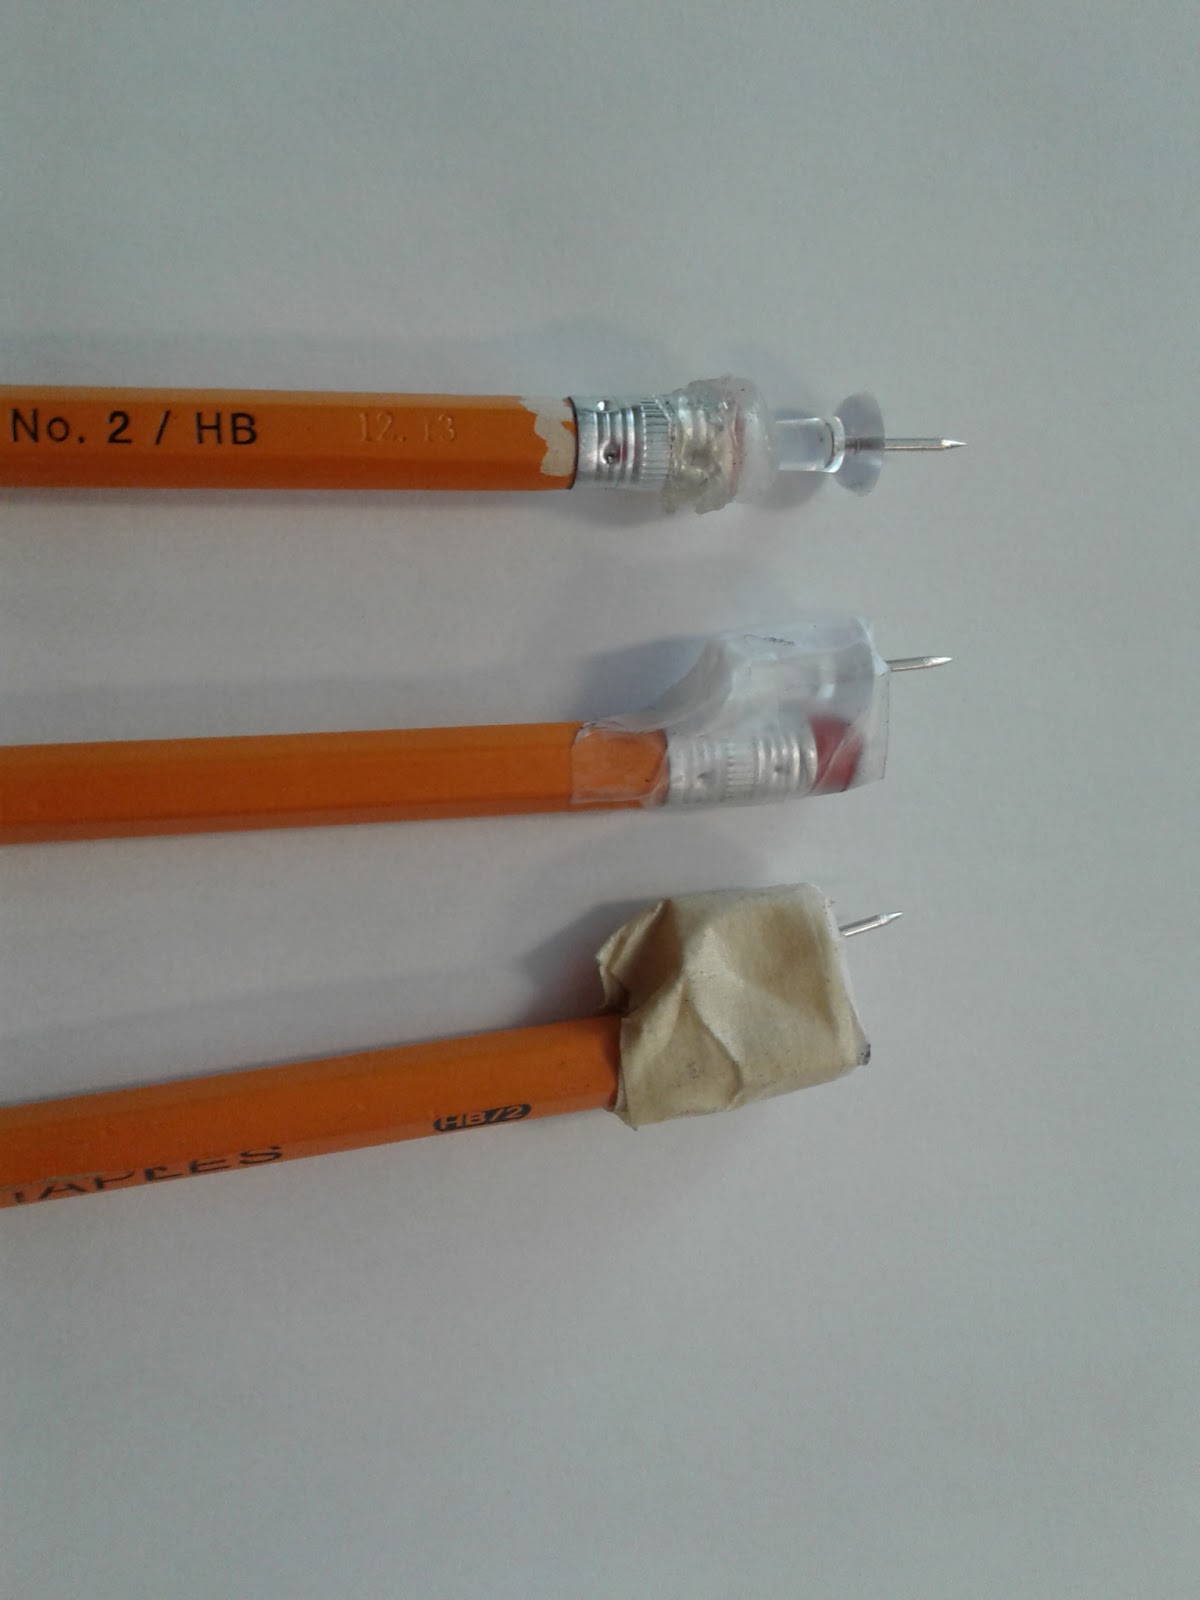
I ordered a pack of both rainbow and solid coloured scratch art paper. They come with sticks to scratch with but my perfectionist students said they were "too dull" so made their own by taping a thumbtack onto the end of a pencil. We also used bamboo sticks which have a really fine wood tip. 


Students draw their design first on copy paper, tape it onto the scratch paper and trace over all the lines with a ballpoint pen. This will transfer grey lines onto the scratch paper. Then they scratch away with their chosen tool. For this project I left the subject matter completely up to students- I like this lesson for the end of the year or right before a holiday as it's simple yet fun and keeps the kids engaged. 

Some Grade 7 - 9 finished works:


Friday, February 19, 2021

Underwater Scratch Art using Oil Pastels


Here's a classic art lesson that's been taught by art teachers for decades: diy scratch art.
Grade 4 students drew an underwater scene on cardstock. \they outlined the pencil lines with a thick sharpie. Then they coloured in everything using light coloured oil pastels. The colours need to be light!!


Then cover it with a coat of black tempera and let dry. Use a wooden stylus to scratch out designs all over the picture. These look so cool when finished!!


Monday, May 7, 2018

Gold Scratch Art Drawings


This is a project my mixed high school class (Grades 10-12) completed sometime last year. I had a stack of random gold scratch art board that had been hidden in a back cupboard (you know how it goes) that I re-discovered during a Spring cleaning. I usually give a lot of options for subject matter for my high schoolers, so I simply demonstrated how to use the scratch board and told them to focus on line variety (different thicknesses), different hatching techniques,  pattern and/or texture (fur, feathers, etc).

The boards came with some really dull wooden styluses- my students just instinctively knew they wouldn't be able to get the amount of desired detail with them, so constructed their own 'shanks' from taping/hot gluing a push pin to the end of a pencil. 


They first drew their image on copy paper that was the same size as the boards (8 1/2 x 11"). Then they taped the paper to the boards and traced over all the pencil lines firmly using a ball point pen. This transferred the design to the scratch board. Then they scratched away. 

Some Grade 10 - 12 results:


Tuesday, November 14, 2017

Oil Pastel Scratch Art Owls


This is a homemade 'scratch art' type of lesson using oil pastels layered in contrasting colours, 
then scratched with a wooden bamboo stick.
I found THIS photo pinned on Pinterest but couldn't find the original source. Please tell me in the comments section if you know the originator of this project.

Grade 3 students started off by drawing an owl onto smooth cardstock, 
then outlined it using a thick Sharpie.


On scrap paper, they practiced using the oil pastels and decided on 
some contrasting colours to use. 


Colour in one area really thickly with one colour, then add another thick layer of a contrasting colour right on top. Using a bamboo stick/skewer, students scratched out various types of patterns.
Afterwards, we cut these out.You could also paint the background.


Some Grade 3 results:


Related Posts Plugin for WordPress, Blogger...