ABOUT THIS BLOG

"A Faithful Attempt" is designed to showcase a variety of K-12 art lessons, the work of my art students, as well as other art-related topics. Projects shown are my take on other art teacher's lessons, lessons found in books or else designed by myself.
Thanks for visiting!
LAND ACKNOWLEDGEMENT I acknowledge, with deep respect, that I am gathered on Treaty 7 territory. I acknowledge the many First Nations, Métis and Inuit whose footsteps have marked these lands for generations. I recognize the land as an act of reconciliation and gratitude to those whose territory we reside on or are visiting.

Saturday, January 28, 2012

Paul Klee Inspired Heart Painting


Valentine's Day is fast approaching- it's one of my favourite holiday times as it involves alot of pinks, reds, glitter and sweets! So I have a couple of Valentine themed projects that I will share in the next couple of weeks.

The first project is a reposting of a Paul Klee inspired Valentine project my Grade 6 class made last year.

"Art does not reproduce the visible; rather, it makes visible." Paul Klee

Paul Klee was a Swiss-born artist who worked in a variety of styles during his career including Expressionism, Cubism and Surrealism; therefore, his work is difficult to classify into one style. 
His work has a very whimsical, musical and almost child-like style. In fact, Klee greatly admired the art of children who he felt seemed to create free of any outside influences. He tried to achieve the same untutored simplicity in his own art.

If you even get a chance to visit Switzerland, check out the Paul Klee Museum in Berne. I visited it back in 2006 and it's fantastic. I knew a little about his work before I visited, but had no idea of the wide variety of different styles he had. 
I left with a new appreciation and understanding of him afterwards.

Paull Klee, "The Rose Garden", 1921      Source


This project focuses on his Cubist period; breaking up the picture plane into angular shapes. It also introduces the wax-resist technique. 
This project took about 2- 90 minute periods to complete.


Paul Klee, "Landscape and the Yellow Church", 1920


Here's how we made these:

Fold a sheet of paper in half and cut out one or two hearts (or more).


Trace these onto a piece of cardstock (or any smooth paper).


Here, a student is practising first in her sketchbook.
Using a ruler, break up the picture plane into rectangles, squares, etc.


Here's a finished rough copy.


Pass over all the pencil lines with a Sharpie or black pencil crayon.
Then choose a few colours of wax crayons (4-5) and roughly colour in each sections,
alternating colours. Make sure to press hard.


Don't fill in all the paper- we'll be using paint for that.


Here's a close-up showing the white spots leftover- that is what you want.


Here's a student adding black pencil crayon after she finished colouring. Either way works.


Now for the wax-resist painting: we used tempera discs simply because I find them convenient and they work well. Watercolours, or liquid watercolours would also work brilliantly.


It is important to choose a colour that looks good with the wax crayon- you can choose a contrasting colour for a more dynamic effect, or a similar colour for a more calm effect.
Add a lot of water so it's more like an ink consistency.  

Then, you simply paint over the entire artwork (go in broad strokes in one direction with a flat brush) and then blot up any excess paint that's floating on top of the wax crayon parts. 
The paint will colour in all of the white spots and make the whole piece unified.


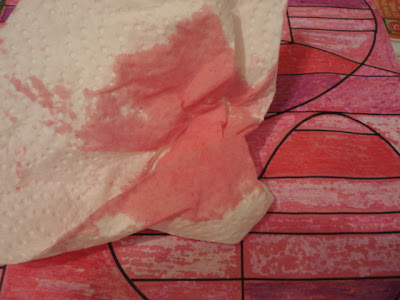
Dab excess paint off with a paper towel....


Ta da!


Grade 6 work:


Sunday, January 22, 2012

Foods With Moods


This is a plaster sculpture project my Grade 5/6 class created which was inspired by the book: "How are You Peeling? Foods with Moods". The food illustrations are by New York based artist Saxton Freymann. He essentially uses only an x-acto blade and black-eyed peas (for the eyes) to create his expressive food characters. The illustrations in this book are so original- some are funny, some are sad and it's the perfect starting point for discussing emotions with students. Even though this book is geared towards younger students, my Grade 6's loved it and I own a copy myself! 


Image Source


Here's a short video that shows the illustrator discussing his process of creating 
these edible art characters.


So students were asked to think of any type of food and then create a character that expresses a specific emotion. I have to say that 'happy' was a very popular emotion, I think, in part, because, well, my students are very happy overall! But looking at it deeper, I think we're all kind of taught that we have to be, or should always be, or at least appear to be, happy, and not to engage with other emotions, like sadness, or jealousy, or suspiciousness, etc. So I really tried to encourage my students to think of different types of emotions that they've had and that they're all valid and important for our personal growth. 

We built the initial creatures simply out of wadded-up newspaper held together with masking tape. Some made their eyes out of separate balls and then hot glued them on at the end. We then used plaster gauze strips to cover it all and painted them with acrylics. We've also done this with simple papier mache strips and it works the same. The kids really enjoy this project, in part, because it uses their all-time favourite medium of plaster!!

Ta da!

"Happy Steak"


"Very Happy Orange"


um... the, errr, "Scared Banana" was much discussed in the staff room and has become a long running joke amongst the teachers!


A student adding a final coat of varnish to her fruits in chocolate sauce. She brought the bowl in from home.


Yes, the hallway walls are in desperate need of a paint job!
The characters below were all made from papier mache (no plaster).


The yellow guy has to be one of my all-time favourite creations: a "Suspicious Horned African Melon". 
I love how he has that old-timey suspicious look from old cartoons complete with a twirly moustache.
The "In Love Litchi" was made with toothpicks pushed into the newspaper body.


Sunday, January 15, 2012

The Butterfly Project


The Holocaust Museum Houston is collecting 1.5 million handmade butterflies for a memorial to remember each of the children who lost their lives during the Holocaust. The butterflies will eventually comprise a breath-taking exhibition, currently scheduled for Spring 2014. The Museum has already collected an estimated 900,000 butterflies. I originally participated in this with a Grade 7 class about 3 years ago when the project was first announced. Each student made their own individualized butterfly which was mailed to the museum. I checked the museum website a few days ago to see when the exhibit was and saw that it's still in progress, so thought I would post about it.

In order to facilitate the butterfly project, the museum website has some lesson plans and activities you can follow. The main lesson is based on the book “I Never Saw Another Butterfly: Children’s Drawings and Poems from Terezin Concentration Camp 1942–1944”. During the completion of this project, students will learn about the experience of young children during the Holocaust through a study of the poems and pictures drawn by those imprisoned in Terezin. They will create handmade butterflies to represent the children who were imprisoned.


 “I Never Saw Another Butterfly” is a heartbreaking and beautiful collection of works of art and poetry by Jewish children who lived in the concentration camp Terezin, outside of Prague. Between the years 1942-1944, about 15,000 children under the age of 15 were incarcerated at various times. Of these, more than 90 percent perished during the Holocaust; fewer than 100 survived. In these poems and pictures drawn by the young inmates, we see the daily misery of these uprooted children, as well as their hopes and fears, their courage and optimism. Where known, the fate of each young author is listed; however, most died prior to the camp being liberated.

Below are some photos I took from the inside of the book showing some of the children's art. Most of the art was done on scrap paper, wrapping paper, the backs of office paper, etc.


Many of the artwork and poems deal with the idea of 'home' and they are very effective in conveying the desperate need of these children for the comfort of home.


This poem, by Pavel Friedman, inspired the Butterfly Project.


Reading this book, I was stunned at the talents of these young children, considering the circumstances they were in. At the same time you feel a horrible sense of sadness for these children, most of whom were transported to and died in Auschwitz.

The Terezin concentration camp was unusual in that it housed a large proportion of artists, teachers and intellectuals. Thanks to the great number of teachers and artists in this camp, children continued to gain access to art supplies and were given an outlet to vent their creativity and frustration.

One of these teachers was a remarkable woman: Friedl Dicker-Brandeis. A former student of the Bauhaus in Weimar, she was an accomplished artist and designer. When she was ordered to Terezin in December 1942, she conceived a mission for herself and brought what art materials she could to camp. She helped to organize secret art education classes for the children of Terezín. She saw drawing and art as a way for the children to understand their emotions and their environment. In this capacity she was giving art therapy. Drawing on her Bauhaus experience and available supplies – her hoarded materials, office forms, scrap paper, cardboard, wrapping paper- she provided excellent training in art fundamentals, studies of everyday objects, complex still lifes, all the while freeing her students to reveal their feelings through their art. 

 
In September 1944, Friedl was transported to Auschwitz; but before she was taken away, she gave a fellow prisoner two suitcases filled with 4,500 drawings done by the children. She died in Birkenau on October 9, 1944. After the war, a survivor brought the suitcases with children's drawings to the Jewish Community in Prague. The drawings are now in the Jewish Museum in Prague's collection. Source 1.  Source 2.  Source 3.

Like I mentioned earlier, I did this project some time ago with a Grade 7 class. I specifically chose that class because they were very mature, creative and  worked well together, so I knew they could handle the subject matter and get quite a bit out of the whole project. It was sooooo quiet in class while we were working on this- the atmosphere was really quite sombre, which felt so strange as my art room is usually full of lighthearted chatting and joking around. I shared with the class some of the poems and then we looked at the artwork together and had a really good class discussion on the topic. Then each student made their own butterfly using whatever materials they wished (make sure to refer to the guidelines on the website, as there are material and size restrictions).

I encourage you to consider how you might be a part of this wonderful project. The exhibit is scheduled for the Spring of 2013 and they are apparently still accepting butterflies through 2012.

In the theme of butterflies, here's a wax-resist rubbing project I have done with elementary classes that you might like to try out. I modified it from a project I found in the  Usborne book: "Playtime Activities". It's an excellent project to discuss the element of 'texture' with younger students.


Using scrap card (we used cereal boxes), cut a whole bunch of small pieces.


Fold a piece of regular printer/copy paper in half. 
Glue the card pieces onto one side with white glue. Fill the whole side completely.


Then fold the paper back together so the clean side is on top of the card side.  Use the side of a wax crayon and, pressing HARD, rub it all over to reveal the pattern below. Really emphasize to the students to press hard, otherwise this technique doesn't work so well.


Then cut the paper apart. You can re-use the card paper to do multiple rubbings in different colours, or students can swap papers to get a varety of patterns.


Now, do a wash of watercolours overtop. Mix colours, do one colour only, whatever they want. I found that dark colours over light wax crayons looks the best, imo. The waxed areas will resist the paint and the paint will only stick where the white paper remains. Kids love this part!


Once this paper is dry, fold the sheet in half, draw half a butterfly, cut it out and unfold. Students then cut out bodies and antennae from scraps of painted paper and glued those on. I give students a handout showing a variety of butterflies so they can see and be inspired by all the different types. I also had them practice drawing and cutting out different butterfly shapes from scrap paper so they could choose their favourite one.


Ta da!


Afterwards, students can  experiment with different wax rubbings from objects around the classroom/school. The one below was done on a piece of rough plywood.


Related Posts Plugin for WordPress, Blogger...