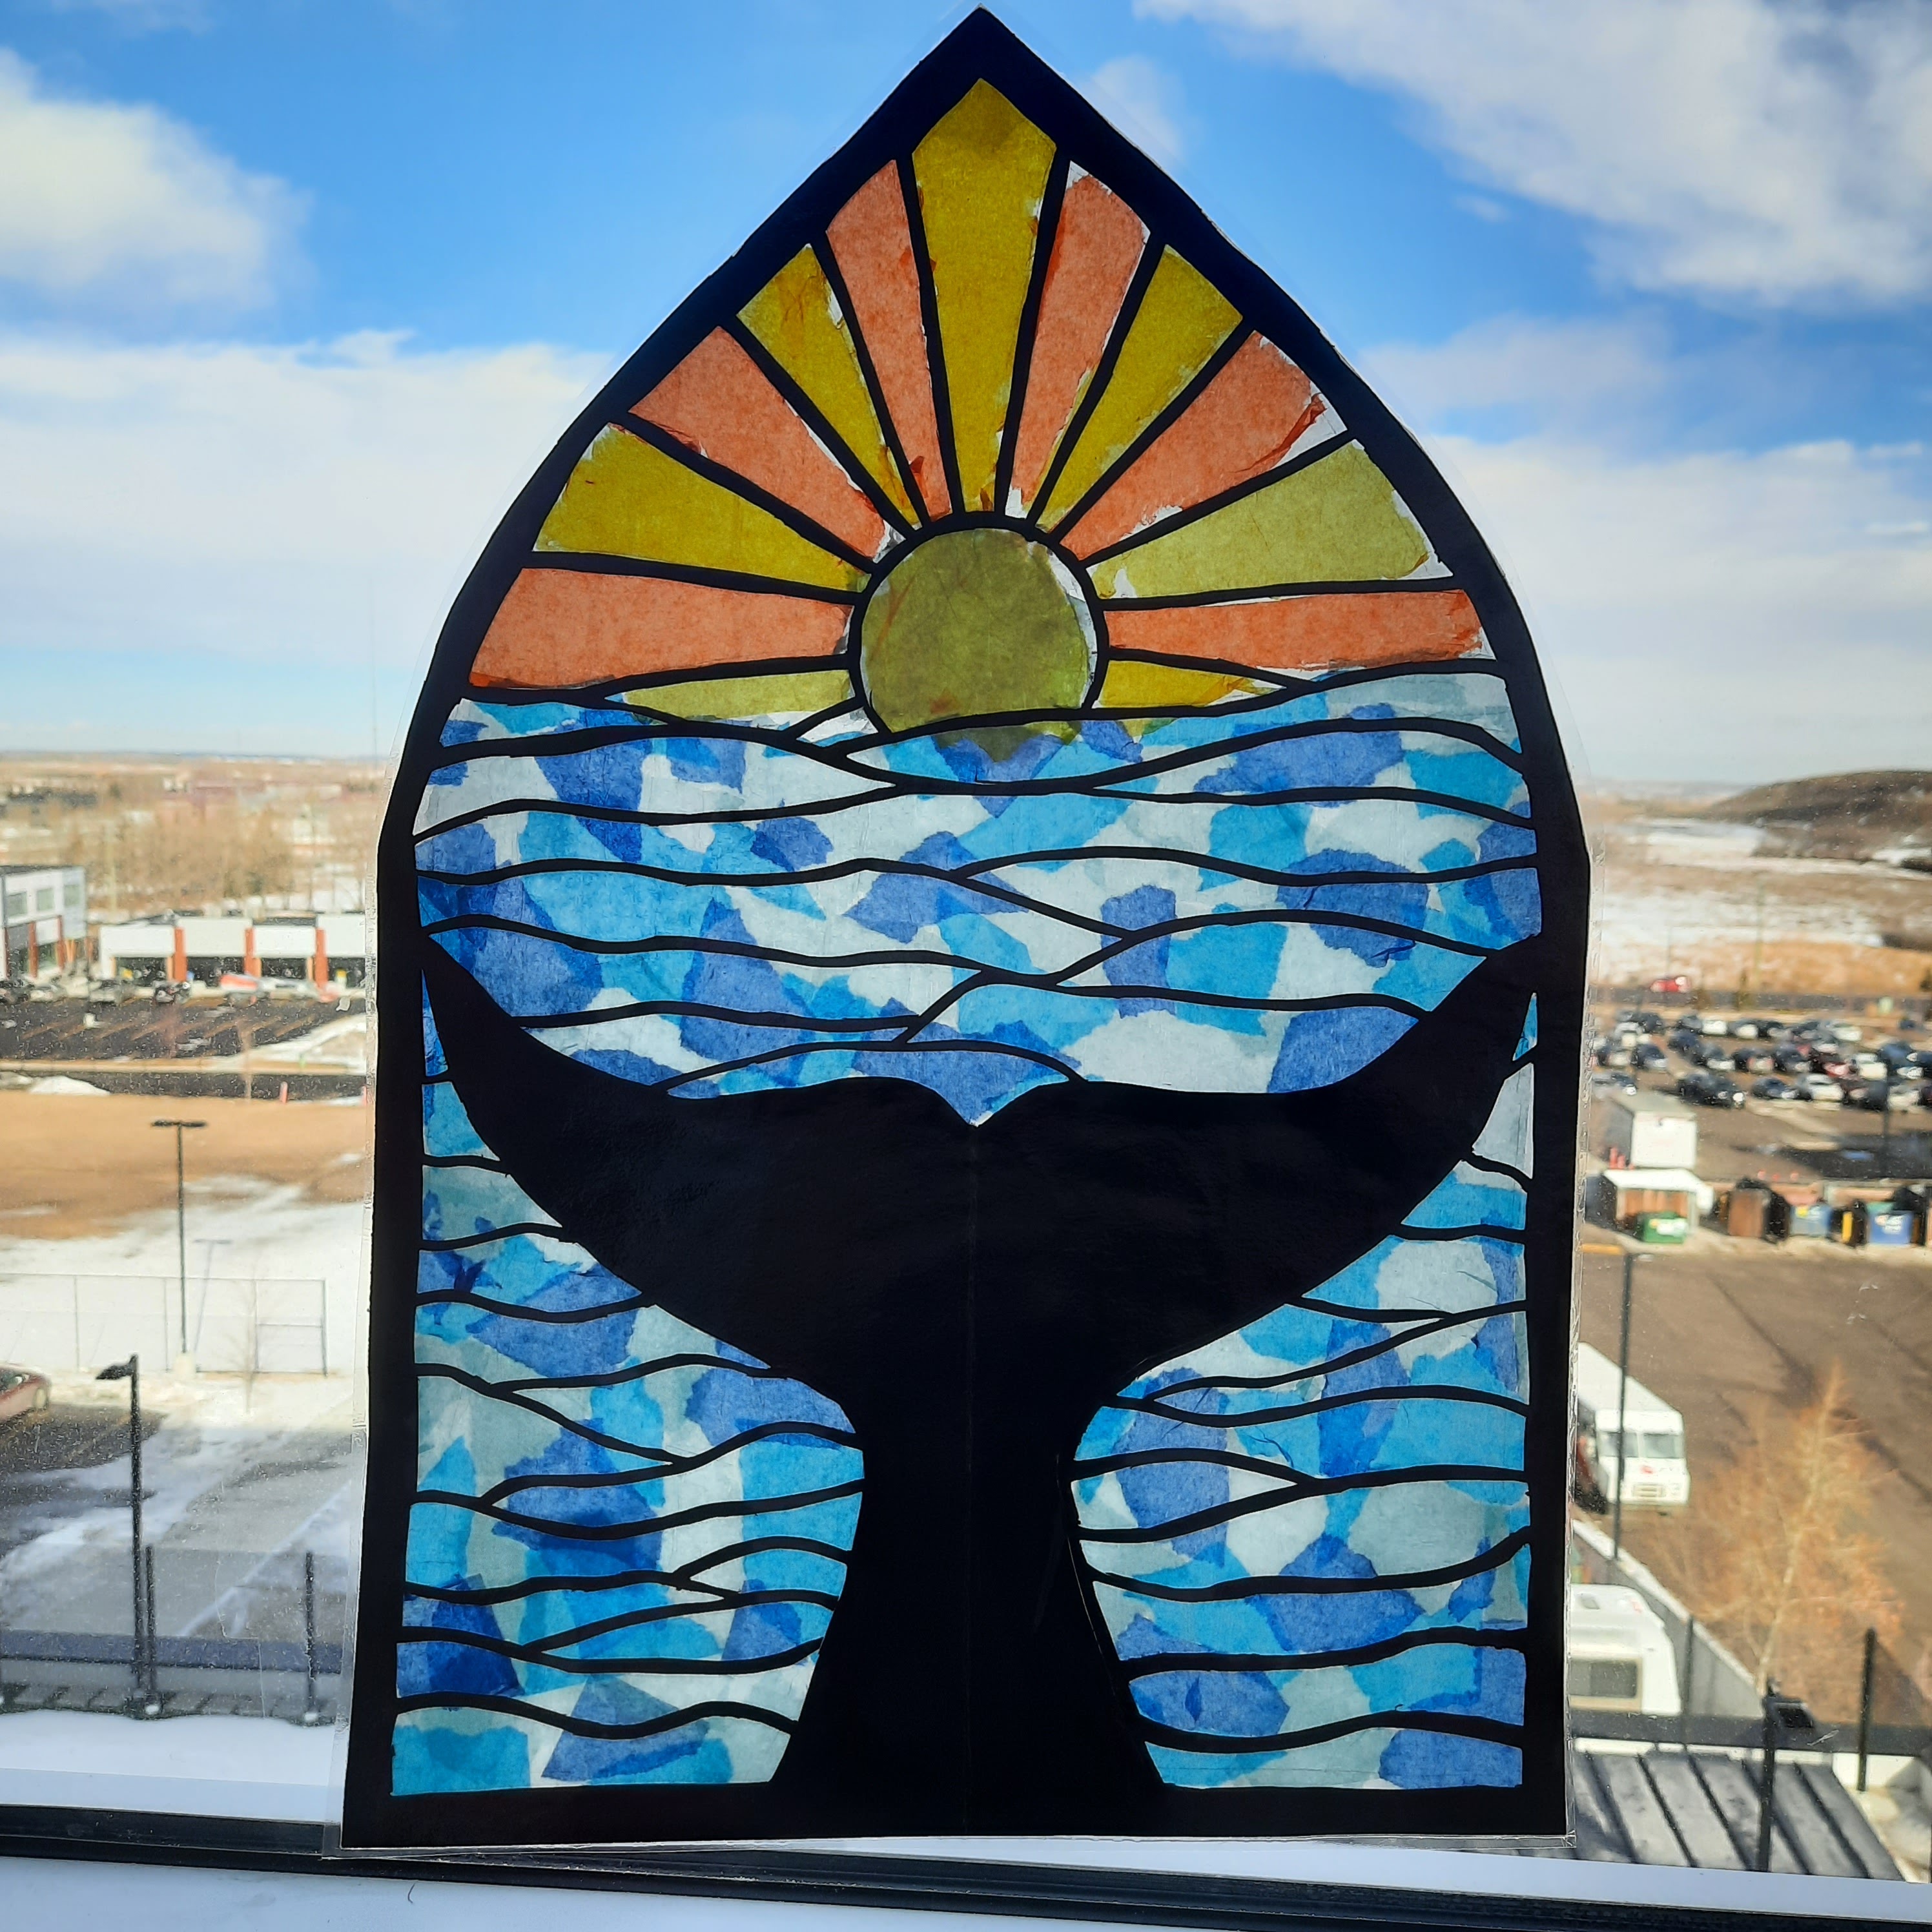
Here's an absolutely stunning faux stained glass project my junior high students recently finished.
These are made from black construction paper and tissue paper. They took about a month or so to finish, due to the intricate nature of all the steps.
To start off, I showed students a slideshow about the stained glass in Western Europe during the Middle Ages. I showed them a video of how stained glass is made (the technique hasn't really changed in hundreds of years!).
So then students started planning their own design. It could be any subject matter. I demonstrated how to make one using thick black construction paper. The key thing is you don't want the lead lines too this. I told them a minimum of 1 cm thickness, but many made them thinner! This resulted in lots of torn bits that they had to tape together on the back.
So here are the basic supplies- mini cutting boards, x-acto knives and parchment paper.
Make sure you use good quality and nice pure black construction paper. Tru-ray is the best brand in my experience. Anything less than that doesn't not cut cleanly and is too flimsy.

To make it symmetrical, some student folded their paper in half vertically.
They drew their design in white pencil crayon. Shading in what needs to be cut out really helps.
Include a border as well, to hold the whole thing together.


A finished cut piece. Then cut a sheet of parchment paper slightly larger and trace the black paper outline onto it and cut that out. This will be what you glue the tissue paper too.

There are two ways to attach the coloured tissue paper. I call the first way kaleidoscope.

Using watered-down glue, just collage various ripped colours of tissue onto the parchment paper


And voila. Let the tissue paper dry and then glue the black paper on top carefully using white glue.


The second method is if students want a specific colour for each section. You basically cut tissue slightly larger than each space and glue stick it on the back. This technique takes a bit longer.


Here's some more progress photos:


 |
| back view |


I hung these in a long hallway with lots of windows and they looked stunning with the light shining through!


.jpg)


6 comments:
Beautiful work period. I have done this project for 40 years and have never used the parchment paper technique. What a great idea. Thanks for sharing.
Thanks so much, Anonymous :)
Great project! Thanks for sharing the details on this! Did you laminate the students' work before hanging in the window?
Thank you Christine. Yes, these were laminated. I normally don't laminate them, but because these were on display for a while for a Medieval Market we had at our school, I wanted to make sure they were protected as we had hundreds of people visiting the school. So it's definitely not a necessary step.
This projects look like so much fun and the results are beautiful!
I have a question about the watered down glue stage of the project. Does one paint each piece of tissue with the watered down glue or do you paint the whole piece of parchment and then put the tissue paper onto that? Also, if you do a specific color for each section do you still need the parchment paper backing? Lastly, what is the water to glue ratio?
Thanks for sharing this project!
Anonymous: you just paint sections of watery glue onto the parchment, lay down the pieces of tissue and put another coat on top of the tissue paper to seal it and flatten it.
The specific colour per section- we don't use the parchment at all- just glue the piece of tissue onto the back of the black construction paper.
Glue ratio I just eyeball- but probably 60% glue to 40% water. If it's too thick it just rips the tissue paper.
Hope this helps!
Post a Comment