
This was my first time teaching mosaic work to my students. I went through a phase when it was trendy back in the 90's- I decorated small tables and other decorative objects with basically broken crockery I bought at thrift stores. So I had some experience with the craft, just not teaching it.
A fellow colleague asked me to teach this class with her- she had always wanted to try making something, so she learned along with our students.
For supplies I bought:
* terracotta plant pots from Wal mart- about 6 inch size
* from the hardware store: spackle and pre-mixed tile grout
* from Dollarama- sponges
* from Amazon- we ordered tiles for mosaic crafts- they were MUCH SMALLER than the photo depict!! But they worked well- just very expensive for the small bags we received. Why are Amazon photos so deceiving??


So first I made a sample, as I always do, to make sure things go smoothly. I initially tried to glue the tiles onto the pot with white glue. But they just slid down the sides. So I switched to drywall spackle applied with a palette knife. The spackle was super cheap for a large amount.

This took about 3 classes (40 min each).

Once the pot is covered and dry (see below), it's time to grout.

Wearing rubber gloves, just throw that grout on and push it into all the cracks and crevices.
This was a super fun step!!

Really take your time and then try and wipe off the excess before cleaning the pot with a sponge.
We used buckets of water at the tables to continually wipe/rinse/wipe/rinse until the tiles are essentially clean. Then we buffed each tile with a dry microfiber cloth.

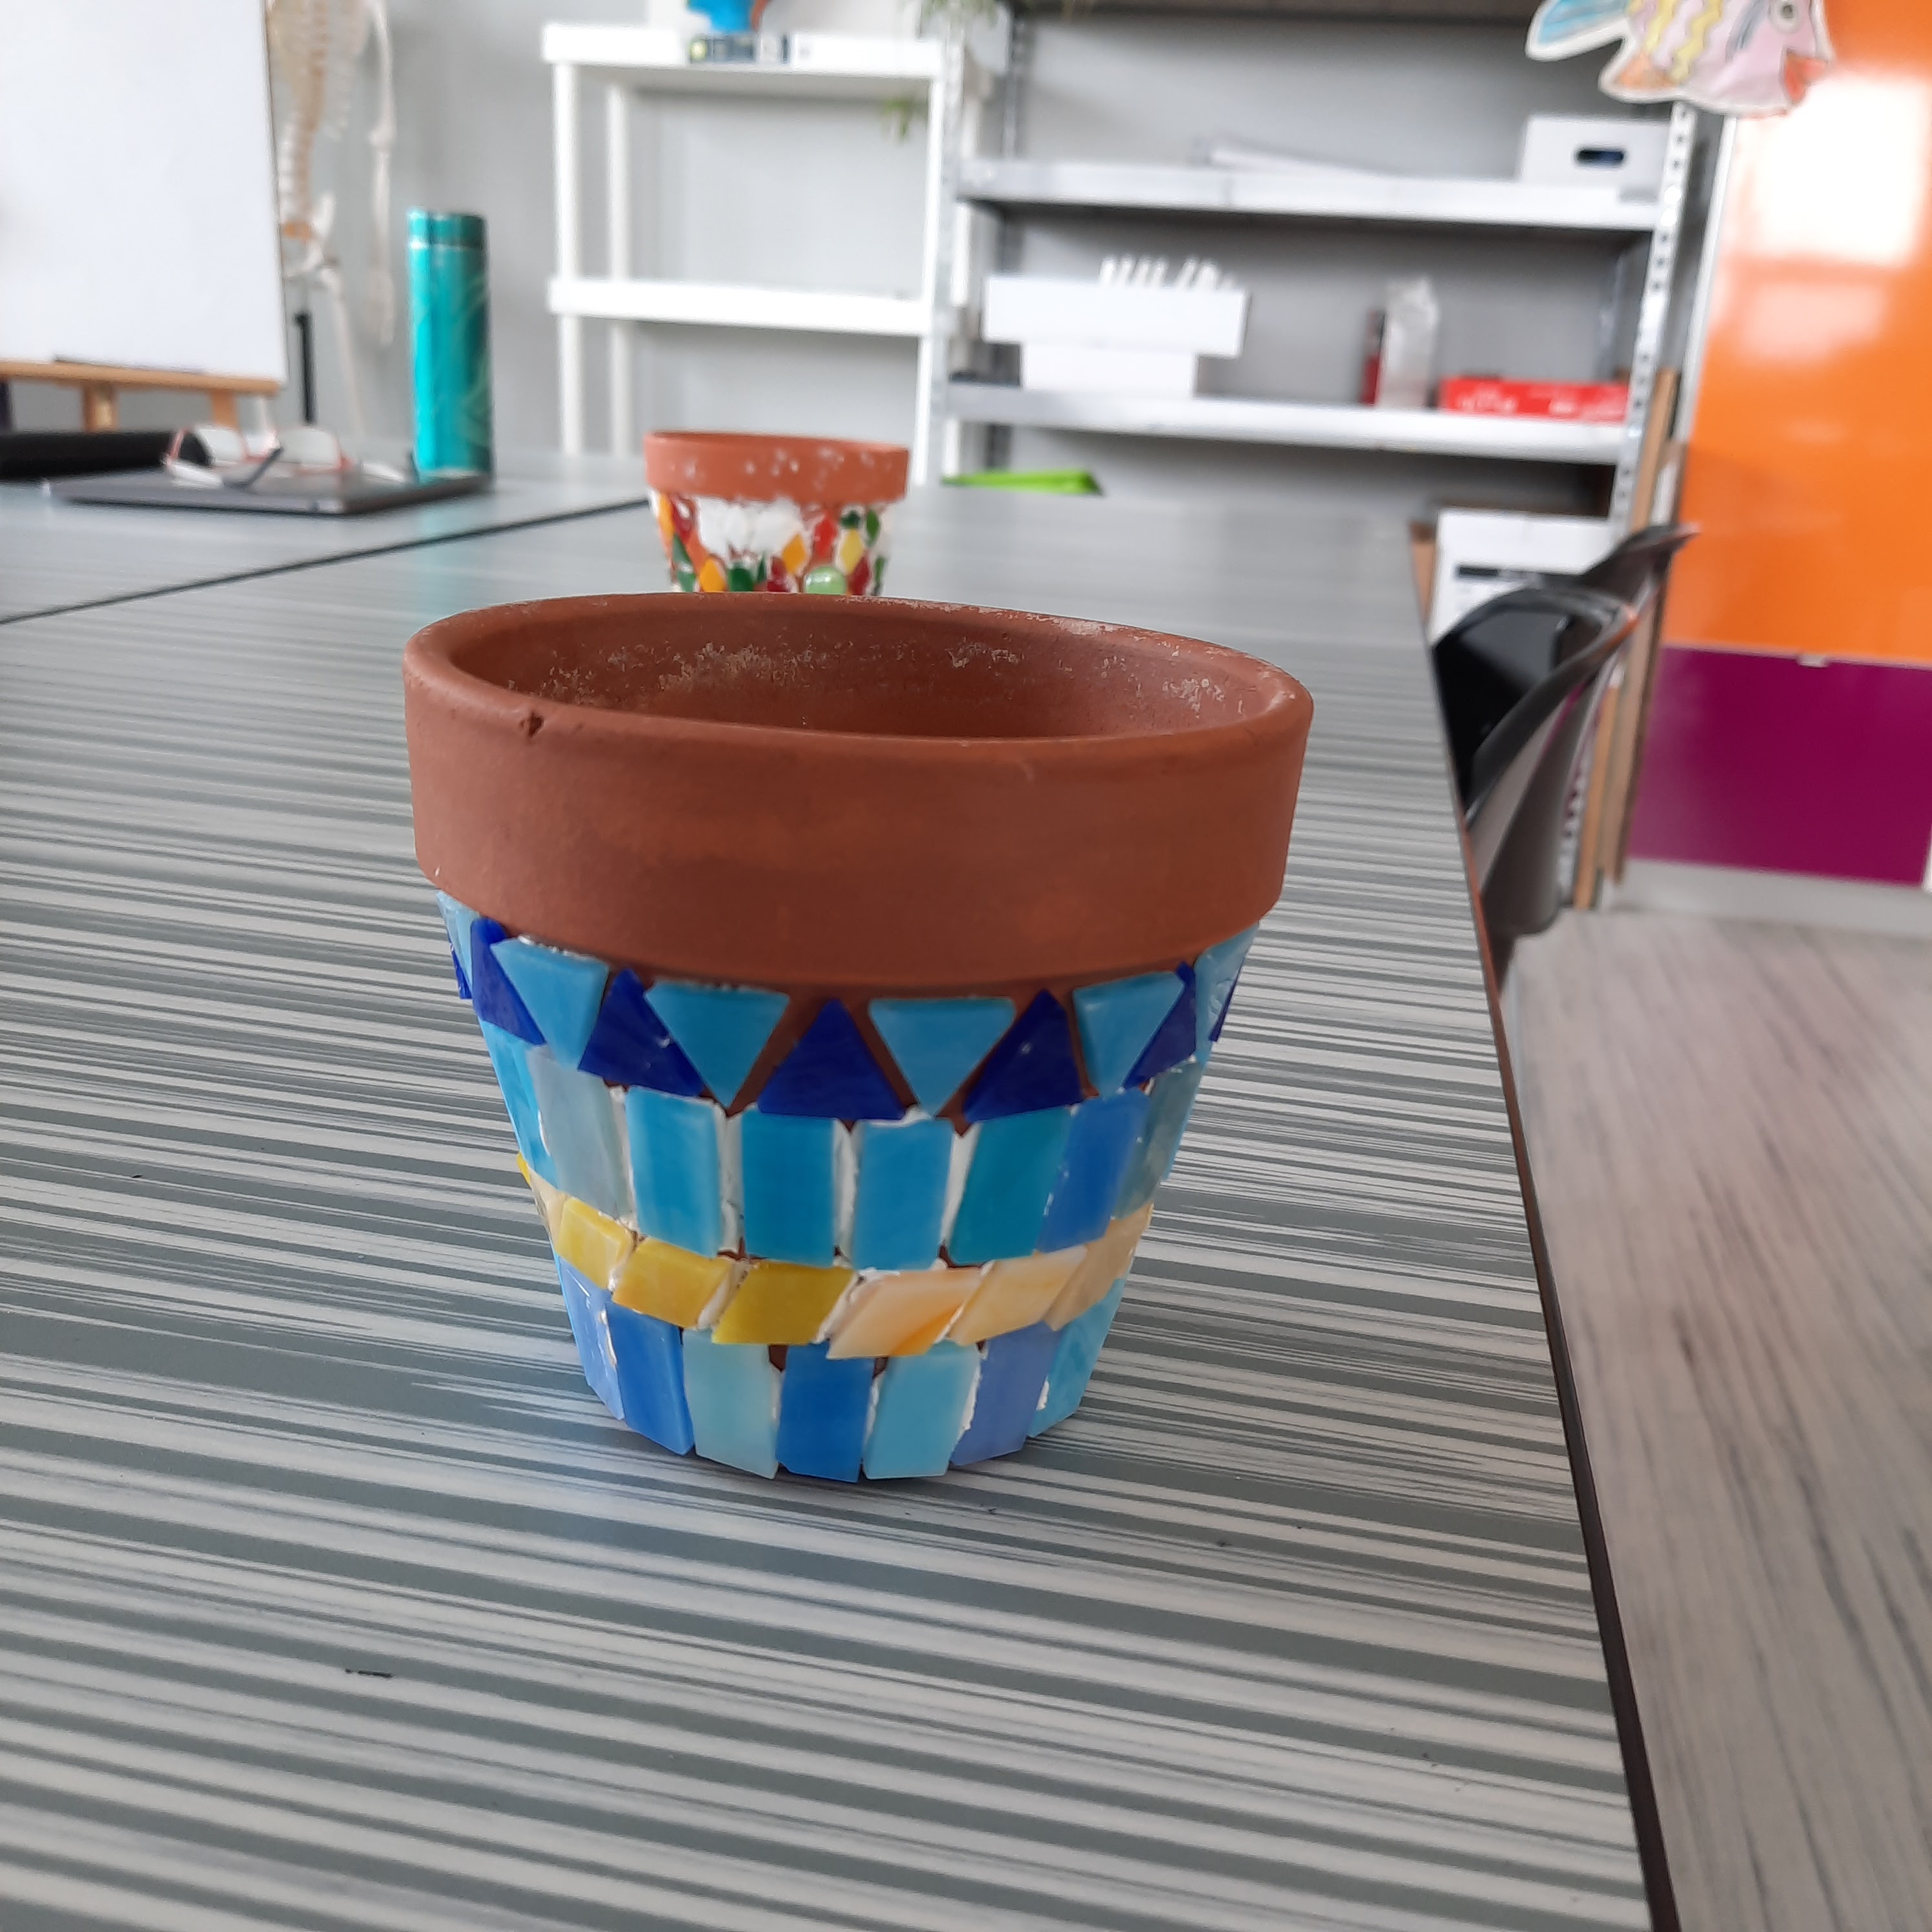
Some finished pots created by Grade 8 and 9 students:


2 comments:
The pots look great - and it’s wonderful to teach the art of mosaics - just a few technical comments being a mosaic artist.
IF the pots are to be used outside, they first have to be sealed (inside & out) so moisture doesn’t get into the terracotta as it can cause the pit to crack.
Also, don’t use white glue or sparkle as the adhesive. Outside adhesive needs to be Thinset (comes pre-mixed now!) or Welbond for indoor pots. The shards/tiles won’t slip if you wait a bit for the Welbond to set and working from bottom to top helps!
Yea everyone first heads to Amazon but they are not always the cheapest. Google Mosaic Art supplies and there are many options!
I hope this has helped! I just hate to see love & effort go into an art project only to see it fail later on. IMHO
Thank you for these tips :)
Luckily the pots will be indoor pots!
Post a Comment