
This is a fantastic lesson that's been on my 'to-teach' list for a few years now. I had always assumed it would be super messy, cutting foam, and I was always afraid of further angering our custodial staff! I think that's part of the reason why I put it off for so long. But it actually wasn't messy at all. Using regular white styrofoam is super clingy and static-y and messy but not this floral foam.
I found the lesson HERE from the United Art & Education website. There's detailed instructions, a PDF and a video! I taught it to my mixed elective class of Grades 10-12.
So a warning about supplies: I bought this wet floral foam (not dry) at a Dollar Store. It worked the best. I bought a bunch last spring and they sat in my classroom until the winter when my kids finally started this lesson. I needed to buy more foam as a few kids wanted to re-start, but I could not find it in any Dollar Store! It seems it might be a seasonal (Spring/summer) product, at least where I live in Canada. I ended up finding some more at Michaels but it was a different texture and not the same to work with. Plus it was quite a bit pricier and only came in a 5-pack.

You'll also need to gather some flat, open containers for each student to work in and contain the carving mess. Box lids worked great; I always try to snag the box lids that our photocopy paper comes in at school.
Tip: a great place to find flat boxes is liquor stores! (beer flats- they're great!)

For the carving tools. we simply used plastic utensils and bamboo skewers.
The foam is so soft that you can carve it with any basic tools. You can also smooth everything out with simply your fingertips or a very fine grit sandpaper.

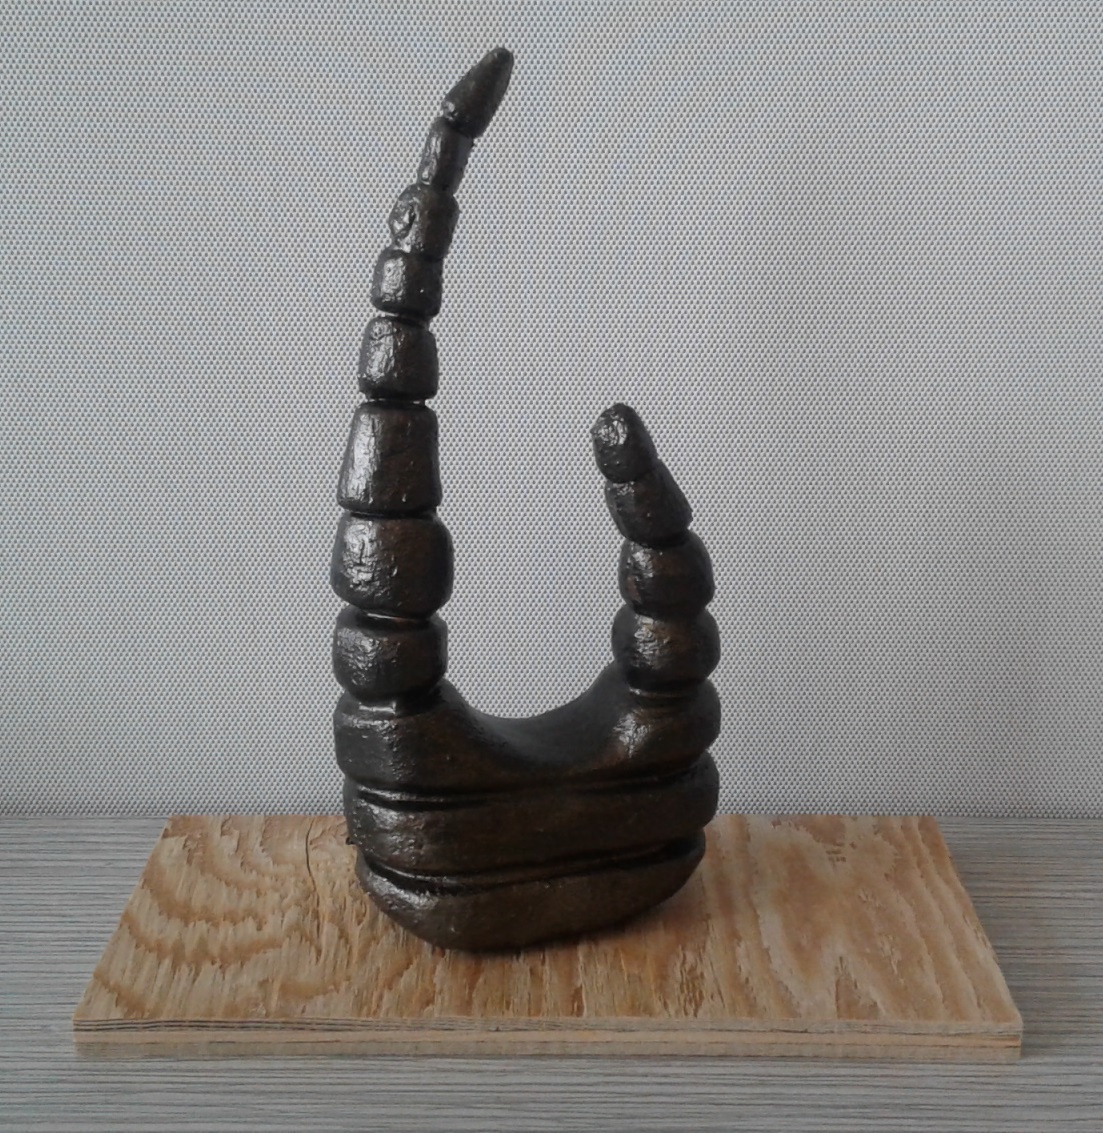
I also cut some wood into small rectangles to be used as bases if the students wanted to mount them.

Initially I wanted to the kids to create an abstract sculpture but some ventured into figures. I showed slideshows of both Henry Moore as well as Jean Arp (LOVE). We also talked about subtractive sculpture. Then the kids went to town carving. The foam is really soft so it will show any indentation where the kids grip it too hard. So just be aware of that.

Once carved, we primed ours using cheap white house paint. I put it into a squeeze bottle for easier dispensing for the students.

We stored our projects in a shelf. Once primed and dry, students painted them using acrylic paints.
I bought a whole bunch of different shades of metallic craft paints from Michaels.
Once dry, you can also spray varnish these for extra protection.

The kids seemed to quite enjoy this project and I can't wait to teach it again!


7 comments:
These are So Impressive! Wow! I must try this sometime.
LOVE LOVE LOVE The work by your students! How lucky they are to have you!
Thank you for your comments Mary and Remember the Shadows :)
Just WOW!!!!!!!
Mlla: thanks :)
Wow this is amazing! not expensive sculpture supply but one of a kind of art work, please keep on posting. Thank you for sharing.
I loved the one that was the figure; I preferred the laying-down position. I'm definitely keeping an eye out for that floral foam!
Post a Comment