 |
| "Sassy Strawberry" |
This is a fun papier mache project I only do every few years or so, my "Foods with Moods". It's inspired by THIS book which I own and love reading to my students.
I will fully admit papier mache projects are not my favourite to teach. I love how they turn out in the end, but I find it such a time consuming process, with loads of drying time in-between, Plus I find my elementary/middle school students struggle with doing the papier mache technique well. They always want to rip huge sheets of newspaper in order to find a 'faster' way of covering the form. I find, in general, they don't have the patience needed to make really refined papier mache sculptures. I think, in the future, I'm going to teach this to older grades. Currently, I taught this to a mixed grade level class of Grades 4-6 students.
So first I read the story to the kids to inspire them. Then they need to decide on any type of food (fruit, veg, candy, whatever) and decide on a 'mood' for their food.
Using newspaper, scrunch it up into the relative shape of the food.
Tape it all together using masking tape. Then scrunch up different features (eyes, mouth, etc) and tape those on securely.

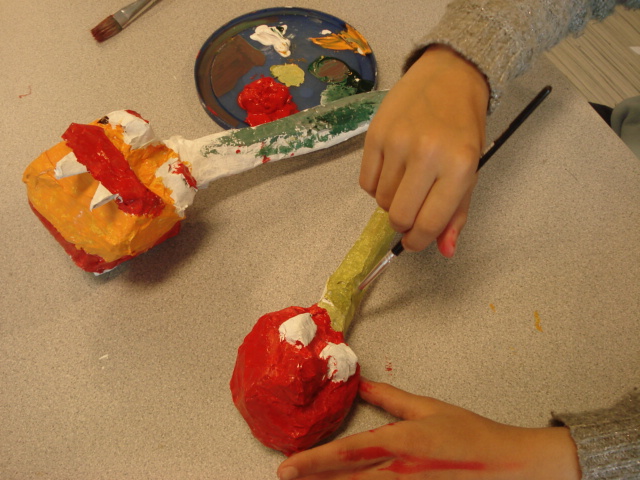
I've always used wallpaper paste for my papier mache projects- it's cheap, not sticky and wipes off hands and tables easily. The kids say it feels like 'drool', lol. Plus it doesn't go 'off'. I use this Elmer's Art paste and love it. I've found it's almost impossible to find old-fashioned wallpaper paste in hardware stores anymore, so I order the Elmer's stuff now. I store it in Tupperware type containers so the kids can share them at their tables. I demo the old tear the paper into thin strips, dip into paste, wipe off excess and lay onto form. Smooth it down, and always overlap the next strip.

Once covered in newspaper strips, we lay them onto small yoghurt cups to allow for
maximum air circulation and let them dry overnight.

The next class the kids prime them with white acrylic paint. Time to wait again for it to dry. *sigh*
(have a backup project at this point, unless you have short class periods- mine are 80 minutes long).
Once the base coat is dry, kids paint their food using acrylic paints. I really encouraged them to get the paint into all the nooks and crannies and not to let any base coat show through.
About a year later- just kidding, but it felt like a year- probably 4 weeks later, these were ready. I displayed them in the art room on paper plates during some school-side event. They were a big hit!


 |
| this is a broccoli! |


4 comments:
I like this project a lot, is make me happy :-)
Have a great weekend.
Love it. looks like the kids enjoy it
What did you use as the final shiny coat?
I used high gloss spray varnish.
Post a Comment