
This is a great lesson I found in an 2000 issue of Arts and Activities magazine, called "Looking at Faces from a New Angle" by Art teacher Mary Mulkey.
It is a great introduction into Cubism and the Cubist portraits by Pablo Picasso. My Grade 7 class made these. I started off by showing a slideshow of his famous Cubist portraits and having a discussion with the kids about it- discussing the lines, shapes, colour and stylization. Then discuss the strange fracturing of the face, the mixed up angles, the bold black lines, etc.
 |
| Pablo Picasso, Portrait of Dora Maar, 1937 |
Here's how we made these paintings:

Practice three Cubist style heads in sketchbook first.
'Connect' the heads with hair, to give some unity. Once they have a rough idea,
start the good copy on large heavy white paper.
start the good copy on large heavy white paper.

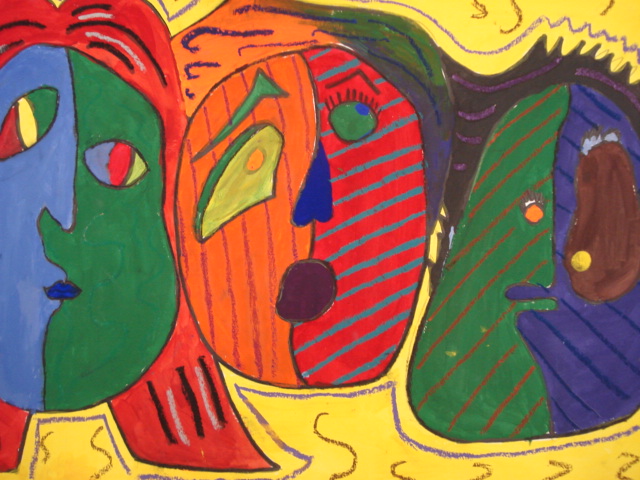
More specifically: draw three oval heads- split them down the middle with a wavy profile-type line and draw different, crazy, opposite features on each side.
I found this to be a challenge for students to do- they are so used to drawing a face symmetrically and 'normally'! They kept saying 'mine looks wierd' to which I would reply 'the wierder the better!'

outline with permanent black marker...

Paint with tempera- we always use paper palettes as I have only one sink :(
I emphasize to the kids to only squeeze out a Loonie (Canadian dollar) size dollop of paint. Sometimes it works, other times not so much, as you can see from the photo above.... But the kids are generally very conscientious of the amount of paint they use, and if they have leftovers, they always ask around the class if anyone needs extra.

painting, painting....
The painting took about two classes. Once dry, students added patterns and details with oil pastels - I encouraged them to be loose and expressive. Some wanted to touch the lines up again with the markers.
Ta da!


3 comments:
Wonderful! I may be brave enough to try with my 4th or 5th graders since you've illustrated your steps so beautifully. Sorry to hear about the sink issue though - here's a recent post of mine about tempera paint that might help: http://handsheadnheart.blogspot.com/
Thanks, Nancie. You have a great blog- lots of great organizational tips!
Just came across these - outstanding!
Post a Comment