ABOUT THIS BLOG

"A Faithful Attempt" is designed to showcase a variety of K-12 art lessons, the work of my art students, as well as other art-related topics. Projects shown are my take on other art teacher's lessons, lessons found in books or else designed by myself.
Thanks for visiting!
LAND ACKNOWLEDGEMENT I acknowledge, with deep respect, that I am gathered on Treaty 7 territory. I acknowledge the many First Nations, Métis and Inuit whose footsteps have marked these lands for generations. I respect the histories, languages and cultures of all the Indigenous peoples of Canada, whose presence continues to enrich our community.

Sunday, October 14, 2012

Glue Line Chalk Pastel Pumpkins


This is a re-post of a pumpkin still life project my Grade 7 students made. 
I brought in some mini pumpkins for them to look at- I find their drawings look so much better if they draw directly from observation. They first practised drawing pumpkins in their sketchbooks. Emphasize the use of curved lines to create a really realistic, 3-D looking pumpkin.


For the good copy, they used clear glue (we used Elmer's brand but any clear glue will work) to 'draw' directly onto black heavyweight construction paper (12 x 18"). Technically you could draw in pencil first and then pass over the lines with the glue, but I liked to challenge my kids to draw directly with the glue. 
It loosens them up. 

I prefer using clear glue, as opposed to white glue, as the clear glue dries nice and shiny and really black, and white glue dries more like a cloudy grey. 
But, by all means use white glue if that's what you have on hand. It works as well.

Students were required to draw a minimum of three pumpkins and they needed to be of different sizes (variety) and show overlapping (to create an illusion of depth).


The lines will be raised when wet, but they completely flatten out when dry. 
TIP: if you get any glue 'bubbles' after they've drawn the pumpkins, make sure to have kids pop them all with a pin, otherwise they do dry as bubbles and don't look so good in the finished piece.
Let these dry flat overnight.


The next class, students used chalk pastels to colour the pumpkins and background. Chalk pastels on black paper, as many art teachers know, is magical: the colours come out so rich and velvety. The glue lines will get dusty with the chalk, so for the last step, I had students use a think damp paintbrush to 'clean' off all the glue lines, so there were shiny and black again.


Ta da!


Thursday, October 4, 2012

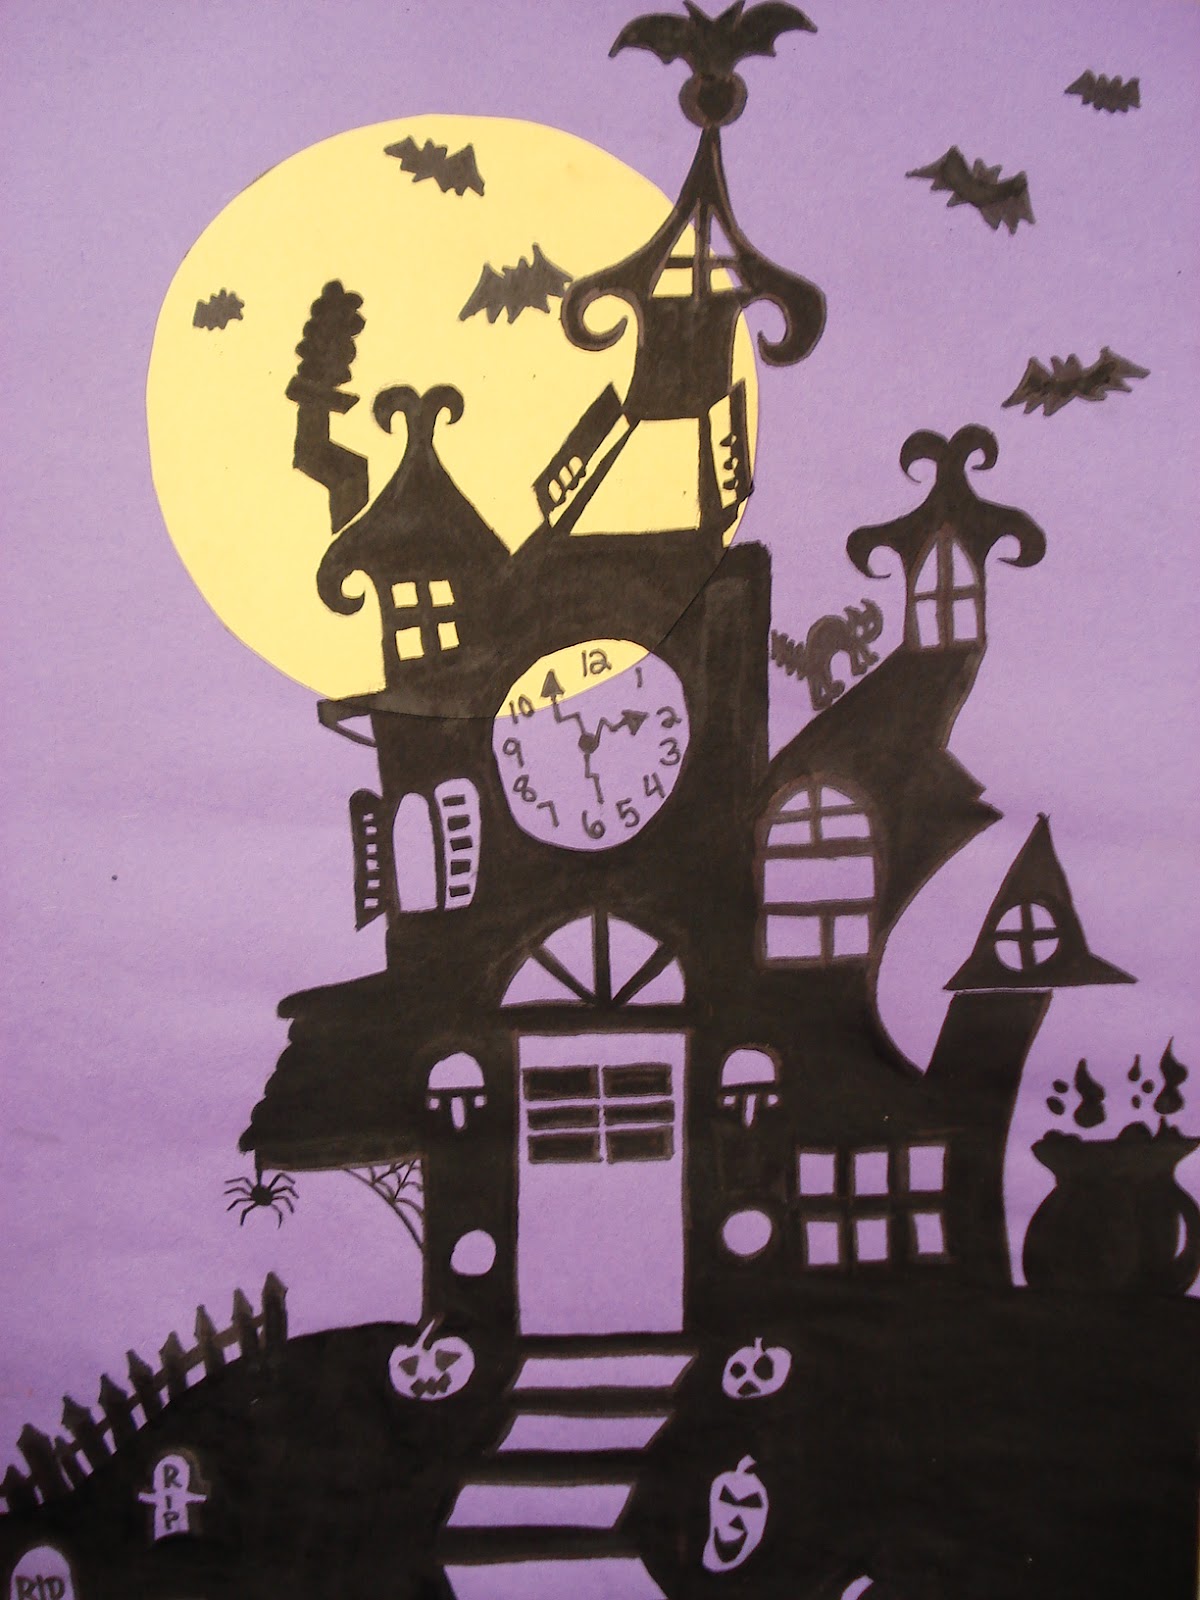
Haunted House Silhouette Painting


With Halloween just around the corner, I though I'd start posting some holiday lessons. 
This is a repost of a Halloween project a Grade 8 class made a couple of years ago. It's a great lesson on positive and negative space as well as architectural features.
I was inspired by the project  "Sun and Moon" from the Art Attack website.

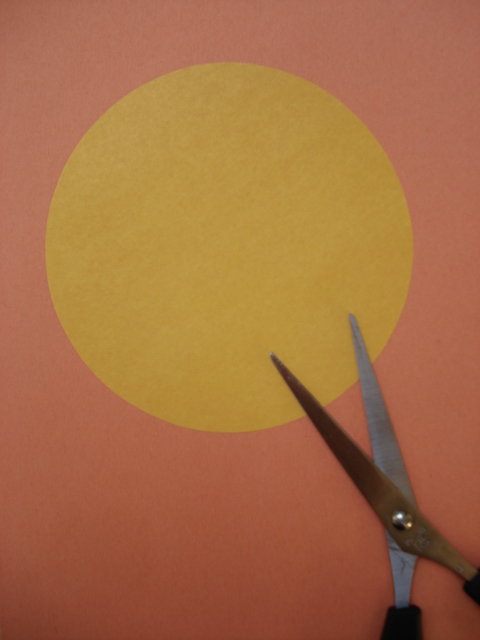
Start off with a sheet of construction paper for the background- orange, purple, or green. Then draw a large circle (for the full moon) onto yellow or orange construction paper, cut it out and glue it 
onto the background paper.


Before sketching out ideas, I showed a slideshow of different haunted houses and had students share ideas. Students planned their haunted houses on a sheet of white paper first. I find it's easier to work out the design on white paper- easier to erase/make changes as opposed to drawing directly on construction paper, where any type of erasing shows up and can easily wreck the paper. 

I provided a handout illustrating a variety of Victorian-type houses. You want to encourage interesting window shapes, perhaps a fence, withered trees, a pathway leading to the house, etc. and any "Halloween"-type accessories (cats, bats, pumpkins, witches, ghosts, etc.)


Once you have your drawing finalized, coat the back of the paper completely using your pencil.  We're making transfer-type paper here. Then tape your drawing onto your coloured background sheet and pass over all the pencil lines using a ball-point pen. Press fairly hard. 
This will transfer the graphite onto the coloured paper.


So once you remove the white paper you can see the clean transfer of the drawing 
onto the construction paper. 


We used black India ink (as it's such a rich, true black) for our paintings, but thinned down acrylic or good quality tempera paint would probably work as well. You can also add smaller, more intricate details, using a black marker.


Here are some Grade 8 results- they had alot of fun with adding all sorts of fun and spooky details.
I find this age group has such a vivid imagination!


Friday, September 28, 2012

Pattern: Plaid Cat Collage


This is a collage project, suitable for elementary grades, using paper painted in a plaid pattern. If you encourage the use of "Halloween" type colours (oranges, purples, greens) it could make a nice Halloween project. One of the main objectives, though, is to teach students how to paint a plaid pattern, and how to look at an animal in more simple terms of basic shapes in order to create a collage (similar to the technique used by Eric Carle).

I was initially inspired by the "Mixed Media Plaid Puppy" project posted by Barbara Boville on the Incredible Art Department website here.

So start off by showing students example of plaid patterns. Maybe point out some that students themselves might be wearing. Have them describe the pattern and colours used. plaid is a pattern consisting of crossed horizontal and vertical bands in two or more colors in woven cloth. Common examples of plaid patterns include: tartan (most common) and the more simple gingham. (Source)

So to start off, students need to use flat brushes in at least three different sizes
large, medium and a thin one. For the paint, you can use watercolours, tempera or acrylics. 


This is the most simple way I found to create a plaid, but there are limitless ways so just experiment. 

We used watercolour paint. Start off by painting the thickest or widest lines first and then work down to the thinnest lines. On white paper (heavier weight is best), paint three wide stripes (largest brush) horizontally, then turn the paper around and paint three vertical lines. Depending on how watery your paint it, you might need to wait a bit at this point before adding any more stripes or the paint will just end up bleeding together. Try to have student work on 2-3 different sheets of paper separately so each one has a bit of time to dry in between.


OK- then switch to the medium sized brush and add more stripes both horizontally and vertically.
You don't need to use the same colour at this point.


Using a smaller brush, add some thinner stripes of colour. Again, you can switch up your colours.


Finally, try to add some really thin stripes. And there you have a basic plaid. You can paint over more and more if you like, continuing to layer different colours to get a more complex design.


For younger students (Grade 2 for example), a simple check or gingham pattern is much easier. Try to have the kid paint the stripes as close to each other as possible. Using larger paper will help alot with this.


The next class, once the paper is dry, flip it over and have students draw the basic shapes for a cat collage- encourage them to 'break-down' or separate the head, the body, paws, tail and ears. Cut those apart.


Assemble them onto a black sheet of paper and arrange it how you like, then glue all the pieces down using a glue stick. Then add facial features using markers or more collage pieces or 
googly eyes or however you like.


Ta da!


Saturday, September 1, 2012

Glue Pictures- faux embossed metal


This is a project I found in an Usborne activity book. It's very simple and needs only a few supplies: white glue in a bottle, a piece of card, and gold and black acrylic paint. 
I've seen this lesson done with glue and then you put aluminium foil on top, but this skips that step and it still looks good- like faux embossed antique metal.

So each student needs a piece of heavy card (we used cut up cereal boxes)and a bottle of white glue 
(FYI: we used Elmers brand glue for this- it is fairly thick and that's good. I think some no-name generic school glues might be too runny and therefore not work. So test your particular brand of glue out before teaching this to a class. Tacky glue would also work brilliantly as it's thicker than regular white glue.)


You can choose a subject matter for the project for more focus, or leave it open-ended. I chose birds.
Draw your design onto the card lightly in pencil. 
Practice in a sketchbook or scrap paper first. Try to fill the page.


 Then, using a glue bottle, slowly and carefully pass over all the pencil lines.


You may have to touch up areas. Just take your time. 
If you make a mistake, just wipe it off and start again.


Let dry flat overnight. 
By the next class, the card will have curved/warped a bit, but that's ok. 
The glue will have also flattened out a bit.


Now it's time to create a faux antique metal effect. Paint the whole picture with gold or bronze or silver metallic acrylic paint. Let dry. 


Once it's dry, get some black acrylic paint ready and a damp paper towel or cloth.
Paint the entire picture with black paint and then, using the damp paper towel, gently rub away the black paint, revealing the gold underneath. This gives sort of an antiquing effect.


You can use this technique with lots of age groups, from elementary to Grade 8 as you can see from the results below.


Related Posts Plugin for WordPress, Blogger...