ABOUT THIS BLOG

"A Faithful Attempt" is designed to showcase a variety of K-12 art lessons, the work of my art students, as well as other art-related topics. Projects shown are my take on other art teacher's lessons, lessons found in books or else designed by myself.
Thanks for visiting!
LAND ACKNOWLEDGEMENT I acknowledge, with deep respect, that I am gathered on Treaty 7 territory. I acknowledge the many First Nations, Métis and Inuit whose footsteps have marked these lands for generations. I respect the histories, languages and cultures of all the Indigenous peoples of Canada, whose presence continues to enrich our community.

Saturday, February 12, 2011

Puffy 3D Heart using Papier Mache


This is a fun and relatively simple papier mache 'shortcut' project involving a heart. 
A great artist to look at beforehand with the students would be
American Pop artist Jim Dine and his heart series.

Here's how we made these:

Cut two matching hearts from 2 sheets of cardstock. (our were simply 81/2 x 11")


Open up a paperclip and tape it securely to the top of one of the hearts. 
This will be the hanger.


Close the heart and tape all the edges together with masking tape, 
leaving one section open for 'stuffing' purposes....


tape, tape, tape...


Now stuff it with bunched up paper towel or tissue. Something soft-ish.


Tape it shut.


Now rip up a sheet or two of newspaper- these are about 4" strips.
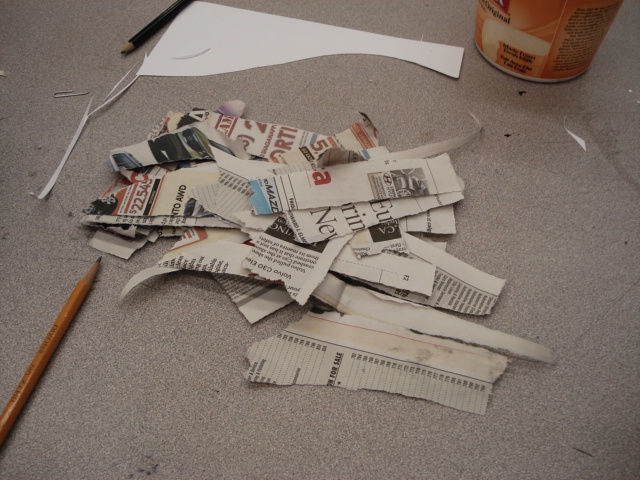

Using wallpaper paste (or watered down white glue- I prefer wallpaper paste as it's not sticky and easy to wipe off the tables), apply the strips, making sure to slightly overlap them. 
You only need one layer.


This is what you'll get.


Now do the same thing with the paste but use paper towel and create lots of wrinkles.
This creates both interesting texture and blocks out the newspaper patterns 
so you don't need to prime them with gesso/white paint.


Let the hearts dry overnight.
Students then painted them with acrylics. 
I demonstrated how to achieve a silver and gold faux finish. 
First a dark colour, then lightly dry brush a lighter colour overtop. 
For old silver or pewter, for example, paint the heart black first. Let dry, then dry brush on silver paint and rub off excess with a paper towel. Fiddle around with this technique until you get the look you want.

So here the student is beginning the base coat of black- make sure to get into all the crevices
and not leave any white showing.


Let dry 10 minutes or so....


Dry brush on a metallic paint such as silver.


The silver will highlight all the ridges and emphasize the texture.


Add a ribbon/yarn/string for hanging and you're all finished.
Some students also chose to collage on words cut from magazines. 

These were made by Grade 7 students:
Ta da!


Sunday, February 6, 2011

Baa Baa Black Sheep Collage Craft


Here is another project utilizing bubble printing. 
See my original post here

I was inspired by the children's nursery rhyme "Baa Baa Black Sheep". It is an English nursery rhyme from the 18th century. I start off by reading this rhyme to my class.

For the art project, start off by adding a squirt black tempera paint to watery dish soap for the black sheep's 'wool'. I mix up a big batch and then distribute it out to individual small cups- one per student.  This is a very messy project- make sure the kids (and yourself) are wearing paint shirts!! 


Using a straw (I cut them in half to be economical), students blow until the bubbles rise above the cup. Then immediately place your sheet of paper on top and lightly press it down.


Here's the first print.  Continue doing this until most of the paper is covered.


It looks really cool and textural. Let dry (it doesn't take long).


Once dry, demonstrate to the class how to draw a fluffy cloud-like shape on the back of the bubble paper.


Cut out. This is the sheep's wool.

On any scrap black paper, students draw a simple round head with ears and two rectangles for legs. Cut out.


For the background, you could use blue paper and have the kids draw and colour on a green hill. Or, let them loose with the watercolours or tempera paint, and paint a simple hill and blue sky as seen below.


Glue on the body, then the legs, then the head. 
Make sure to glue them high enough to leave room for the poem at the bottom of the hill.  


Now you can use googly eyes if you have them, or have the kids cut out their own circles for eyes.  I always demonstrate how to fold a small scrap piece of paper in half, draw a circle, cut out and then you have two of the same.  Easy!  Hand cut eyes look way more cute and wonky compared to googly eyes, though I do love googly eyes as well.  It can be a pain, though, having to help 25 kids peel off the stickers on the backs of  googly eyes. Kids can also decorate their sheep faces however they want.


I typed and copied the nursery rhyme and then this is cut out
with decorative scissors. Students then glued it to the bottom of the page.


Sunday, January 30, 2011

Bubble Printing Collage


Here's another post on a 'classic craft'- the humble bubble print. 
Kids love to do this, because, well, it involves bubbles of course. 
I've done this with all ages and you can get some really creative and
sophisticated artwork from it.

Here's the basic steps:

Mix up some paint (tempera or acrylic) with some water and dish soap- I just make a big batch of watery paint then experiment with adding soap until I get a good 'bubbly' consistency. 
But the general ratio is: 25% Dish Soap, 25% Paint, 50% Water

I mix a large batch and then pour it into individual cups for the students and throw in a straw.

Blow some bubbles so it comes above the container.  With young kids (Kindergarten) you have to show them how to do this properly because some inevitably always suck up the paint- not good.


Warning: this is a really messy project... just so you know.
Very drippy, but the soap makes for an easy clean-up.


Place your paper over the bubbles and gently pat down.  
I use regular printer paper.


Lift and pop any bubbles that might remain on the paper. 
Then repeat the process until the entire paper is covered with bubbles.
I've used a tiny yoghurt container, but you could use larger, wider plastic bowls and get the paper covered faster, probably.


So here's my lovely paper: this would be nice collage paper for Valentine hearts.


 Try different colours and try mixing colours as well.
 Once the paper is dry, draw on the reverse blank side- shapes, designs, anything, then cut them out and glue it to a contrasting sheet of paper for a simple collage.

Ta da!
Related Posts Plugin for WordPress, Blogger...