
Here's this year's version of the very popular tin foil embossing project!
Draw a simple design on the back of a cereal box. I encourage abstract designs (organic or geometric) but many students like to do some simple realistic images like simple landscapes.
Cut lengths of yarn and glue down using white glue. Let dry overnight.


Cut a piece of heavy duty/barbeque foil one inch larger than the cereal box.

Cover the yarn side with a liberal amount of glue stick. Place the foil on top, and start burnishing it using a piece of felt. This helps prevent tears. Work from the center outwards, to prevent air bubbles.


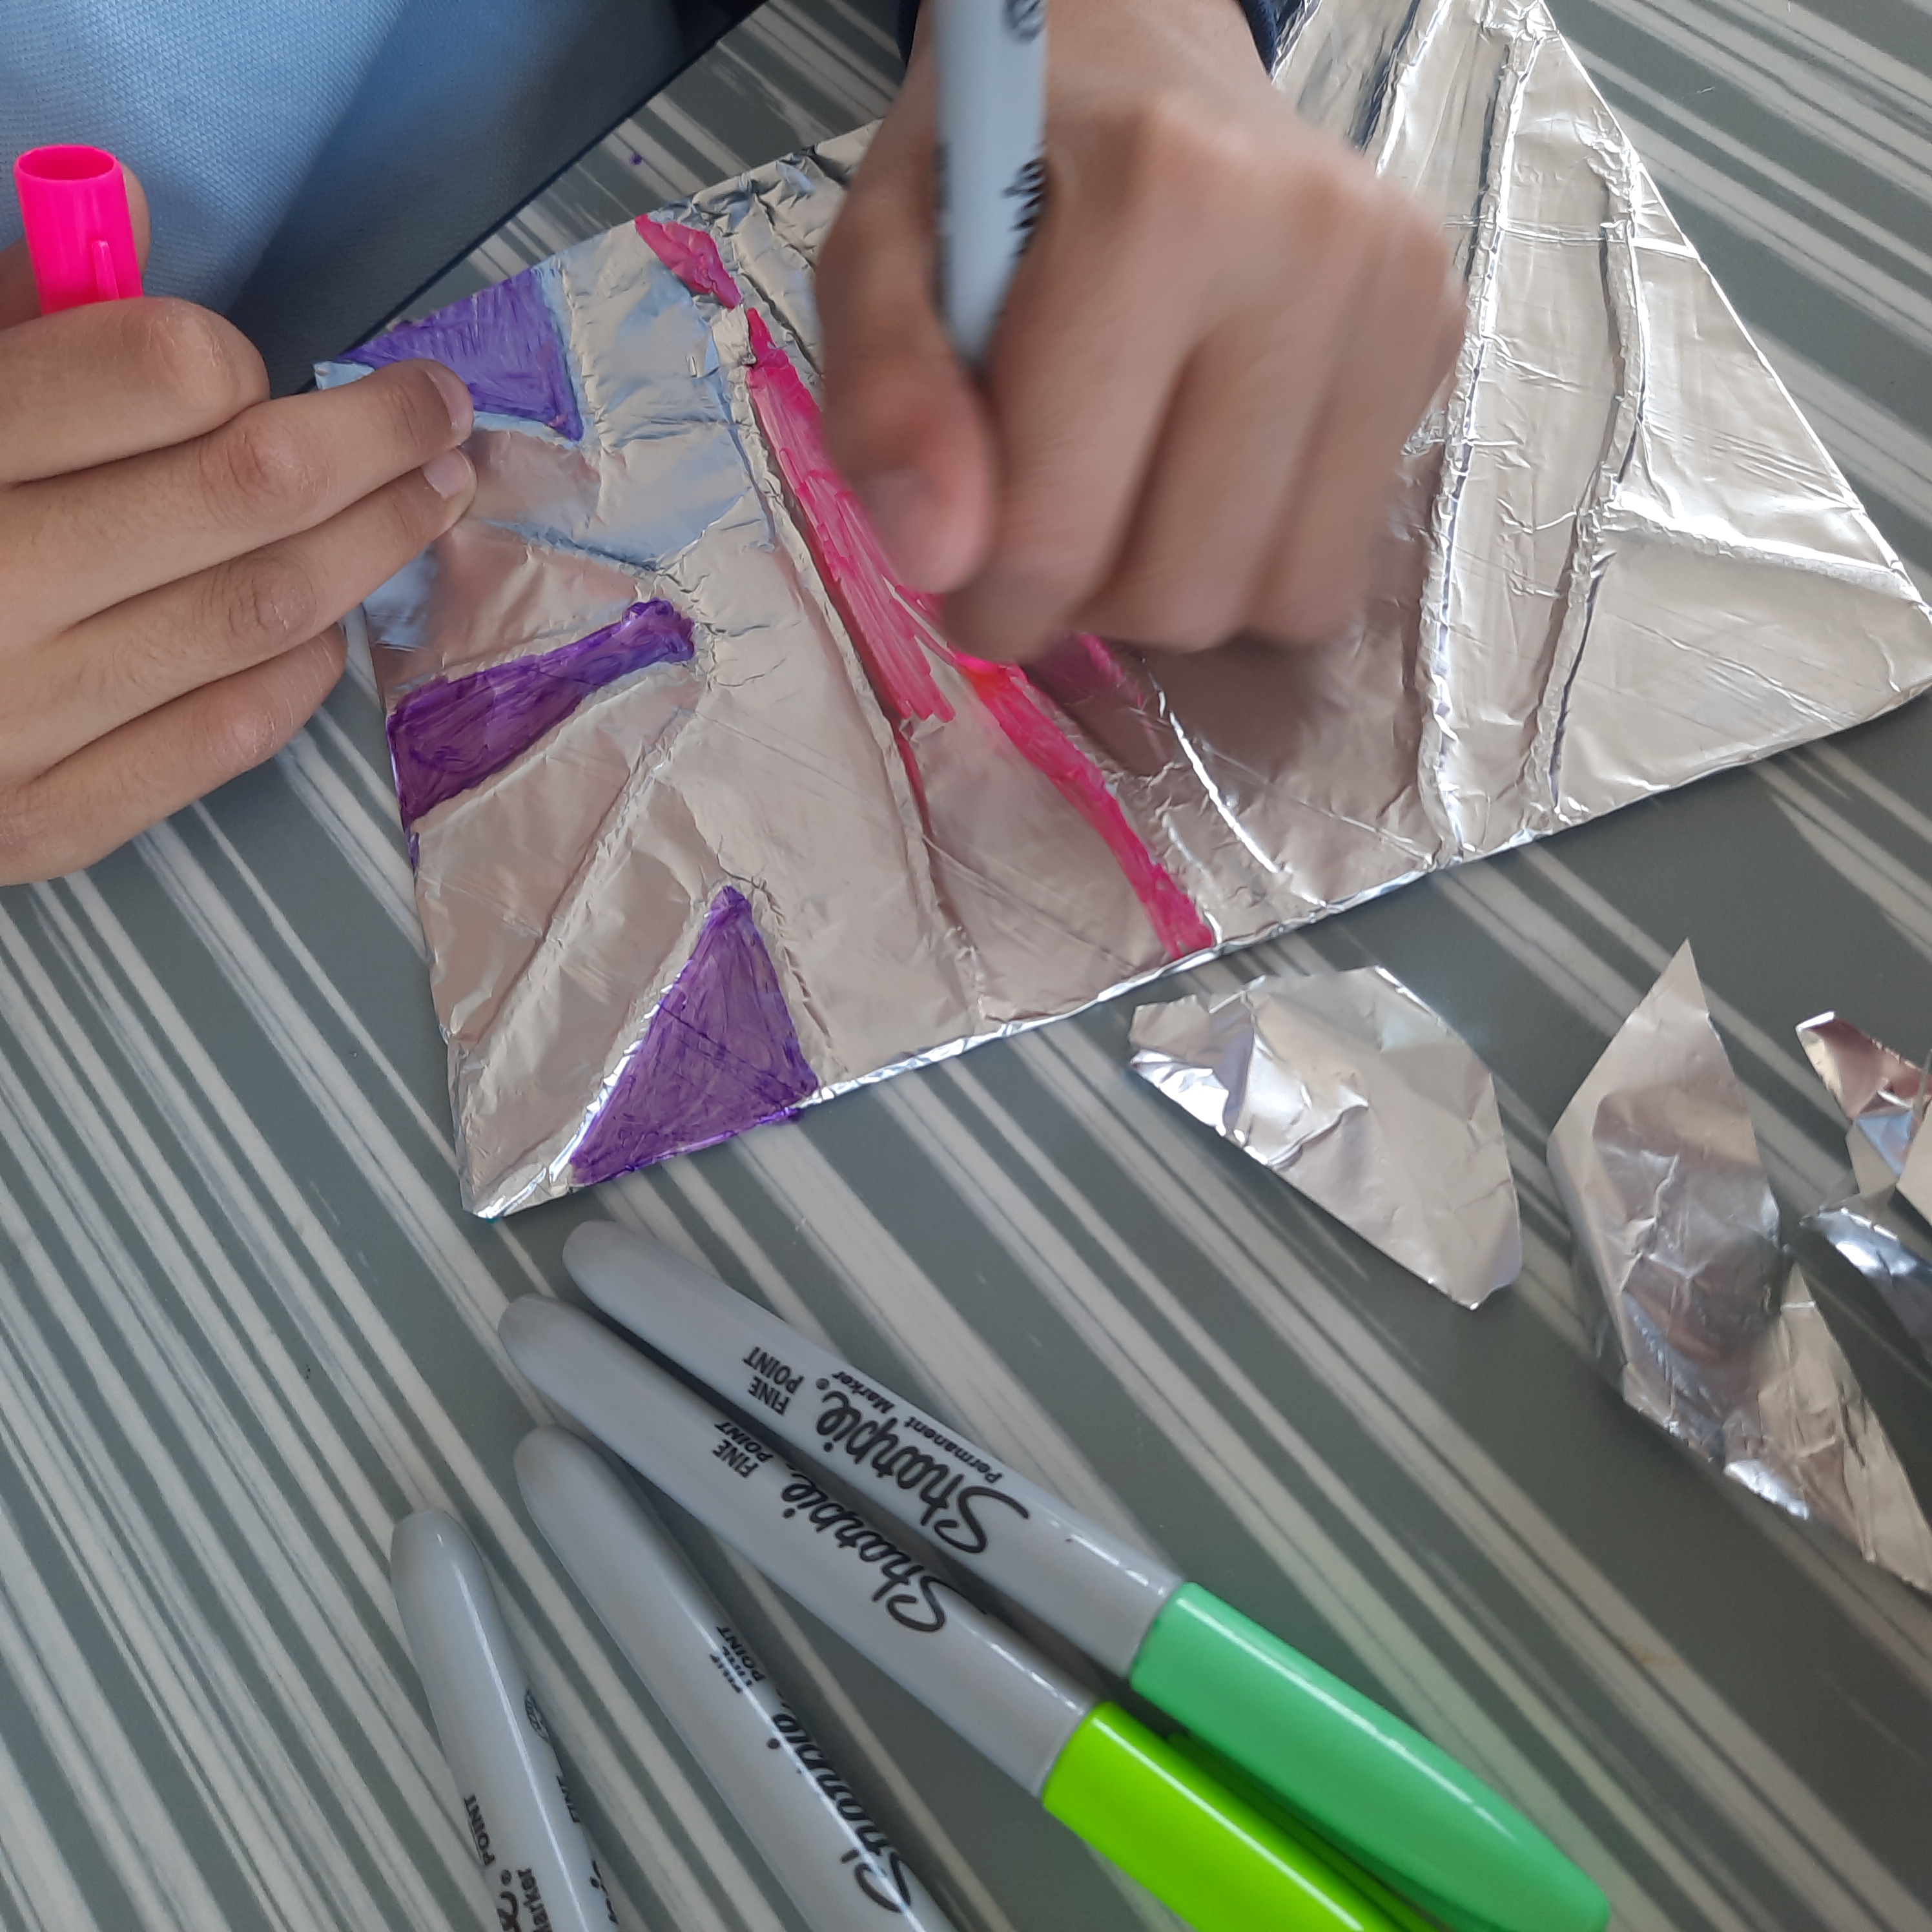
Wrap and glue the excess onto the back. You can also test Sharpie colours on the back,

Colour all the sections using coloured permanent markers.


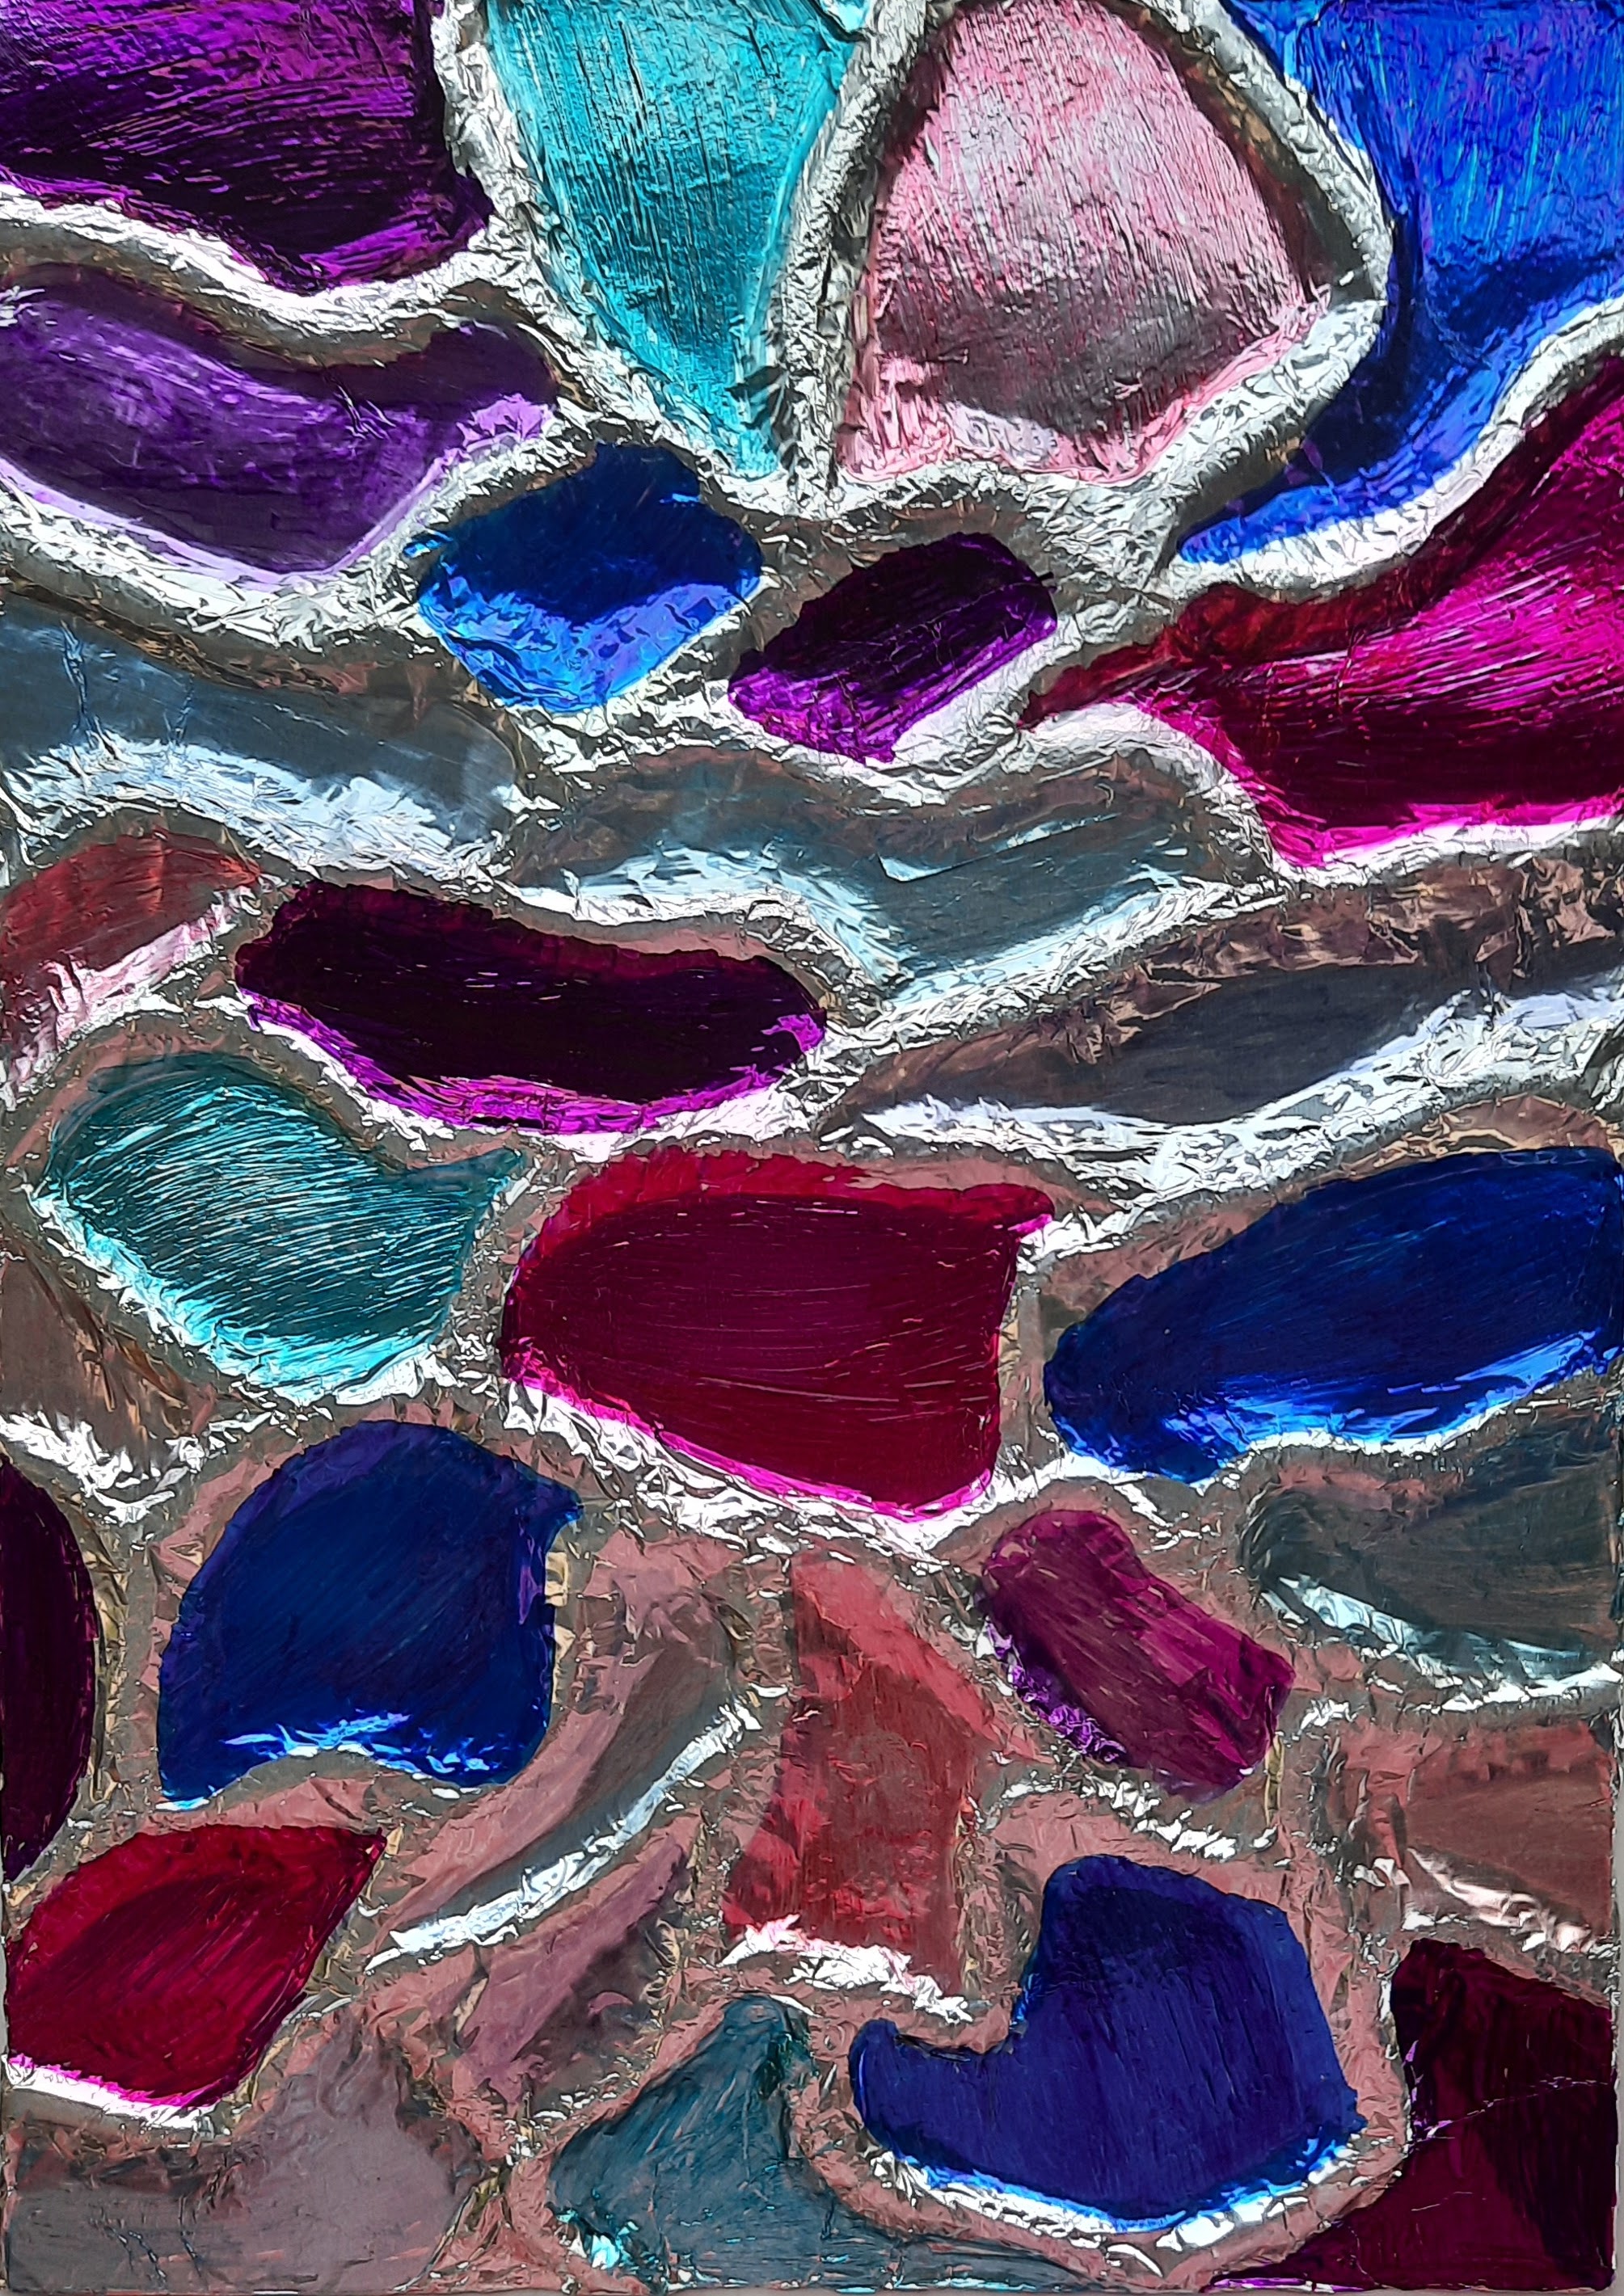
Some finished Grade 4-6 artworks:


No comments:
Post a Comment