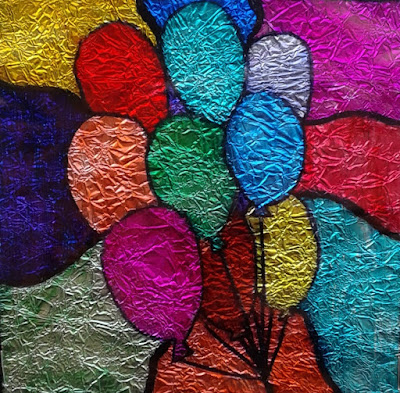
This is a beautiful December project that yields gorgeous results. I give my Grade 7 - 9 students the choice to do something holiday-themed or any subject matter they want.
See my original posting HERE.
They sketch their stained glass design on regular 8 1/2 x 11" photocopy paper. They each have their own laptop so find images to reference online.
Then slide the finished drawing into a sheet protector and trace over all the lines with a permanent black marker- make the lines nice and thick as these will be the 'lead' lines. Then colour in the whole picture using coloured permanent markers.
After one class (80 minutes).
For the background, cut a cereal box the same size as the page protector image and cut it out. Cover it in glue stick and then wrap it in crumpled up aluminum foil.
Finally. cut out the sheet protector and staple it to the foil covered cardboard. Sometimes we use washi tape or coloured tape to wrap the edges. Depending on the brand, though, it can peel off the plastic unfortunately.
Some Grade 7 - 9 finished pieces. These photos don't convey how stunning these are in person, especially when the light catches them!!


These are fabulous!! Love this idea👍🏾
ReplyDeleteThank you :)
ReplyDeleteThese are amazing! Thanks for sharing this idea!
ReplyDeleteThanks so much Anonymous :)
ReplyDeleteWhat do you mean by “cut out the page protector and staple it”?
ReplyDeleteDo you put the foil inside the sheet protector? What are you cutting?
Thanks,!!
A page protector has two layers. Cut off the top layer (the coloured image). Staple it on top of the foil cardboard to secure.
ReplyDeleteWow Beautiful I’m always looking for new projects to do with my Granddaughter thank you
ReplyDelete