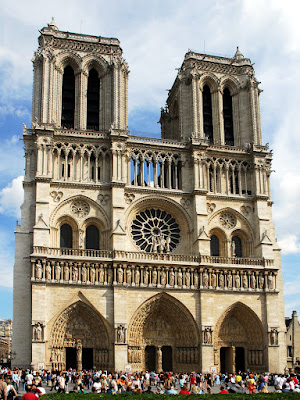
Rose windows are particularly characteristic of Gothic architecture and may be seen in all the major Gothic Cathedrals of Northern France.
When it comes to famous windows, few are quite as vivid as the Rose Windows in the Notre-Dame Cathedral in Paris. This is a great lesson on symmetry and colour symbolism.
The cathedral is considered one of the finest examples of French Gothic architecture. Construction of the cathedral began in 1163 and was largely completed by 1260. The cathedral is a widely recognized symbol of the city of Paris and the French nation.
Every detail of the Rose Windows was carefully planned to give a message to onlookers. The colors chosen hold specific meaning that just about anyone viewing them at the time they were built would understand.
While the Rose Windows of Notre Dame are strikingly beautiful, the art form used there was made to inform as much as it was to please the eye. The general population at the time they were built was illiterate, and they relied on pictures and symbols to tell them stories that they were unable to read. Much of the art from this time was used to impart religious lessons and stories to the common people, most of it referring to the bible. This is why some of the most intricate and representative art from this time is found in these beautiful cathedrals.
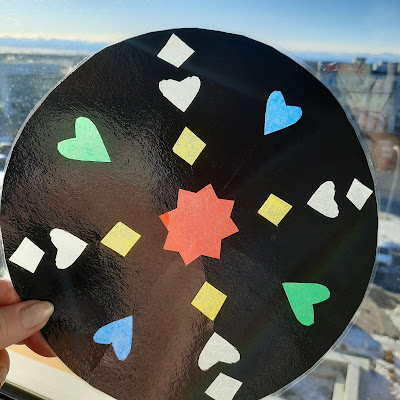
To make these faux stained glass rose windows, start by tracing two circles- one on parchment paper and one on black construction paper (I prefer Tru Ray as it's a rich black colour).
You will create a collage of colours onto the parchment paper using watered down white glue and tissue paper. Some of my students wanted their shapes to have their own specific colours so they cut them out and glued them behind each cut out which is much more time consuming.
Once everything is glued down nice and smoothly, fold your black circle in half three times and cut out shapes- just like what one would do for a paper snowflake.
Then, using dots of white glue, carefully glue the black paper on top of the tissue background (you might need to trim the tissue paper down a bit so it doesn't show) and place heavy boards or books on top to really seal it all together nicely. Put between wax paper in case some glue seeps out.
I laminated all of my students work so they are much more durable.
Fair warning, when these are hung in a window (they look gorgeous)- the sun WILL fade the colours significantly.
These were made by Grade 4,5 6 students. As you can see, none used the 'kaleidoscope' method I showed them above, lol. They all wanted each shape to have a distinct colour!
 |


No comments:
Post a Comment