Tuesday, September 22, 2015

Rainbow Colour Wheels


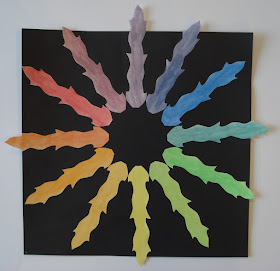
This colour wheel lesson holds a special place in my heart as it was one of the first lessons I ever taught my Junior High students my first year teaching.
I had ordered this book below: "The Art Teacher's Survival Guide" as I saw it in an art catalog and thought it looked good (I think the words "survival guide" was a big selling point for me, haha!) 
This lesson came from it and is called "Personal Rainbow Color Wheel".


I have students first fill out a color wheel worksheet just to reinforce all those colour theory terms.


On a long strip of cardstock, students design some type of shape and cut it out.


Then they trace it onto heavy white paper 12 times and then paint it using either watercolours or acrylics; whichever they prefer. I find most students use watercolours.


Once dry, students carefully cut them out them and placed them in a radial pattern on a large sheet of black paper. You want to make sure it's all nice and balanced before committing to glue.


These all turn out really nice and make a colourful and dramatic display.
Here's some Grade 8 results:




Friday, September 18, 2015

Chalk Pastel Dino Drawings


Here's another project I do for my "Prehistoric Art" unit my Grade 4's study with me. 
It's a very simple, straightforward project that yields great results. You really can't go wrong with chalk pastel on back paper, in my opinion. Transporting them home without smudges, though, is a whole other issue!

I have a ton of dinosaur books that I collect at garage sales over the summer. Students flip through these and decide on a dinosaur to draw. On 12 x 18" black construction paper, students draw out their dinosaur and need to include some type of setting as well. They can make their dinos any colour as we really don't know what colours they were. They pass over all their pencil lines with a black wax crayon, then start colouring with chalk pastels. I encourage them to mix colours and add highlights for extra interest and realism.


Sunday, September 13, 2015

Cave Art Paintings


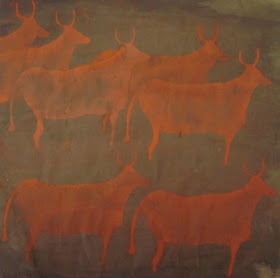
This is a Lascaux Caves inspired art project I do with my Grade 4's during our "Prehistoric Art" unit. 
I start off by showing a Youtube video explaining all about the famous Lascaux caves in France. Then we look at some up close photos of the actual cave paintings. We discuss what types of materials early man might have used to create the paintings (animal fat mixed with pigment,s blood, ash/charcoal. etc). We also talk about why they would have created these paintings and the types of animals that are represented.

For the art project, I pre-cut large squares of simple brown paper from a big roll I have. Students can choose to tear/rip the edges to make it uneven and rough. using tempera pucks, students mix a variety of earth tones and paint over the entire paper to give it a cave wall type effect. 


I give the students a handout of various cave art images for them to create their animal stencil.


On piece of cardstock/tagboard, students draw a simple outline of an animal.


Then they poke a hole in the middle and cut out the interior to create a stencil.


They place the stencil onto their painted background paper and, using charcoal or chalk pastels, rub around the outside of the stencil then use their finger to blend the chalk to the inside. It creates a really cool soft faded effect that also mimics shading a bit.
They can overlap and change colours however they wish.


Grade 4 results: