Saturday, October 25, 2014

Fluffy Puffy Ghosts


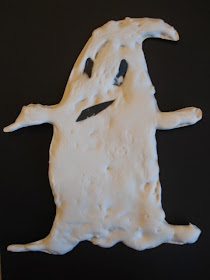
Hahaha, these Grade 1 ghosts turned out so adorable!  We used the classic and super fun puffy paint recipe: mix an equal amount of shaving cream and white glue in a bowl. 
This is a great lesson to discuss the art element of texture.
I mixed up a big batch and filled up an ice cream bucket- those plastic 4 litre ones. It was easily more than enough for my 16 students. I buy the cheap-o shaving cream from the Dollar Store. I only needed one can for my class.


The kids first drew a simple ghost shape on cardstock. 
Heavy weight paper works best for this.
Then they globbed on the puffy paint and tried their best to spread it around. 
Using their fingers helped alot to push the puffy paint to the edges. Next time I might just use popsicle sticks as opposed to paint brushes.
Then they cut out eyes and a mouth from scraps of black construction paper. 
Place it on the ghost and gently push it into the puffy mixture.

yes, this ghost has armpit hair, lol

Ours dried overnight, but they were still a bit damp on the back, so I flipped them over and let them dry out another day. Then I cut them all out. The kids loved them!!!


I displayed them up high, out of hands reach, because all the students in the school 
want to poke and touch them!!


Tuesday, October 21, 2014

Frankenstein Kids


I found this super adorable art lesson HERE on the Artventurous Blog. 
She links to THIS website (artforkidshub) which has a tutorial on how to draw Frankensteins's monster. My Grade 3 kids watched this tutorial and drew along for a practice. They loved it!

Then I re-drew it on my whiteboard step-by-step again for the slower students.


After their practice drawing, they drew their good copy on thick 12x18" white drawing paper.


Then they outlined their drawing with a Sharpie.


Then they outlined all the way around their figure with a yellow wax crayon. 
Then they added some electricity lines.


Then they colored in their figure using construction paper crayons.


Finally- phew! - they used watercolor in the background.


This took about 3 - 40 minute periods in total.
Some Grade 3 results- ta da!


Tuesday, October 14, 2014

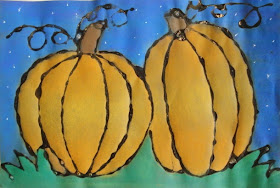
Glue Line Chalk Pastel Pumpkins


This is a repeat one of my more popular posts that gets alot of hits from Pinterest around this time of the year. This year I did this lesson with my Grade 7-9 art elective class. 

They start off by drawing between 2-3 overlapping pumpkins on black construction paper (ours are 12 x 18"). It's helpful to have some actual pumpkins (or mini pumpkins) in the classroom for kids to draw from. I encourage them to have different shapes and sizes of pumpkins to create interest and variety (principles of art, ahem :)
They used a light colored pencil to draw with.


Once dry, they traced over all their lines using Elmer's clear glue (my preferred brand because it dries SHINY!!!). You can also use regular white glue.


Let these dry FLAT overnight.


The next class, I do a short demo for students on how to shade and 
add highlights using chalk pastels. 
We're aiming for some realistic looking pumpkins here.
Provide paper towels to clean off the 'dirty' chalk pastels and 
scraps of black paper so kids can test out their colors beforehand.


Color the pumpkins first, then do the background.


Grade 7 - 9  (mostly Grade 8, though) results!