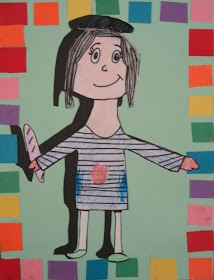
These charming 'portraits with shadows' were made by Gr.3 students.
I found the idea at the elementary art blog: "An Art Room Filled with Fauves".
The supplies you'll need are:
- white drawing paper
- strips (1-2") of colored paper
- black paper (for the shadow)
- colored paper (for the background)
- glue stick, scissors, pencils
- colored pencils or markers
So start off with the kids drawing a full figure person- you could make it a self-portrait lesson,
or kids might research a famous historical person (to link with Social Studies), whatever.
I gave the kids free reign to choose whomever they liked.
Draw this lightly in pencil, then colour with media of your choice; we used colored pencils.
Carefully cut out the figure. Place upside-down onto black paper and slowly trace
with a light colored pencil. This will be the shadow- cut out.
Decide where is the best placement for the shadow- I found it works slightly above or below to
either the left or the right hand side.
For the border, I pre-cut a bunch of construction paper using a paper cutter- it went really fast. These were about 1 inch thick or so. Kids will cut these into squares and glue them around their background paper to create a simple border.
Ta da!


