Thursday, December 30, 2010

Funky Flamingos


This is a fun lesson I've done for years with 3rd and 4th Graders. First, I show them pictures of flamingos and give them a handout with lots of different types of flamingos. Then I demo how to draw one and they practice in their sketchbook. 
Then they paint their background first on a sheet of heavy white paper- sunsets, sunrises, beach scenes- whatever they want. We use tempera paints and glitter paint for the ocean. 

While these are drying, they start drawing their good copy flamingo on another sheet of white paper. Paint these with bright pink tempera and let dry. Then add a nice thick outline with a black permanent marker and carefully cut them out (warning- super skinny legs are tricky for students to cut out). Paint a thin layer of white glue on the back and glue them to the background.  For a final touch, add a googly eye and a feather for a tail. If you have some sand, you could also sprinkle this on some white glue if you have a beach scene (see last two photos).

Here's a good handout from Enchanted Learning.com


Glitter paint is fun for the ocean.


Hot glue on a feather for a tail.

Ta da!


Wednesday, December 29, 2010

Plaster Masks


I did this mask project with a Grade 8 class.  To create the masks, we used plastic face forms which I ordered from Dick Blick. I initially liked them because they are multicultural. However, once I opened them, they're actually quite small-- I wish I could find much bigger ones. 


plastic face forms

plaster roll


I have done this mask project before having students make the masks on their faces, but it's quite the process: you always have one or two who don't want to do it, girls don't want their make-up to come off, etc, hence, I went with the face form and it's MUCH more convenient.  Students LOVE working with plaster, btw.  It's my most requested medium by all grades.

We used plaster strips to form the masks, about 2-3 layers. Once dry, we primed them and then students could use any materials they wanted to create a mask of their choice. I showed them examples of masks from around the world beforehand.

Some hot glued on additions, such as cut out cereal boxes, parts from egg cartons, cardboard tubes, etc.  I like to emphasize 'reuse & recycle' in my classroom, like most Art teachers do! I also keep on hand loads of 'crafty' materials (sequins, plastic jewels, glitter, feathers, etc). These were spray varnished at the end.

In my sample, I hot glued on a cut cereal box to add height.

Open up a paper clip and hot glue it to the back for a simple hanger.

Ta da!

My sample: I was going for an Indonesian style mask.


Pressed Flower Pictures


A Grade 3 class made these charming pressed flower/leaf collages. This project takes quite a while as you need to collect and dry the leaves. We went out one day during the summer and I gave each child a plastic container. They collected a variety of leaves and flowers. Back inside, I wrote their name on the cover an old magazine (one each) and then showed them how to separate the leaves/petals and lay them in-between paper towels.

Then I stacked them all and put some heavy books on them and left them to dry for about 2 weeks.
Then the kids simply made pictures with them- we used small paintbrushes and white glue to carefully apply them to cardstock.  They could also add details with markers.

Ta da!


Then one of my high school girls saw these are was inspired to
create her own in her sketchbook:


Plasticine Pictures


These plasticine pictures were created by a Grade 1 class. I always keep a container of plasticine around the class for kids to play with if they finish early. For this project, kids simply made a picture with plasticine- they stuck it on squares of scrap foamcore I had lying around. I have also done this on paper plates as well, though, they're not as sturdy as foamcore.

Beforehand, I like to show/read a children's book with plasticine illustrations-- my favourite is anything by Canadian author & illustrator Barbara Reid.


"Fox Walked Alone" by Barbara Reid

Here are some of the Grade 1 results: Ta da!


Tuesday, December 28, 2010

Pop-Up Book - Il était une fois...

I find pop-up books so magical- like little paper sculptures. The art behind producing them is quite complicated. This is a charming promotional video for a new, upcoming pop up book by French artist Benjamin Lacombe.
http://www.benjaminlacombe.com/

Checkerboard Op Art


This was a lesson I left for my Substitute Teacher when I was away at a conference. It is an introductory Op Art lesson, hence I used it with my Grade 6's. It is fairly easy, anyone can teach it and it uses limited materials (only markers). I found the lesson here on the Incredible Art Deaprtment website and altered it a bit.

To be honest, I thought this lesson would be a bit boring, as it's just so much repetitive coloring.  In the end, some kids did complain a bit (the rushers- heh, heh), but not as much as I expected.  I often ask my students how they are enjoying the project if it's the first time I'm teaching it and they are very honest with me (sometimes too much!) -- it is a good gauge for me whether or not I will do the lesson again. 

With this one, the paper was quite large, so next time I would just use regular 8x10"  (A4) paper. One warning- some of the markers ran out; other kids couldn't remember which colour they used the previous class- something to keep in mind if you teach this.


Trace a variety of sizes of circle (we use plastic lids). Draw slightly wavy or straight lines in one direction; rotate the paper and draw some more lines. Don't draw too many lines or it gets too complicated to colour. Mark every other 'section' with a dot- this will be where the darker colour will go. These seem to look best when two very contrasting colors are used.

In-progress

Ta da!


Ceramic Llamas


Grade 6 students made these clay llamas.  I have to say it was super challenging for them, especially attaching the legs.    
Here's the steps:


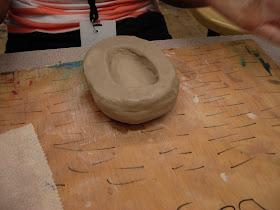
Make a pinch pot for the body.  Flip over and shape to appropriate oval-y body shape.


Make nice thick sturdy legs out of columns of clay.  Scratch and attach well.
This was by far the most difficult part- students had a tendency to make the legs waaaay too thin and long to support the heavy body. 


After some time - whew!, the legs should be able to support the body.
Let this part air dry while you sulpt the neck and head separately.  I demonstrated how to make realistic eyes, ears, etc. Then scratch and attach that to the body. Use a plastic fork to scratch 'fur'.  If there's any time left (we had one-90 minute period), kids can make a basket to sling over the llamas back as they are used traditionally as pack animals in South America.

Here's some llamas that I taught to an older grade- Grade 8, and they had an easier time of it.


Here are some of the final glazed ones.  Ta da!


This one is three headed.